
Details of the front of the engine
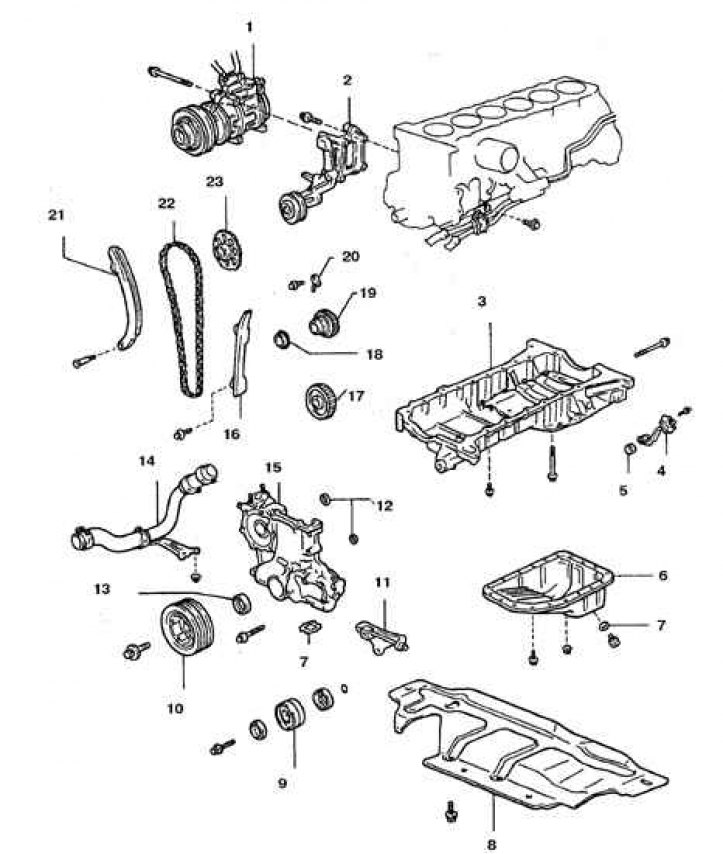
1. Compressor; 2. Bracket; 3. Pallet 1; 4. Oil level sensor; 5, 7. Gaskets; 6. Pallet 2; 8. Bottom shield; 9. Tensioner roller; 10. Pulley; 11. Belt adjuster; 12. Ring; 13. Front oil seal; 14. Radiator pipe; 15. Lid; 16. Calm; 17. Oil pump drive gear; 18. Drive sprocket; 19. Drive gear; 20. Oil nozzle; 21. Tensioner shoe; 22. Chain; 23. Camshaft driven gear
Removing
1. Disconnect the battery from the ground.
2. Block the rear wheels.
3. Raise the front of the car.
4. Remove the bottom shields.
5. Remove the radiator expansion tank (see subsection 4.5).
6. Turn out candles and remove all belts of a drive.
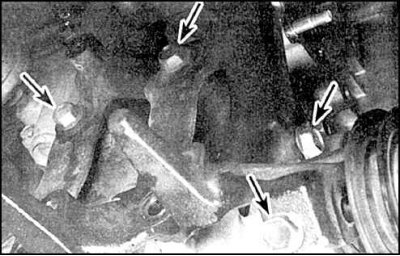
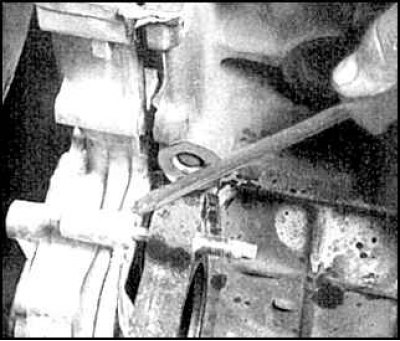
7. Remove the air conditioning compressor and set aside without disconnecting from the line (air conditioning compressor bolts are indicated by arrows).
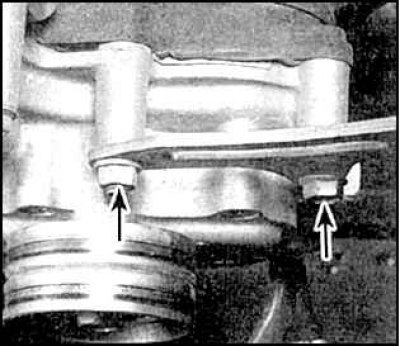
8. Remove alternator, tensioner pulley and all brackets (alternator adjusting bracket bolts are indicated by arrows).
9. Remove the cruise control actuator (if provided) and take it aside.
10. Disconnect the lower radiator hose and remove the coolant pump.
11. Set the piston of the 1st cylinder to the TDC of the compression stroke.
12. Remove the cylinder head.
13. Remove the tray.
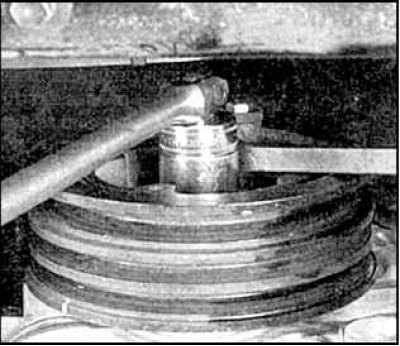
14. Loosen the bolt securing the crankshaft pulley.
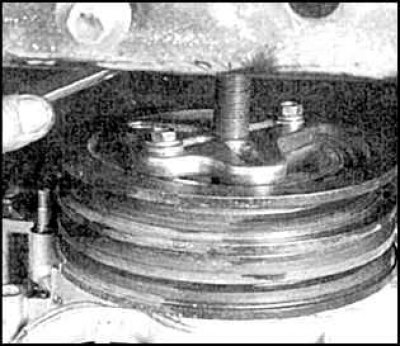
15. Remove the crankshaft pulley with a puller.
16. Loosen the bolts and nuts of the chain cover and carefully remove the cover.
17. Remove chain and sprocket. Remove dampers and tensioner parts.
Examination
1. Check the condition of the camshaft gear teeth. Check the condition of the chain, wear of the rollers and connecting links. Replace worn parts. In case of severe wear of dampers, remove and clean the sump and oil receiver.
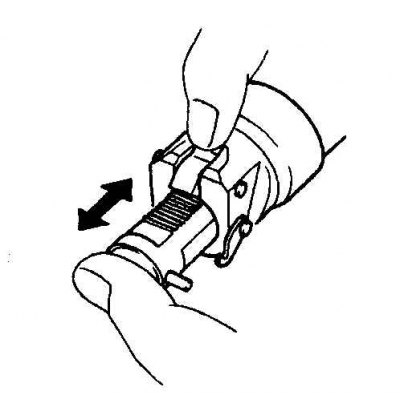 | 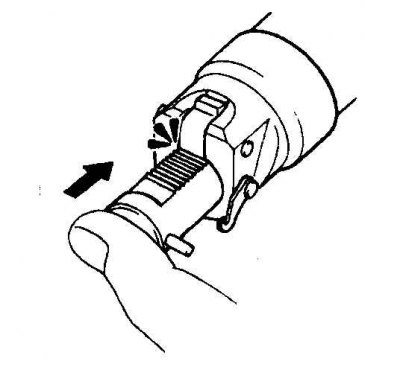 |
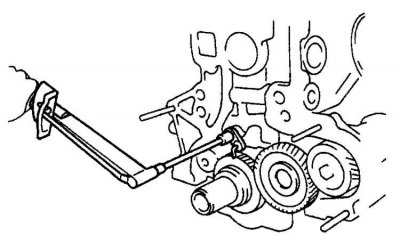
2. Check the operation of the plunger and tensioner retainer. The plunger must move freely in the body bore (left). The latch must securely hold the plunger (on right).
3. Check the cleanliness of the oil nozzle jet.
Installation
Designation of bolts of fastening of a chain cover differing in the sizes
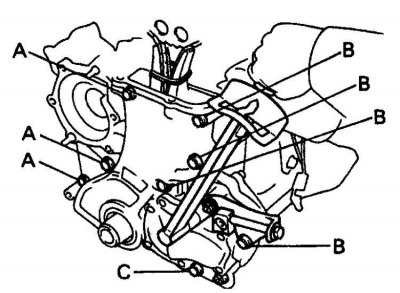
Bolt A - 30 mm
Bolt B - 50 mm
Bolt C - 60 mm
1. Clean the front of the engine, chain and cover, install new o-rings and injector. The nozzle must face the chain.
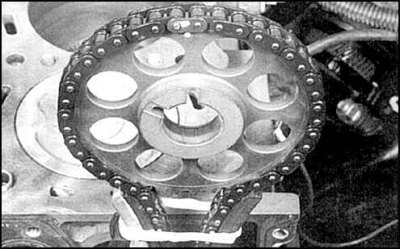
2. Put the chain on the camshaft sprocket, aligning the marks, crimp the chain with dampers, tying it with a strong tape.
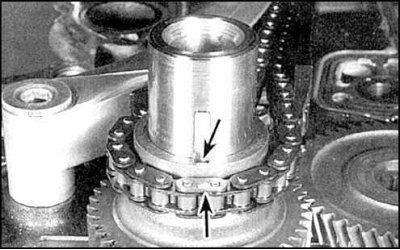
3. Align the other link with the ID mark with the crankshaft keyway (arrows) and put on the leading sprocket.
4. Apply a 3 mm bead of sealant to the cover, make sure all gaskets are present and install the cover (within 5 minutes after application), by engaging the oil pump drive rotor shaft with the crankshaft drive gear.
5. Wrap the bolts (see fig. Designation of bolts of fastening of a chain cover differing in the sizes) and tighten to the specified torque. Remove the chain tie.
6. Install the rest of the parts in reverse order. Start the engine only after checking the correct installation of the chain.