
Note. Recommended interval: every 24,000 km or 12 months.
Warning! Brake pads generate brake dust, which contains asbestos, which is harmful to health, so do not use compressed air or inhale the dust when cleaning brake pads.
Attention! To clean the brake mechanisms, use only a special brake cleaner.
In addition to the prescribed intervals, the brakes should be checked every time a wheel is removed or if defects are suspected.
The main signs of brake failure are:
- vehicle pulling to one side during heavy braking;
- increased stopping distance;
- strong squealing sound when braking;
- brake fluid leaks, usually on the inside of a tire or wheel.
Disc brake pads have built-in wear indicators that emit a squealing or foreign noise when the brake pads are worn to the limit (scratching) sound when braking. In this case, replace the brake pads immediately, otherwise the brake disc will be damaged.
Disc brakes
As practice shows, the front brake pads on the passenger side wear out most intensively, therefore, it is necessary to check the brake pads on the right front wheel.
Loosen the right front wheel bolts and apply the parking brake, then raise the front of the vehicle and secure it on stands. Remove the right front wheel.
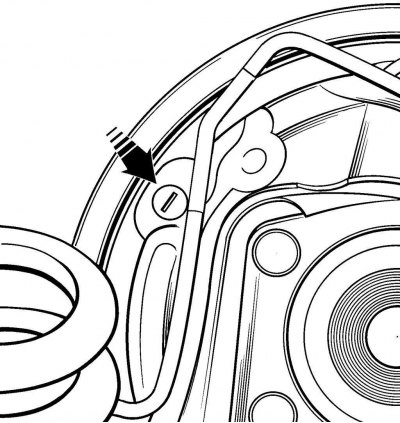
Pic. 2.19. Hole on disc brake caliper for brake pad inspection
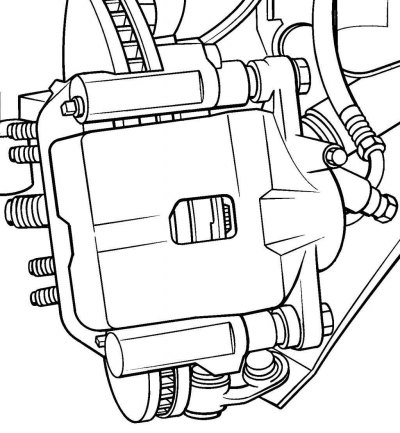
Disc brakes have 2 brake pads in each caliper. Internal brake pads are visible through inspection holes in each caliper (pic. 2.19). External brake pads are visible on the side of the caliper. Visually determine the thickness of the brake pads.
If it is difficult to visually determine the thickness of the brake pads or there is a suspicion of poor condition of the pads, remove them for further inspection. If the brake pad is worn to the minimum thickness, replace all four brake pads as a set.
Use a caliper to measure the thickness of the brake disc. If the disc thickness is less than the limit, replace it. Also check the condition of the brake disc for cracks and burrs.
Before installing the wheel, check the condition of the brake hoses and tubes.
Install the wheel and lower the car.
Rear drum brakes
To check the thickness of the rear brake pads without removing the brake drums, remove the rubber plugs from the rear brake guard and shine
Pic. 2.20. The location of the hole on the protective casing of the rear brake, closed with a rubber plug, for inspecting the rear brake pads
flashlight through the holes on the brake pads (pic. 2.20). Visually determine the thickness of the brake pads.
If it is difficult to visually determine the thickness of the brake pads or there is a suspicion of poor condition of the pads, remove them for further inspection.
Park the vehicle on a firm, level surface.
Place chocks under the front wheels to prevent the vehicle from rolling.
Loosen the rear wheel bolts, raise the rear of the vehicle and secure it on stands. Remove rear wheels.
Remove brake drums.
Use a caliper to measure the thickness of the rear brake pads. If the brake pads are 1.6 mm higher than the rivet heads, the brake pads are serviceable, otherwise replace all four brake pads as a set.
Replace the brake pads also if the pad linings are cracked, greasy or contaminated with brake fluid.
Check the condition of the rear brake return and retaining springs.
Turn away protective covers of working brake cylinders and check up absence of leaks of a brake liquid. If there is brake fluid under the protective covers, replace the working brake cylinders.
Check the condition of the brake drums for cracks, scratches, deep grooves and signs of overheating. If the defects cannot be repaired, replace the brake drums.
Install brake drums.
Install wheels and lower vehicle.
Vacuum brake booster
The vacuum brake booster reduces the force applied to the brake pedal, thereby making driving easier. The principle of operation of the vacuum brake booster is based on the use of vacuum in the intake manifold. When the vacuum booster fails, the brake system does not work, but it is necessary to apply much more effort to press the brake pedal.
Press the brake pedal several times with the engine off to create the same pressure in the cavities of the vacuum booster, close to atmospheric. At the same time, by the force applied to the pedal, determine if the valve body is sticking. Stop the brake pedal in the middle of its travel and start the engine. With a working vacuum booster, the brake pedal should go forward after starting the engine. If the pedal does not move forward, check the attachment of the hose tip, the connection of the tip flange mounting in the amplifier, the condition of the hose and fitting.
Parking brake
Slowly apply the parking brake lever until the lever is raised by 6-8 clicks. Otherwise, adjust the parking brake.
Park the vehicle on a sloping road, apply the parking brake lever, and move the gearshift lever to neutral. If the vehicle is securely restrained from rolling away, the parking brake is working properly and is properly adjusted.