
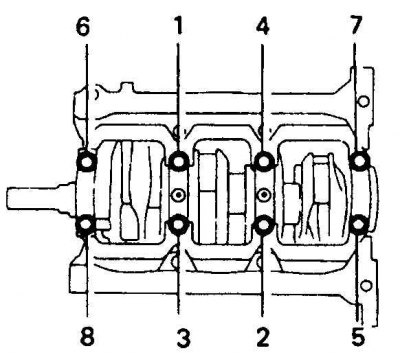
Bolt tightening sequence for main bearing caps on 4-cylinder engines
Bolt tightening sequence for main bearing caps on V6 engines
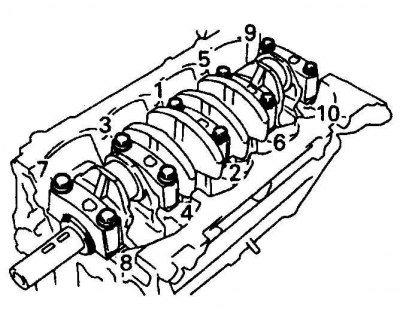
1. Position the block so that the bottom is facing up. Turn out bolts of covers, get covers and lay them out in the order of their installation. Remove the old liners from the covers and cylinder block and wipe the covers and beds clean.
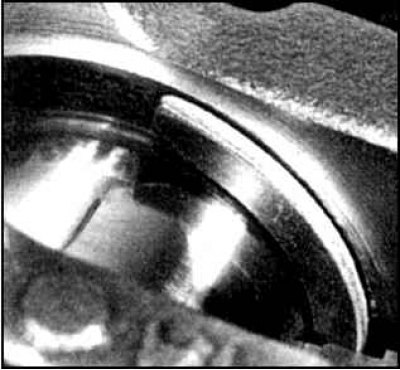
2. Clean the outer surface of the new oil-grooved main bearings, and carefully insert them into the cylinder block bed. Insert the corresponding reciprocal inserts into the covers, aligning the protrusions with the selections. Do not lubricate inserts.
3. Install thrust washers (in the 3rd support on 4-cylinder engines and in the 2nd - on V6).
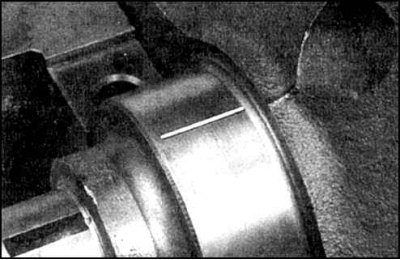
4. Install the crankshaft and measure the clearances in the main bearings. To do this, put a piece of calibration wire on each crankshaft main journal parallel to its axis.
5. Clean the surfaces of the inserts in the covers, install the covers (cover frame on 3VZ-FE engine) and tighten the bolts in three steps with the specified torque in the sequence shown (see fig. Bolt tightening sequence for main bearing caps on 4-cylinder engines or fig. Bolt tightening sequence for main bearing caps on V6 engines).
6. On V6 engines, tighten the cover bolts by 90°.
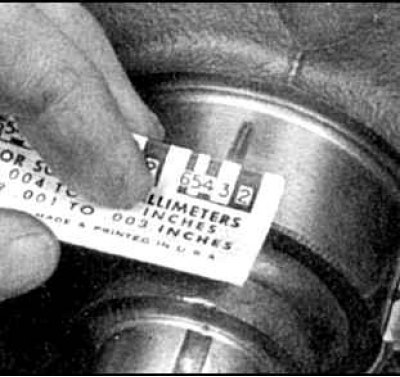
6. Loosen the bolts and carefully lift the covers, compare the thickness of each of the crushed wires with the scale on the package and determine the gap.
7. If the gap is not correct, then the reason may be the wrong selection of the size group of the liners. Make sure there is no dirt or oil between the bearings and the cover surfaces when measuring. If the width of the crushed wire at the ends is very different, then the crankshaft main journal has a taper.
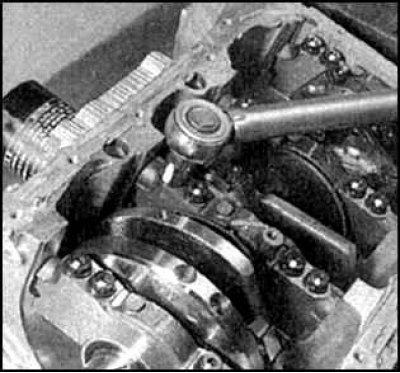
8. Remove the remnants of the wire from the necks and remove the crankshaft.
9. Lubricate the main journals and thrust surfaces of the crankshaft. Lubricate the necks under the oil seal with molybdenum grease and install the crankshaft in the cylinder block. Reinstall the covers so that the arrows point towards the front of the engine. Install half rings.
10. Install the top ring by turning it over the crankshaft journal. The ring grooves must face outward.
11. The lower rings are inserted into the groove on the cover.
12. Tighten the bolts in three steps to the specified torque in the sequence shown (see fig. The sequence of tightening the bolts of the main bearing caps on 4-cylinder engines or fig. Bolt tightening sequence for main bearing caps on V6 engines).
13. Check the freedom of rotation of the crankshaft.
14. Check crankshaft end play (see subsection 3.3.9.1).
15. Install the rear oil seal (see subsection 3.1.14 or subsection 3.2.15).