
Valve train parts
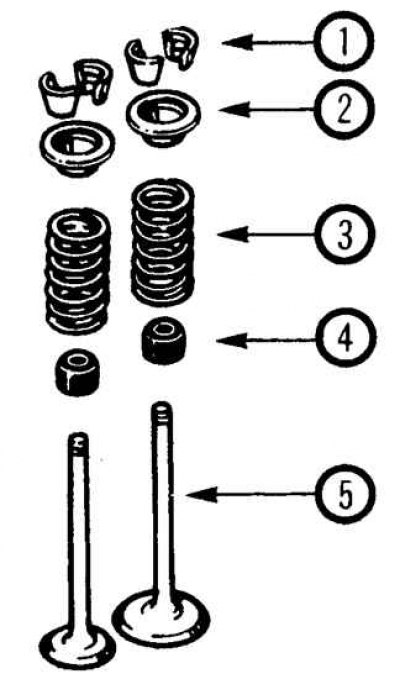
1. Crackers; 2. Plates; 3. Springs; 4. Umbrella caps; 5. Valves
Disassembly
Attention! It seems more appropriate to purchase a new block head than to disassemble, check and repair a used head.
1. To disassemble the cylinder head, it is necessary to remove the rocker arms with rollers, valves and related parts.
2. Removed parts should be stored in the order in which they were installed.
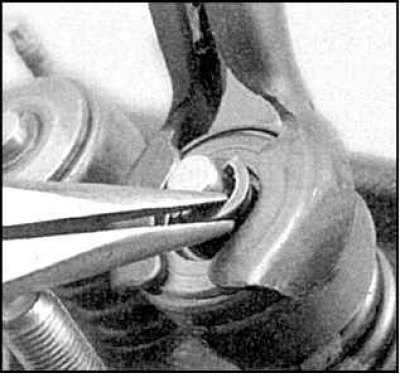
3. Compress the first valve spring with a suitable tool and remove the cotters. Carefully release the valve spring, remove the spring cap, spring and thrust washer (if available).
4. Take out the valve and remove the valve stem seal. If the valve does not come out of the sleeve, then grind the collar near the end of the valve with a file.
5. Repeat the same steps for the rest of the valves.
6. Clean the cylinder head and inspect (it is recommended to do this after the final disassembly of the engine).
Cleaning
1. Remove any gasket residue from the split surfaces of the head, being careful not to damage the surfaces. Remove carbon deposits from combustion chambers, valve heads and scale from cooling channels. Run and clean all threaded holes.
2. Thoroughly flush all parts of the valve train with solvent, being careful not to damage them.
3. Finish all threads with a tap or die, rinse and blow with compressed air.
4. Clean the rocker shaft bolt and studs with a stiff brush.
Examination
Cylinder head
1. Carefully inspect the head for cracks and signs of coolant intrusion. If cracks are found, replace the head.
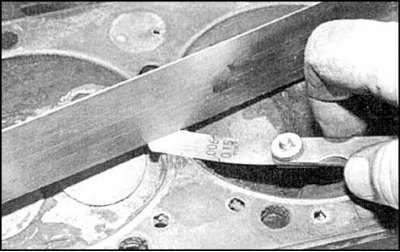
2. Check the deformation of the split surface of the head. If the deviation from the plane exceeds the norm, then the head should be reground.
3. Check the condition of the valve seats. In the presence of pitting (fossae), cracks, traces of burning, head repair in a car service will be required.
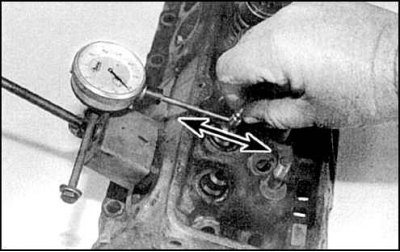
4. Lower the valve about 1.5 mm and check the play of the stem in the transverse direction. If half of the total backlash on the indicator exceeds the norm (clearance in bushing), then the bushing should be replaced (carried out in a car service). If there are any signs of a dubious state of the bushing, they should be checked at a car service.
Valves
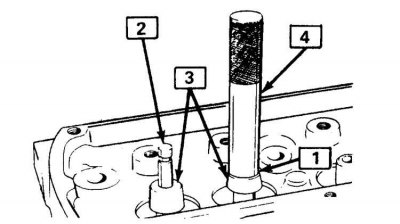
Valve Wear Check Points
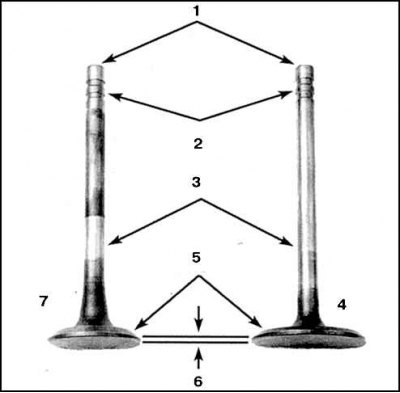
1. Butt; 2. Grooves for crackers; 3. Rod; 4. Inlet valve; 5. Chamfer; 6. Belt; 7. Exhaust valve
Typical valve face wear
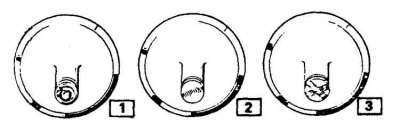
1. Normal wear (trace of the rotator); 2. Abnormal operation of the rotator; 3. Abnormal operation of the rotator
Examination
1. Carefully inspect the valves, check for cracks on the chamfers of the valves, traces of uneven wear, metal carryover and burnout.
2. Check for cracks in the necks and stems and for bending of the stems by turning the valve in the guide (see fig. Valve Wear Check Points).
3. Check the wear of the ends of the rods. The presence of any of these defects indicates the need for valve repair (see fig. Typical valve face wear).
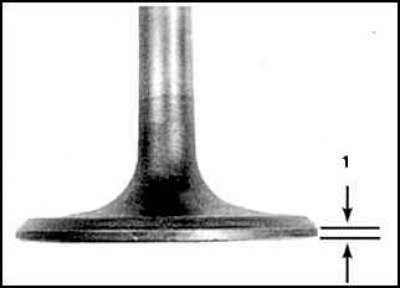
4. Measure the width of the edge band (1) each valve and compare with the standard value. If this distance is less than normal, then replace the valve.
Valve train parts
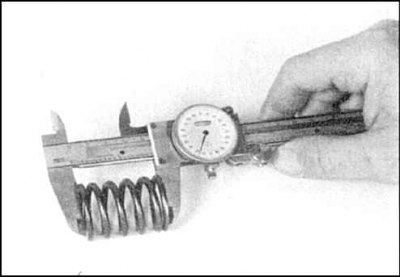
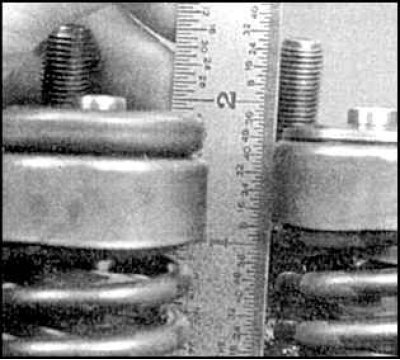
1. Measure the free length of the spring. Replace shrink springs. Before installing the springs on a repaired engine, it is necessary to check them under load on a special stand in a car service.
2. Check the wear and length of the springs. Replace shrink springs. Check the elasticity of the springs (carried out in a car service).
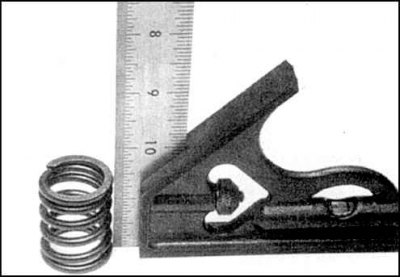
3. Check the verticality of the springs. If it deviates from the vertical, replace the spring.
4. Check up presence of visible traces of wear and cracks on plates of springs and crackers. Replace parts with any defects.
Valve rocker arms
1. Check the presence of pits, traces of wear, metal enveloping on the thrust surfaces of the rocker arms. Also check the condition of the rocker rollers and ball ends of the axles.
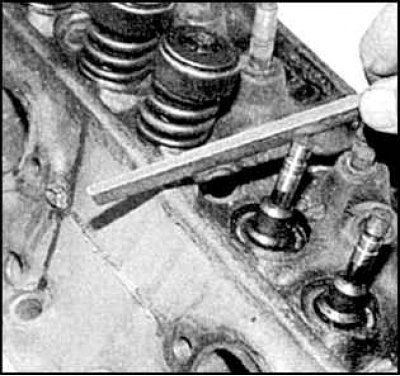
2. Check the condition of the ends of the rods, the presence of chips and traces of wear on them. Check the deformation of the rods by rolling them over sheet glass.
3. Replace badly worn parts.
4. If the check shows that the parts of the valve mechanism are worn, then assemble the head and hand it over for repair.
Assembly
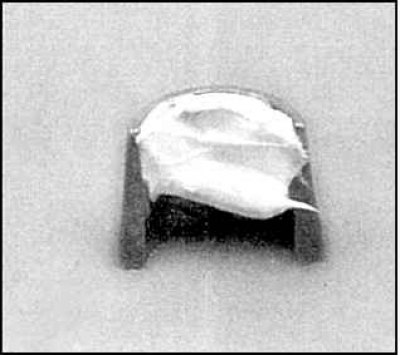
Pressing oil seals
1. Cap in the mandrel; 2. Valve end; 3. cap; 4. Mandrel
1. Before starting assembly. it is necessary to make sure that the head of the block is clean, regardless of whether this part was repaired in a car service or not.
2. If the head of the block was repaired in a car service, then measure the height of the spring in the installed state.
3. Install all parts of the valve mechanism in reverse order, starting with the valve stem seals (see fig. Pressing oil seals). Some motors use umbrella type seals, which are installed only after the valve has been installed.
4. Install support washers or spacers, spring, cup and plate.
Attention! 3F-E engine valve springs are color-coded to guide the spring (see subsection 3.1.7).
5. Compress the springs and install the crackers. Before assembly, grease the crackers to temporarily fix them.
6. Check the height of the spring after assembly, i.e. distance from the support washer to the lower edge of the plate (or the top of the glass). If the height is too high, then install additional support washers.
Attention! It is forbidden to adjust the height of the spring by selecting washers if the height is less than the norm.