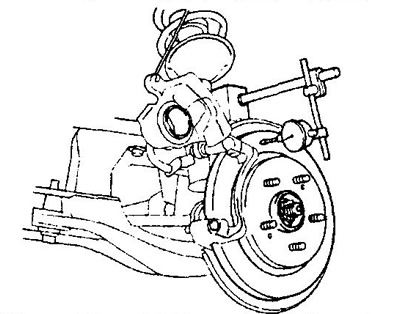
Removal and installation
Note:
- Removal is carried out in accordance with the figure "Front brakes".
- Install in the reverse order of removal.
- The tightening torques are shown in the figure.
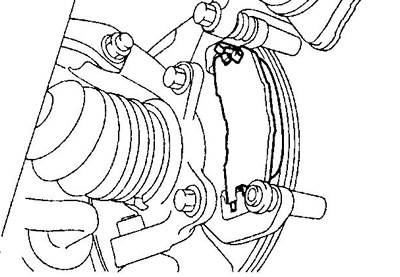
Disassembly and assembly
Note:
- Carry out disassembly in accordance with the figure "Dismantling the front brakes".
- Reassemble in the reverse order of removal.
- The tightening torques are shown in the figure.
- When assembling, apply a special grease that does not damage the rubber to the indicated surfaces.
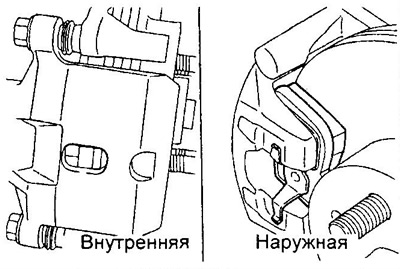
- When installing the pads, position the wear indicator as shown in the illustration.
Install pads as shown.
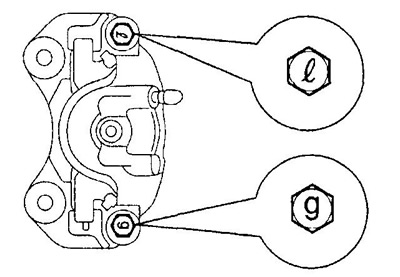
(Models with disc 13", since 2001) Install the guide pins as shown in the figure.
Checking the front brakes
1. Measure the thickness of the brake pads.
Minimum thickness of brake pads:
- disc 13" - 1.0 mm
- disc 14" - 1.5 mm
Nominal thickness of brake pads:
- disc 13" - 10.0 mm
- disc 14" - 9.5 mm
Replace the pads if the pad thickness is less than minimum or if the pads are unevenly worn.
Note: If you need to replace at least one brake pad, then replace all to ensure uniform braking. When replacing the pads, the anti-squeak pads also change.
2. Check the retaining plate bushings.
A) Clean the bearings and their mounting points with a special liquid. Make sure the earbuds are in good condition.
b) After installing the plate inserts, make sure that they do not fall out.
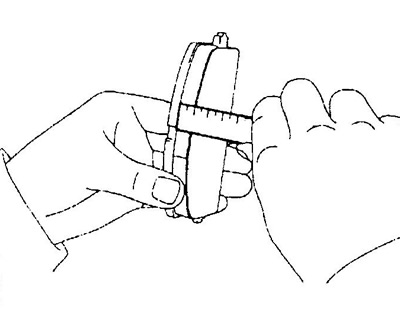
3. Use a caliper to measure the thickness of the brake disc.
Nominal Disc Thickness:
- disc 13" - 16 mm
- disc 14" - 17 mm
Minimum Disc Thickness:
- disc 13" - 15 mm
- disc 14" - 16 mm
If the disc thickness is less than the minimum allowable, then replace the disc.
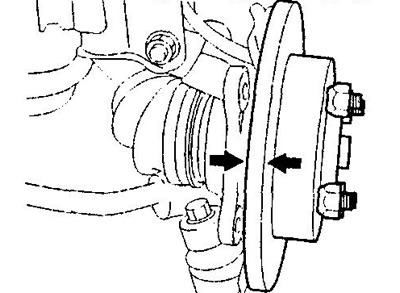
4. Measure the runout of the brake disc at a distance of 10 mm from the outer edge.
- Maximum runout - 0.1 mm
If the brake disc runout is greater than or equal to the maximum value, check the bearing axial clearance and hub runout.