



Note: Assembly should be performed as shown in the figures.
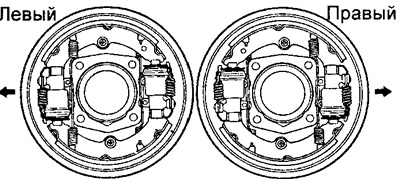
DYNA 150 (with automatic clearance regulator)
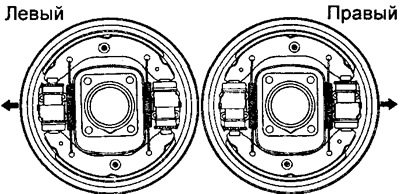
DYNA 150 (without automatic gap adjuster)
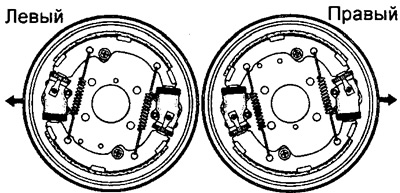
DYNA 100
1. Assemble the wheel cylinder.
(DYNA 100)
a) Apply lithium based grease to the cylinder cap and piston.
b) Apply high temperature grease to the adjusting bolt and nut.
c) Assemble the wheel cylinder in the following sequence: cap, piston, boot.
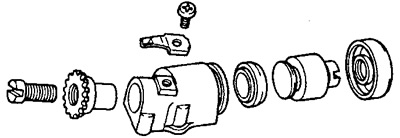
d) Install the adjusting bolt and nut into the cylinder.
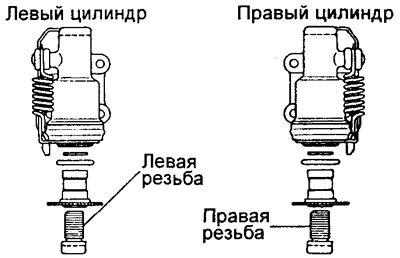
- Right Wheel Cylinder: Left Hand Thread (Yellow)
- Left Wheel Cylinder: Right Hand Thread (White)
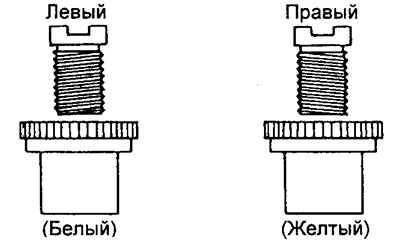
d) Install the regulator locking lever and screw.
(DYNA 150, without automatic gap adjuster)
a) Apply lithium based grease as shown in the figure.
b) Apply high temperature grease to the adjusting bolt and nut.
c) Assemble the wheel cylinder in the following sequence: spring, spring seat, cap, piston, two boots.
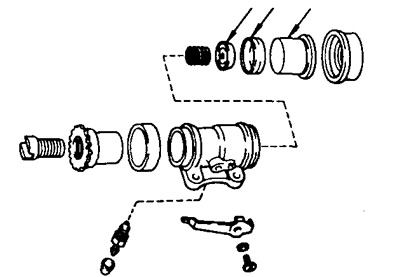
d) Install the adjusting bolt and nut into the cylinder.
- Right wheel cylinder (FR mark): Left-hand thread (Yellow)
- Left wheel cylinder (FL mark): Right-hand thread (White)
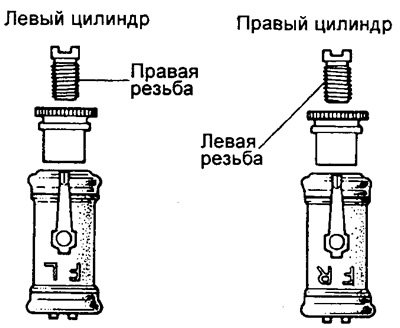
d) Install the regulator locking lever and screw.
(DYNA 150, with automatic gap adjuster)
a) Apply lithium based grease as shown in the figure.
b) Apply high temperature grease to the adjusting bolt and nut.
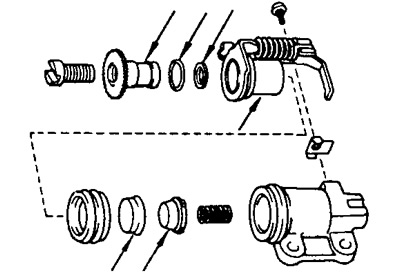
c) Assemble the wheel cylinder in the following sequence: spring, spring seat, cap, boot, wheel cylinder piston unit and automatic adjuster lever with spring, adjuster lever lock, screw.
d) Install the seat and dust seal onto the wheel cylinder piston assembly.
d) Install the adjusting nut and bolt onto the wheel cylinder piston assembly.
- Right wheel cylinder (marked R): Right-hand thread (Yellow)
- Left wheel cylinder (marked L): Left thread (White color
2. Fit the bleed nipple as shown in the figure.
(DYNA 100 and 150 without automatic clearance adjuster)
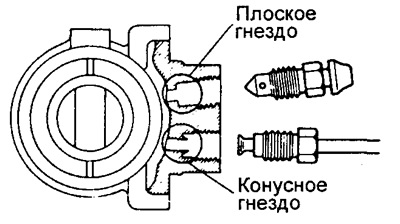
a) The wheel cylinder nipple sockets on the rear side are made flat and conical in shape, as shown in the figure.
b) Both nipple sockets on the front side of the wheel cylinder are made conical.
(DYNA 150 with automatic gap adjuster)
a) The wheel cylinder nipple sockets on the front side are made flat and conical in shape, as shown in the figure.
b) Both nipple sockets on the rear side of the wheel cylinder are made conical.
3. (DYNA 100 and 150 without automatic clearance adjuster) Install the wheel cylinder onto the brake shield.
a) Set the front brake wheel cylinder with the adjusting mechanism facing up and the rear brake wheel cylinder with the adjusting mechanism facing down.
b) Tighten the wheel cylinder mounting bolts.
Tightening torques:
- DYNA 100 - 18 Nm
- DYNA 150 - 25 Nm
(DYNA 150 with automatic gap adjuster)
a) Set the front brake wheel cylinder with the adjusting mechanism down and the rear brake wheel cylinder with the adjusting mechanism up.
b) Tighten the wheel cylinder mounting bolts.
- Tightening torque: 25 Nm
4. Install the brake pipe onto the wheel cylinder.
a) Install the brake pipe in place and tighten the nuts by hand, then tighten them with a wrench.
- Tightening torque: 15 Nm
5. Install the brake pipe retainer on the brake shield and tighten the bolt.
Tightening torque:
- DYNA 100 - 7.4 Nm
- DYNA 150 — 7.8 Nm
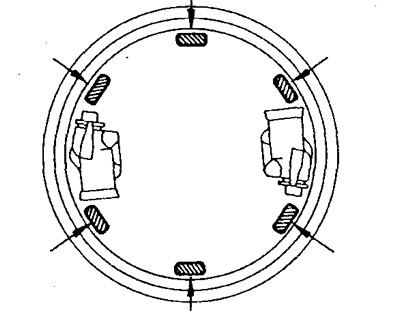
6. Apply high temperature grease to the contact surfaces of the brake shield with the pads as shown in the figure.
7. Install the upper shoe (DYNA 100 and 150 without automatic clearance adjuster).
a) Install the upper shoe holding the shoe spring, insert the holder and put on the two caps.
b) Install the lower shoe in the same way.
c) Using a screwdriver, install the return springs from the front and rear sides.
(DYNA 150 with automatic gap adjuster)
a) Bring the pads towards the center so that the return spring is hooked onto the lower pad.
b) Install the brake pads as an assembly.
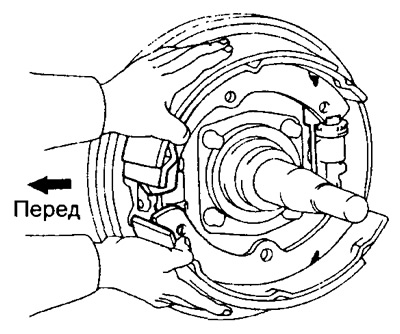
c) Install the shoe retaining spring, insert the holder and put on the two caps.
d) Install the return springs on the front and rear sides.
8. Lightly sand the outer surface of the shoe lining and the working surface of the drum with sandpaper.
9. Install the brake drum (DYNA 100) Install the brake drum and tighten the screw.
- Tightening torque: 6.9 Nm
(DYNA 150) Install the brake drum onto the hub.
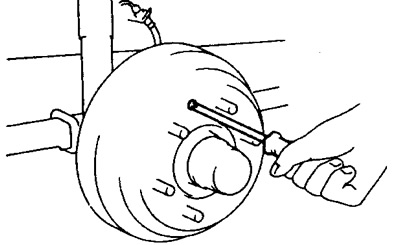
10. Fill the brake system reservoir with brake fluid and bleed the brake system.
11. Check for brake fluid leaks.
12. Adjust the brake pad clearance.
13. Install the front wheel.