
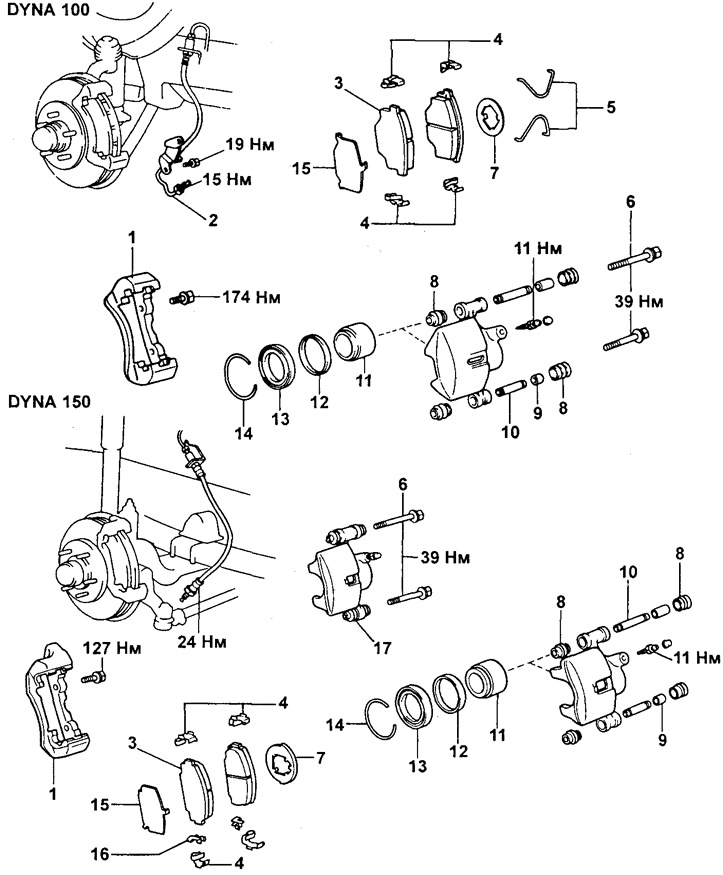
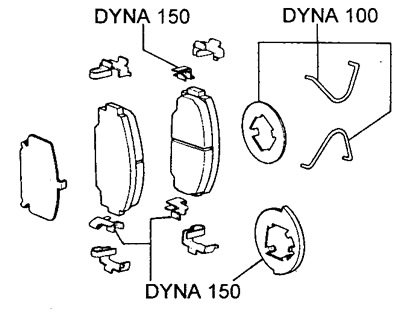
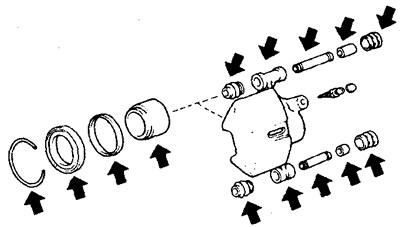
Disc brake.
1 - Bracket,
2 - Brake pipe and bracket,
3 - Brake shoe,
4 - Support plates for brake pads,
5 - Spring,
6 - Set bolt,
7-; 15 - Anti-squeak pad,
8 - duster,
9 - Bushing,
10 - Sliding sleeve,
11 - Piston,
12 - Piston cuff,
13 - Piston boot,
14 - Adjusting ring,
16 - Wear indicator plate for brake pads,
17 - Caliper.
Replacement of brake pads
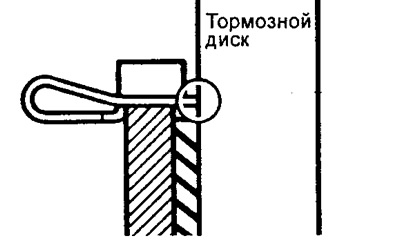
Note: (DYNA 150) If the brakes squeal while driving, check the brake pad wear indicator plate. The brake pad wear indicator plate must be 3 mm away from the brake disc, otherwise the brake pads must be replaced.
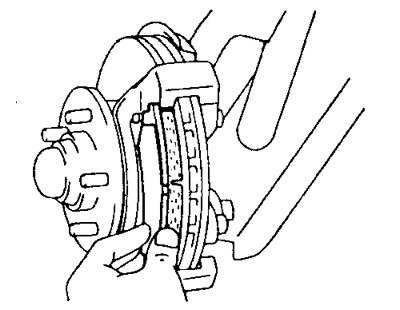
1. Remove the front wheel.
2. Check the thickness of the lining on the brake pads through the inspection hole.
Minimum Thickness:
- DYNA 100 - 1.0 mm
- DYNA 150 - 3.0 mm
Standard value - 10.0 mm

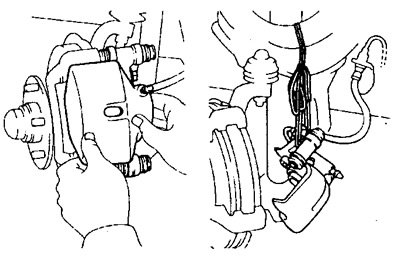
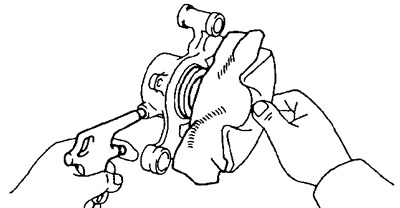
3. Remove the cylinder from the bracket.
A) Remove the two set screws from the bracket.
b) Remove the caliper and hang it so as not to damage the brake hose.
Recommendation: The brake hose does not need to be disconnected.
4. Remove the following parts: two springs (DYNA 100), two brake pads, two anti-squeak pads, four brake pad backing plates, three brake pad wear indicator plates (DYNA 150).
5. Check the thickness of the brake disc.
6. Check brake disc runout.
7. Install the four support plates on the bracket.

8. Install new brake pads.
A) (DYNA 150) Install three brake pad wear indicator plates.
b) Install anti-squeal pads.
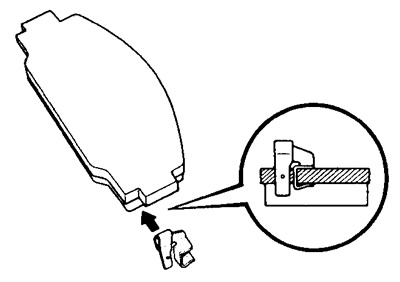
V) Install new brake pads.
Warning: Do not allow oil or grease to come into contact with friction surfaces.
9. Install the cylinder.
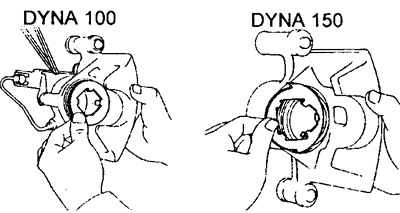
A) Drain a small amount of fluid from the reservoir.
b) Push the piston into the cylinder.
Note: Replace the brake pads alternately for the left and right brakes. Do not remove the pads from both sides, because in this case, when the piston is pressed into the cylinder on one side, the piston on the other side may fall out.
V) Install anti-squeal gaskets on the piston.
G) Install the caliper carefully so as not to damage the boot.
d) Insert and tighten two set screws.
- Tightening torque: 39 Nm
10. Install the front wheel.
11. Check the brake fluid level in the reservoir and top up if necessary.
Removing the caliper
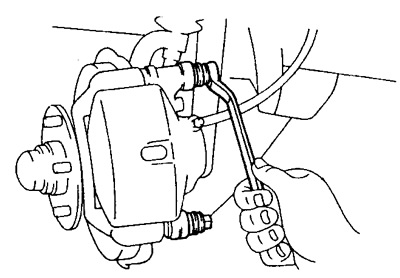
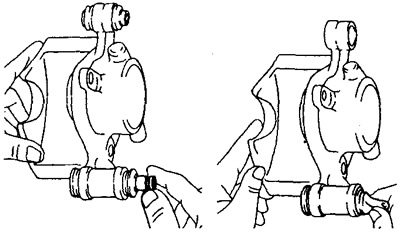
1. Disconnect brake pipes. (DYNA 100)
A) Disconnect the brake lines with a wrench.
Note: Substitute a container for the drained brake fluid.
b) Disconnect the brake pipe mounting bracket from the caliper.

(DYNA 150)
A) Disconnect the brake hose from the caliper.
2. Turn off two adjusting bolts and remove a support.
3. Remove the following parts: two springs (DYNA 100), two pads, anti-squeak pads, four brake pad backing plates, three brake pad wear indicator plates (DYNA 150).
Caliper disassembly
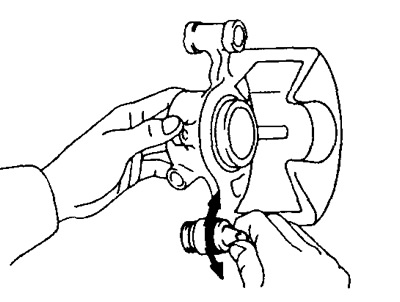
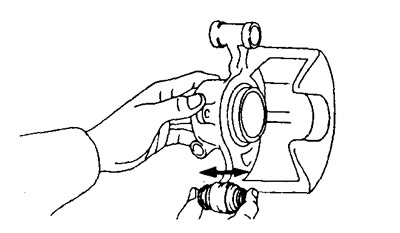
1. Remove the following parts: two sliding bushings, four dust boots, two bushings.
2. Using a screwdriver, remove the set ring and piston boot.
3. Remove the piston from the cylinder.
A) Place a rag between piston and cylinder.
b) Remove the piston from the cylinder with compressed air.
Caution: Do not place your fingers in front of the piston when compressed air is being supplied.
4. Remove the piston seal with a screwdriver.
Checking and repairing components
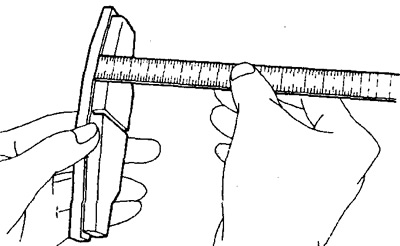
1. Measure the lining thickness on the brake shoe.
Minimum Thickness:
- DYNA 100 - 1.0 mm
- DYNA 150 - 3.0 mm
Nominal thickness - 10.0 mm
Replace the brake pad if the lining thickness is less than the minimum (the cut is no longer visible), or showing signs of uneven wear.
2. Measure the brake disc thickness.
- Rated - 25.0 mm
- Minimum allowable - 24.0 mm
If the disc is scored or less than the minimum thickness, repair or replace the disc.
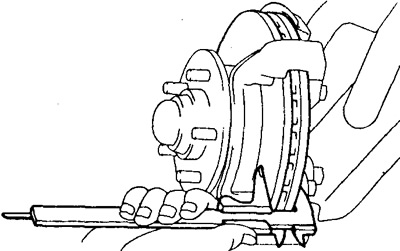
3. Measure the runout of the brake disc at a distance of 10 mm from the outer edge of the brake disc.
- Maximum disc runout - 0.15 mm
If the runout exceeds the maximum value, replace the disc.
Note: Before measuring runout, check that the front bearing play is within specifications.
4. If necessary, replace the brake disc.
A) Remove the bracket from the steering knuckle.
b) Remove the hub.
V) Remove the brake disc from the hub.
G) Install the new brake disc on the hub, tighten the bolts:
Torque:
- DYNA 100 - 69 Nm
- DYNA 150 - 64 Nm
d) Install the hub.
e) Install the bracket on the steering knuckle.
Torque:
- DYNA 100 - 147 Nm
- DYNA 150 - 127 Nm
Caliper Assembly
1. Apply lithium based grease as shown.
2. Install the piston collar and insert the piston into the cylinder.
3. Install the piston boot and secure it with the set ring.
4. Install bushing, boot and sliding bushing.
A) Install the bushing and boot on the caliper.
b) Check that the anthers fit snugly into the corresponding grooves in the caliper.
V) Install sliding bushings.
G) Ensure that the anthers fit snugly into the corresponding grooves of the bushings.
Caliper installation
1. Install anti-squeal gaskets on the piston.
2. Install pads.
3. Install the caliper.
4. Connect the brake pipes to the caliper.
(DYNA 100)
A) Connect the brake pipe bracket to the caliper.
- Tightening torque: 19 Nm
b) Connect the brake pipe and tighten with a wrench.
- Tightening torque: 15 Nm
(DYNA 150)
A) Connect the brake hose to the caliper and tighten it.
- Tightening torque: 24 Nm
5. Fill the reservoir with brake fluid and bleed the brake system.
6. Check up absence of leaks of a brake liquid from system.