



a) Place the pulley key into the crankshaft keyway.
b) Using a hammer, lightly tap the pulley with the flange facing inward.
2. Install tension roller No.2.
a) Install the spacer sleeve and tension roller with the bolt. Tighten the bolt to a tightening torque of 33 Nm.
b) Check the smooth movement of the tension roller.
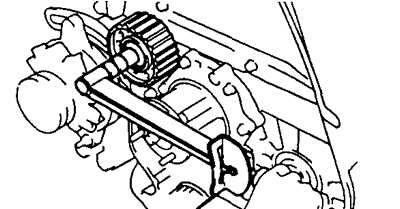
3. Install the fuel injection pump drive pulley.
a) Place the key into the keyway of the drive shaft.
b) Fit the drive pulley so that the TDC mark faces outward.
c) Using the special tool, install the bolt and tighten it.
- Tightening torque - 64 Nm
Warning: Do not tighten the nut with an impact tool.
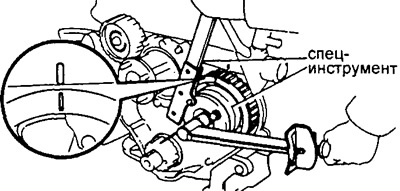
4. Install the camshaft pulley.
a) Place the key into the keyway of the camshaft.
b) Align the locating key with the pulley keyway.
c) Fit the pulley so that the TDC mark faces outward.
d) Using the special tool, install the bolt and tighten it
- Tightening torque - 98 Nm
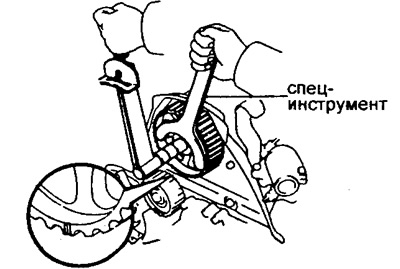
5. Temporarily install tension pulley No.1 and tension spring.
Bolt length A - 76.5 mm, B - 42.9 mm, color - yellow; C - 41.3 mm, color - silver. Bolt C secures the tension roller.
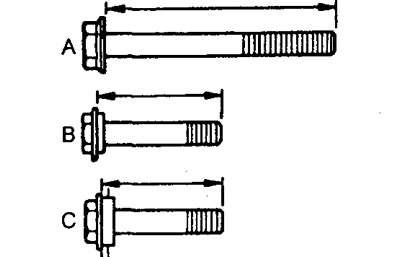
a) Install the tension roller with three bolts. Tighten two bolts (B and C).
- Tightening torque - 19 Nm
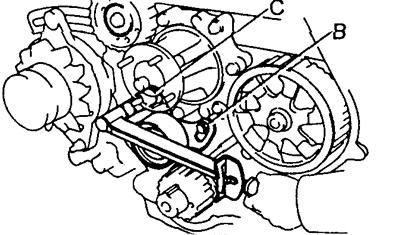
b) Install the tension spring.
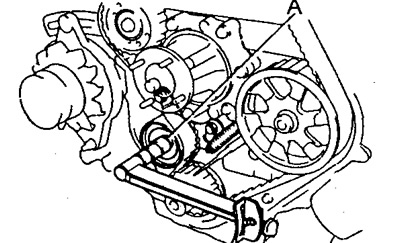
c) Using a lever, move the tension roller bracket as far to the left as possible, tighten the bolt (A).
d) Check the smooth movement of the tension roller.
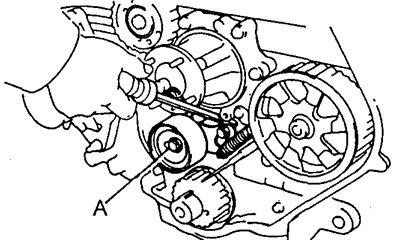
6. Set the piston of the first cylinder to TDC.
Install the pulleys in the appropriate positions.
Warning: The engine must be cold. When turning the crankshaft or camshaft, the valve heads may hit the piston crown, so do not turn the shafts more than the required angle.
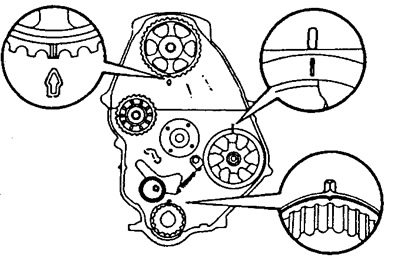
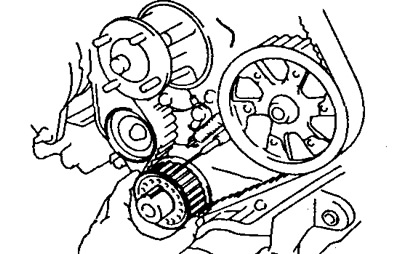
7. Install the timing belt.
Reminder: If the belt is reused, align the points marked during removal; install the belt in accordance with the arrow indicating the direction of rotation of the engine.
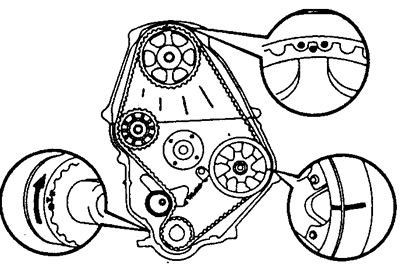
a) Remove water or oil from each pulley (if they exist) and make sure the pulleys are clean.
b) Install the belt on the crankshaft pulley and tension roller No.1.
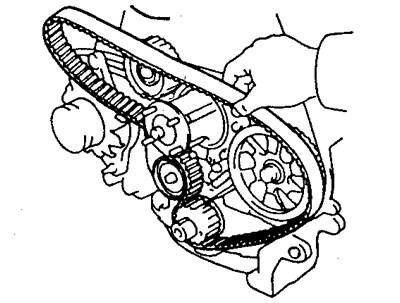
c) Using the special tool, slightly turn the fuel injection pump drive pulley clockwise. Hang the belt on the fuel injection pump drive pulley and align the marks located on the drive pulley and on the belt casing.
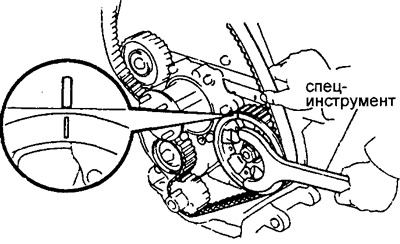
d) Check for slack in the belt between the crankshaft pulley and the fuel injection pump drive pulley.
d) Using the special tool, slightly turn the camshaft pulley clockwise. Hang the belt on the pulley and align the TDC marks located on the pulley and on the belt cover.
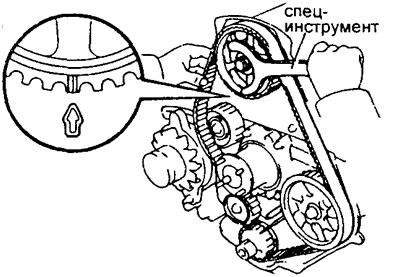
e) Check that there is no slack in the belt between the fuel injection pump drive pulley and the camshaft pulley.
g) Hang the belt on tension roller No.2.
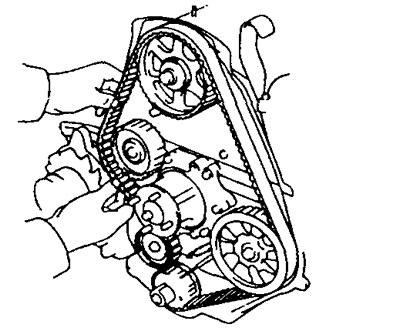
8. Check that the marks match.
a) Loosen the bolt (A) of tension roller No.1; tighten the timing belt.
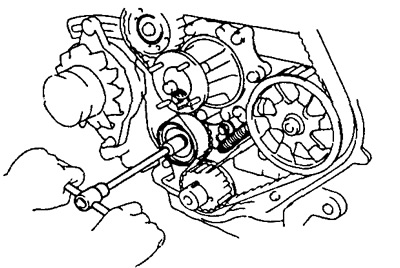
b) Rotate the crankshaft pulley four full turns.
Recommendation: Always turn the crankshaft clockwise.
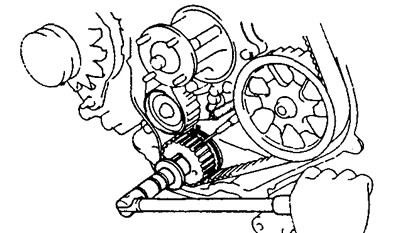
c) Check that the marks on each pulley are aligned with their reference mark, as shown in the figure. If the marks are not aligned, remove the belt and reinstall it.
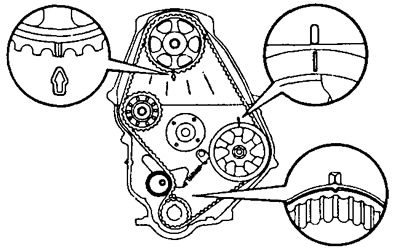
d) Tighten the bolt (A) of tension roller No.1.
- Tightening torque - 44 Nm
9. Install the belt guide so that its cup faces outward.
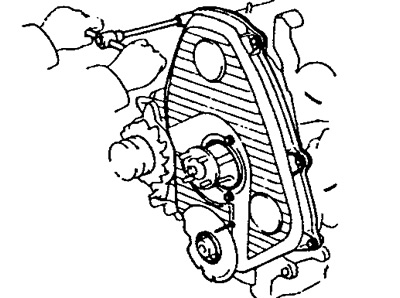
10. Install the front timing belt cover.
a) Install two gaskets and a spacer on the belt cover.
b) Install the belt cover with eleven bolts.
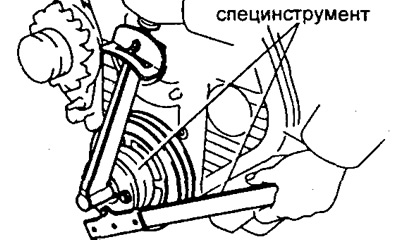
11. Install the crankshaft pulley.
a) Align the key with the pulley keyway.
b) Lightly tap the pulley into place.
c) Using the special tool, install the bolt and tighten it.
- Tightening torque - 167 Nm
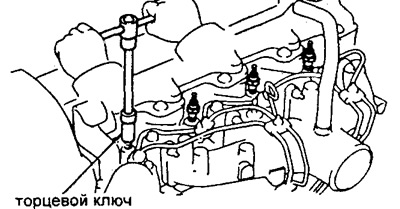
12. Install the glow plugs.
a) Using a socket wrench, install the four glow plugs and tighten them.
- Tightening torque - 13 Nm
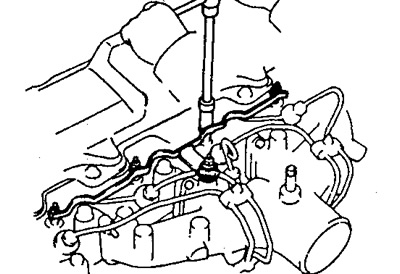
b) (Only for engines equipped with a fixed delay preheating system). Install the glow plug wire with four nuts.
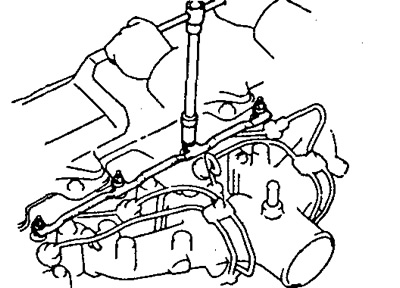
c) Install the lower heat insulating element onto the intake manifold.
d) Install the wire on the glow plugs and the lower heat-insulating element.
d) Install the upper heat-insulating element with the spring washer and nut.
e) Install the four nuts securing the wire to the glow plugs.
g) Install four insulating bushings.
13. Install the water pump pulley (see the relevant section).
14. Install and adjust the tension of the attachment drive belts.
Adjust the drive belt.