Loosen the nut and remove the terminal insulator. Loosen three screws (nuts for generator models 55A, 60A, 70A) and remove the back cover of the generator.
2. Remove the brush holder and electronic voltage regulator.
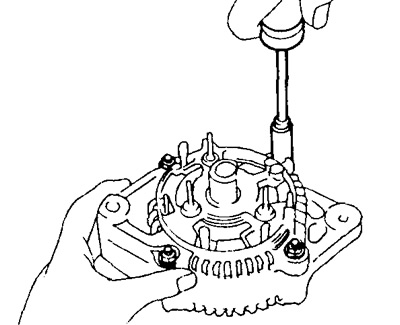
3. Remove the rectifier block. (For generator models 40A, 45A and 50A)
Unscrew the three screws and use pliers to straighten the 4 wires of the stator winding. Then remove the rectifier block.
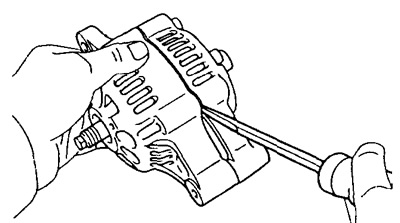
(For generator models 55A, 60A and 70A)
Remove 4 screws, remove the rectifier unit and 4 rubber insulators.
4. Remove the alternator pulley.
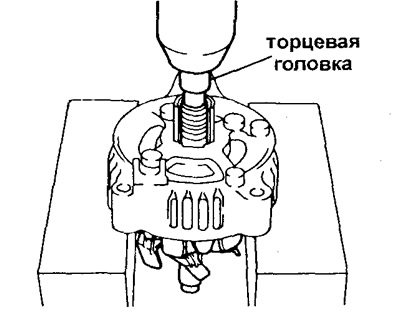
A) Holding a special tool (A) torque wrench, tighten the lever (IN) clockwise.
- Tightening torque - 39 Nm
b) Make sure the special tool (A) securely fixed to the rotor shaft.

V) Clamp special tool (WITH) in a vise and install the generator in it, as shown in the figure.
G) Loosen the alternator pulley nut by turning the wrench in the direction shown in the figure.
Warning: To avoid damage to the rotor shaft, do not loosen the nut more than half a turn.
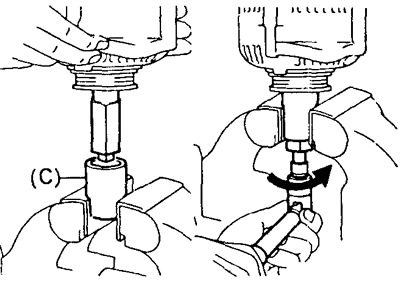
d) Remove the generator from the tool (WITH) and remove the previously installed fixtures from it.
e) Remove the pulley nut and pulley.
5. Disassemble the generator cover from the drive side, the rear cover of the generator and press out the rotor.
A) Remove two bolts and two nuts (for models 40A, 45A and 50A) or four nuts (for models 55A, 60A and 70A).
b) Using a screwdriver, pry the alternator cover on the drive side from the rear alternator on the rectifier side.
V) With socket head and press (appropriate fixture) press out the rotor (together with wavy lock washer).