
Removing
1. Remove the clutch master cylinder.
2. Disconnect the vacuum hose from the booster.
3. Disconnect the inlet tube and clamping bolts of the vacuum hose.
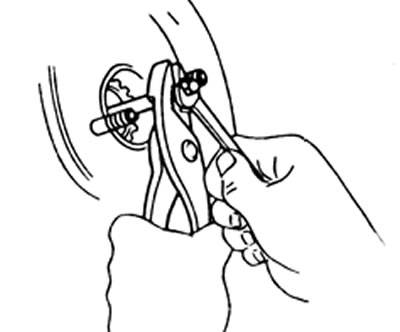
4. Remove cotter pin and pin.
5. Loosen the nuts (from the salon) and remove the clutch booster from the engine compartment.
Check valve check
1. Check that air flows through the valve from the booster to the vacuum hose.
2. Check that air is not passing through the valve from the vacuum hose to the booster.
Installation
1. Pusher length adjustment.
A) Install the gasket to the clutch master cylinder.
b) Install the special tool on the gasket. Lower the rod down until it touches the piston with its tip.
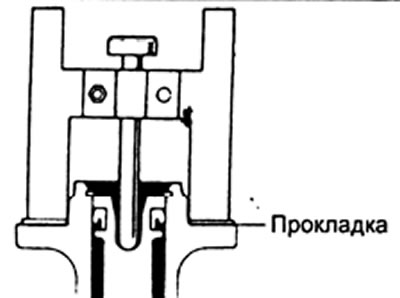
V) Turn the special tool upside down and install it on the amplifier.
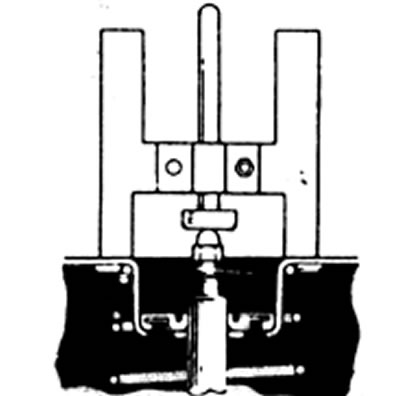
G) Measure the gap between the tappet and the special tool rod head.
Gap - 0 mm
d) Adjust the length of the pusher so that the pusher touches the stem head.
Note: when adjusting the length of the pusher, press the fork so that the pushrod comes out.
2. Install the clutch booster and secure it with nuts.
3. Connect the stem fork to the clutch pedal, install the pin and cotter pin.
4. Install the master cylinder on the amplifier and secure it with nuts.
Tightening torque - 13 N.m
5. Connect the inlet tube to the clutch master cylinder.
6. Connect the vacuum hose to the clutch booster.
7. Adjust the position and travel of the clutch pedal.
8. Bleed the clutch hydraulics and check for leaks.
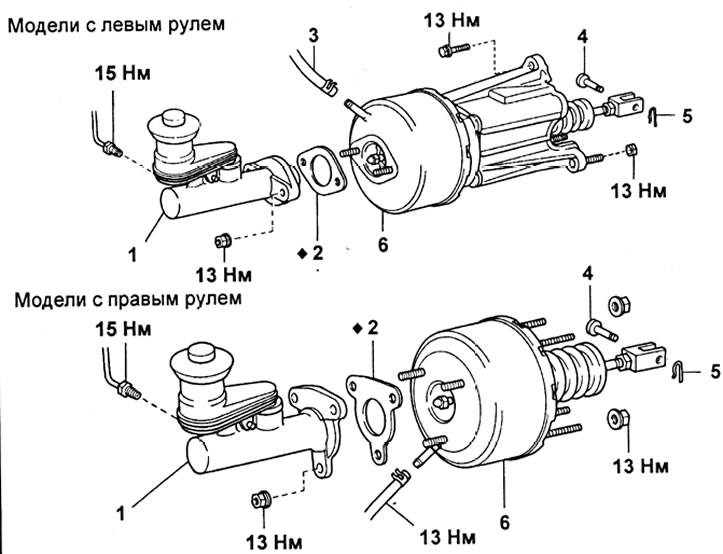
Clutch booster assembly. 1 - clutch master cylinder, 2 - gasket, 3 - vacuum hose, 4 - pin, 5 - cotter pin, 6 - vacuum clutch booster.
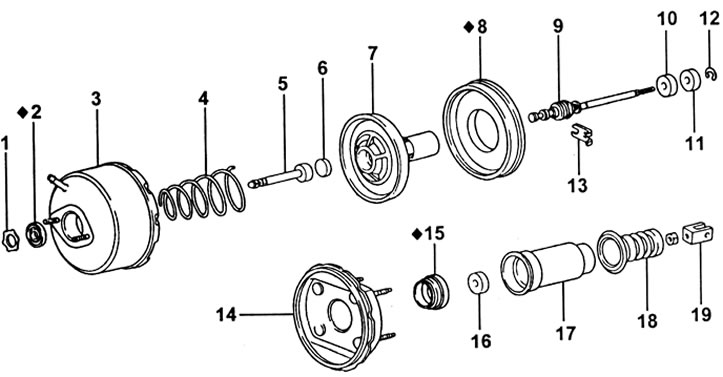
Coupling booster. 1 - ring, 2 - pusher seal, 3 - booster housing No. 1, 4 - spring, 5 - pusher, 6 - buffer, 7 - piston, 8 - diaphragm, 9 - check valve assembly (with pusher), 10 - air filter, 11 - felt washer, 12 - retaining ring, 13 - stopper, 14 - amplifier housing No. 2, 15 - seal, 16 - air filter, 17 - cover, 18 - boot, 19 - plug.