Removing
1. Remove the gearbox.
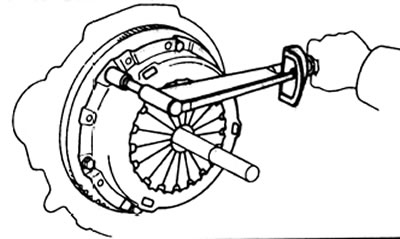
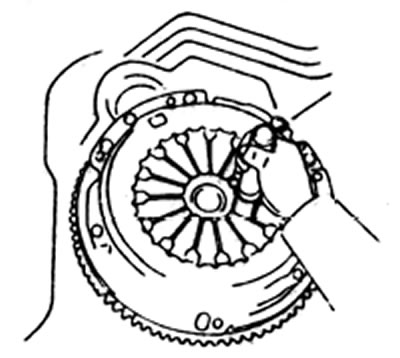
2. Remove the clutch cover assembly and clutch disc.
A) Put alignment marks on the clutch cover and flywheel.
b) Turn away bolts of fastening alternately on one turn.
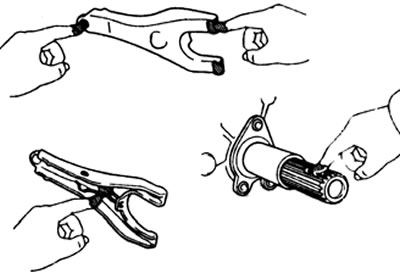
3. Remove a clip and take the bearing of deenergizing of coupling.
4. Remove the clutch release fork and cover.
Examination
1. Check the clutch disc for wear and damage.
2. Check the wear of the friction linings of the clutch disc.
A) Using a caliper, measure the distance from the lining surface to the rivet heads.
Minimum value - 0.3 mm
b) If the measured value is close to the minimum, then replace the clutch disc.
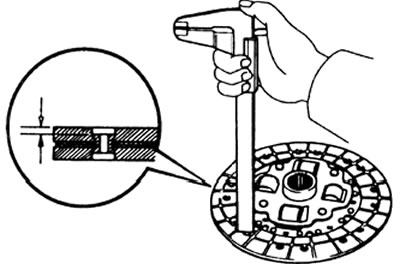
3. Checking the axial runout of the clutch disc.
A) Using a dial gauge, check the axial runout.
Maximum runout - 0.8 mm
b) If the runout is above normal, then replace the clutch disc.
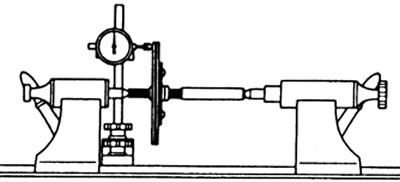
4. Checking the flywheel runout.
A) Using a dial gauge, check flywheel runout.
Maximum runout - 0.1 mm
b) If the runout is excessive, replace the flywheel.
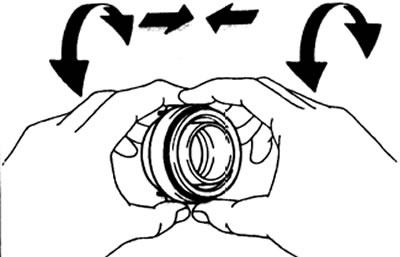
4. Check the thrust bearing.
A) Turn the support bearing by hand while pressing it in the axial direction.
b) If there is a seizure of the bearing or too much resistance to its rotation, then replace the bearing.
Note: The bearing is lubricated for life and does not require maintenance.
5. Replacing the thrust bearing (if necessary).
A) Remove the bearing from its seat using a puller.
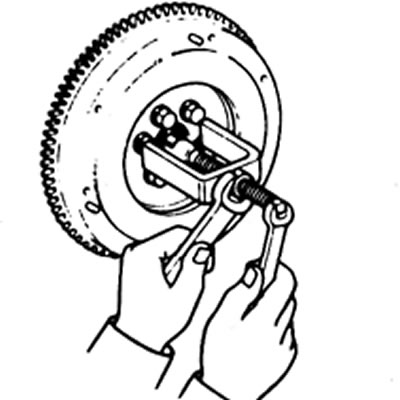
b) Using a drift, press the new thrust bearing into place.

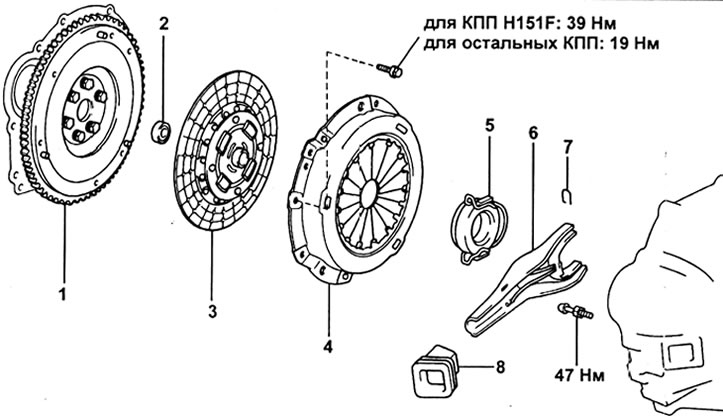
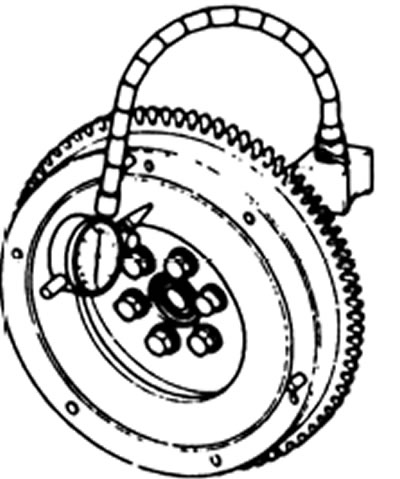
Clutch. 1 - flywheel, 2 - input shaft support bearing, 3 - clutch disc, 4 - clutch cover, 5 - clutch release bearing, 6 - clutch release fork, 7 - clamp, 8 - cover.
6. Diaphragm spring check.
A) Using a caliper, measure the depth and width of the diaphragm spring wear groove.
Maximum depth - 0.6 mm
Maximum width - 5.0 mm
b) If necessary, replace the clutch cover assembly.
7. Checking the clutch release bearing.
A) Turn the bearing by hand while pressing it in the axial direction.
Note: The bearing is lubricated for life and does not require maintenance.
b) If damage is found, replace the bearing.
Installation
1. Using a mandrel, install the clutch disc.
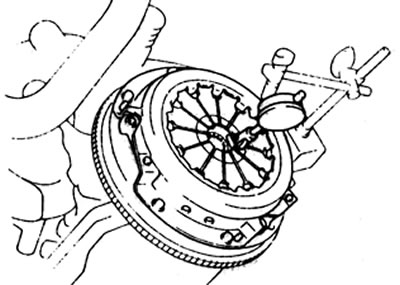
2. Installing the clutch cover.
A) Align the marks on the clutch cover and flywheel.
b) Tighten the mounting bolts crosswise.
Tightening torques:
- for gearbox H151F - 39 N.m
- for other gearboxes - 19 N.m
Note: Temporarily tighten #1 and #2 bolts.
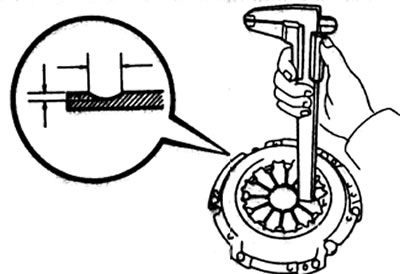
3. Checking the deformation of the tops of the diaphragm spring.
A) Using a special tool, measure the deflection of the tops of the diaphragm spring.
Maximum deviation from the plane - 0.5 mm
b) If the deviation exceeds the limit, then adjust using a special tool.
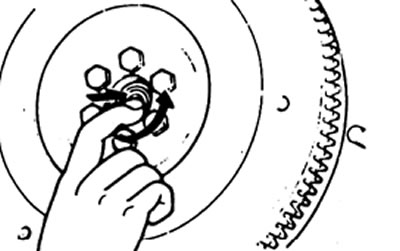
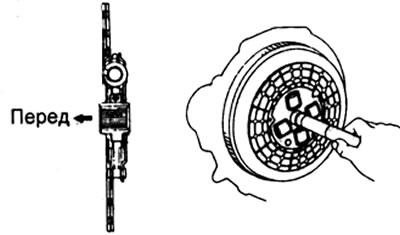
4. Apply lithium molybdenum disulphide grease (NLGI №2) on the parts shown in the picture.