
Removing the upper radiator shroud
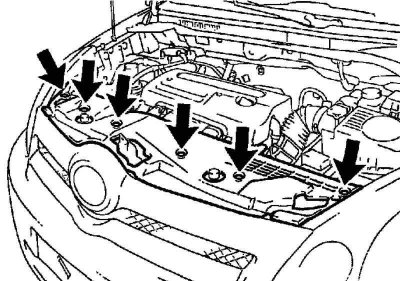
Pic. 7.27. Fastening of the top casing of a radiator
Remove 6 clips and remove the upper radiator shroud (pic. 7.27).
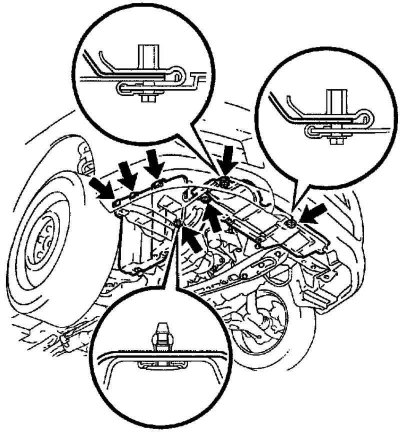
Removal of the bottom left guard of the engine in gathering
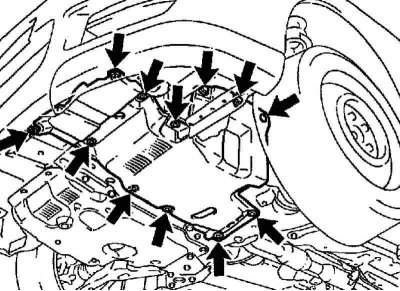
Pic. 7.28. Fastening of the bottom left guard of the engine assy
Remove 4 screws, remove 8 clips and remove engine bottom shield (pic. 7.28).
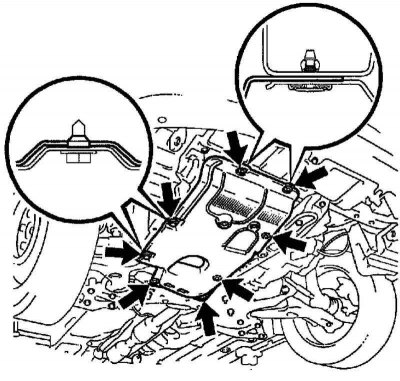
Removing the bottom shield of the engine No. 1
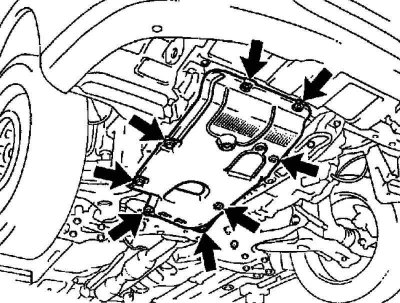
Pic. 7.29. Fastening of the bottom guard of the engine No. 1
Remove 2 screws, remove 6 clips and remove motor bottom shield #1 (pic. 7.29).
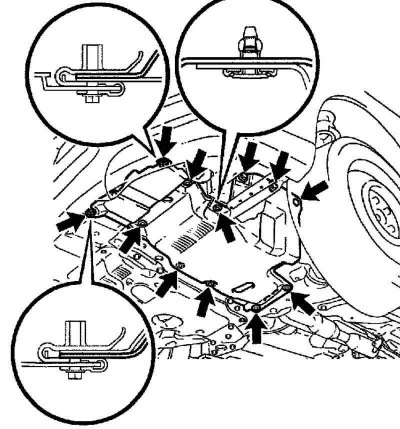
Removing the lower right engine shield
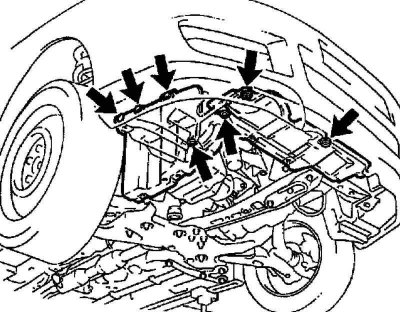
Pic. 7.30. Fastening of the lower right guard of the engine
Unscrew 4 screws, remove 3 clips and remove the engine bottom shield (pic. 7.30).
Removing the generator assembly
Disconnect the generator connector.
Remove the #2 terminal cap.
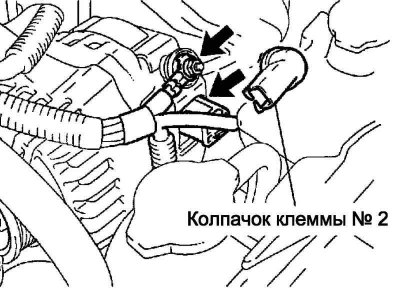
Pic. 7.31. Wire nut and starter connector
Loosen the nut and disconnect the generator wire (pic. 7.31).
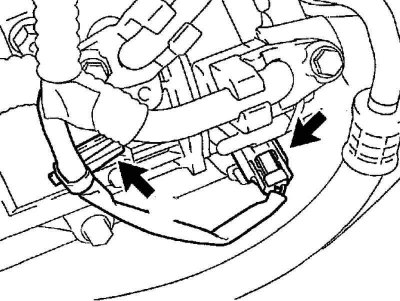
Pic. 7.32. Magnetic Clutch Connector and Harness Clamp
Disconnect the electromagnetic clutch connector (models with air conditioning) (pic. 7.32).
Remove the wire harness clamp (models with air conditioning).
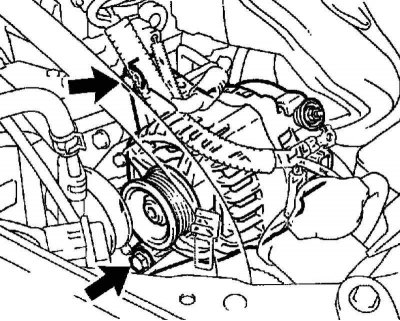
Pic. 7.33. Alternator mounting bolts
Remove 2 bolts and remove alternator (pic. 7.33).
Installing the generator assembly
Install and secure the alternator with 2 bolts.
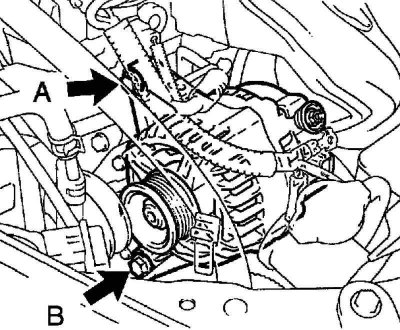
Pic. 7.34. Bolts A and B fastening the generator
Tightening torque: 25 Nm for bolt A, 54 Nm for bolt B (pic. 7.34).
Install the wire harness clamp (models with air conditioning).
Connect the magnetic clutch connector (models with air conditioning).
Connect and secure the generator wire with a nut.
Tightening torque: 9.8 Nm.
Install terminal cap #2.
Connect the generator connector.
Install the fan and alternator V-belt.
Installation of the lower right shield of the engine
Pic. 7.35. Scheme of installation of the lower right shield of the engine
Install and secure the motor bottom shield with 4 screws and 3 clips (pic. 7.35).
Installation of the bottom shield of the engine No. 1
Pic. 7.36. Installation diagram of the bottom shield of the engine No. 1
Install and secure #1 motor bottom shield with 2 screws and 6 clips (pic. 7.36).
Installing the lower left engine shield
Pic. 7.37. Scheme of installation of the lower left shield of the engine assembly
Install and secure the motor bottom shield with 4 screws and 8 clips (pic. 7.37).
Installing the Upper Radiator Shroud
Install and secure the upper radiator shroud with 6 clips.
Connect the negative terminal to the battery terminal.