
2. Install the washer on the rear bearing.
3. Lightly tapping with a plastic-headed hammer, install the rectifier housing. Secure the housing with four nuts.
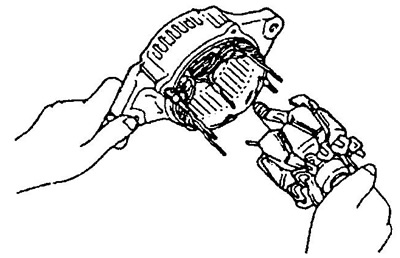
4. Install the rectifier unit, voltage regulator and brush holder.
A) Connect the rectifier block to the case.
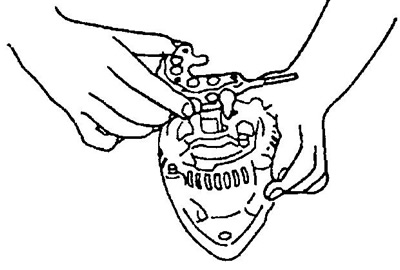
b) Install the washer and tighten the rectifier unit mounting bolt.
V) Tighten the screws that secure the wires to the rectifier unit.
G) Tighten the screws securing the rectifier unit and voltage regulator.

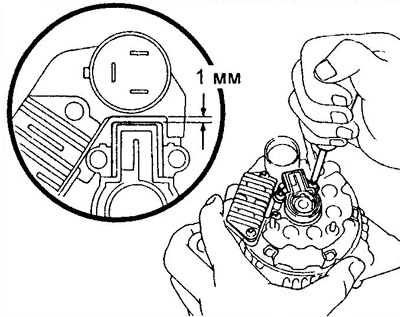
d) Install the brush holder and tighten the brush holder mounting bolts so that the gap between the brush holder and the voltage regulator is 1 mm.
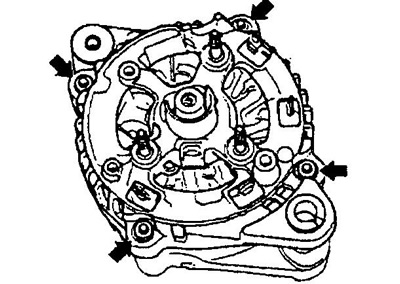
5. Install the back cover of the generator.
A) Install the rear cover on the generator.
b) Tighten three nuts.
V) Install an output isolator.
G) Close the nut.
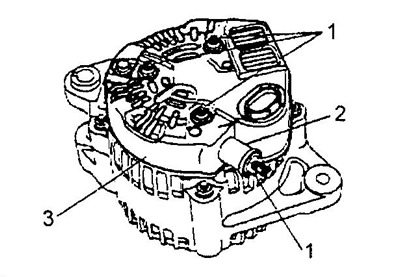
1 - nut,
2 - output insulator,
3 - back cover.
6. Install pulley.
A) Install the pulley on the toe of the rotor shaft and hand-tighten the pulley nut.
b) Holding a special tool (A) torque wrench, tighten the special tool (IN).
- Tightening torque - 39 Nm
V) Make sure the special tool (A) securely fixed together with the rotor.

G) Clamp special tool (WITH) in a vise and place the generator on it.
d) To tighten the pulley mounting nut, turn the special tool (A) in the direction shown in the figure.
- Tightening torque - 110 Nm
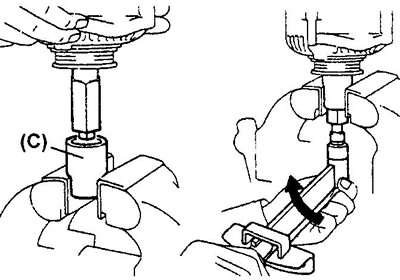
e) Remove generator from tool (WITH).
and) Unscrew the special tool (IN) and remove special equipment (A) And (IN).
7. Check that the rotor rotates smoothly without binding.