
Install the washer.
Install the rectifier housing with a plastic-headed hammer. Secure the housing with four nuts.
Tightening torque: 4.5–5.4 Nm.
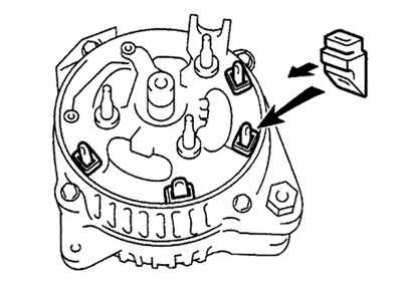
Pic. 7.29. Installation of insulators
Install the four rubber insulators of the rectifier housing (pic. 7.29).
Attention! Install the insulators carefully, being careful not to damage them.
Install the terminal and sealing plate.
Install the rectifier unit by fixing it with four screws.
Tightening torque: 2.9 Nm.
Install the voltage regulator with four screws.
Tightening torque: 2.0 Nm.
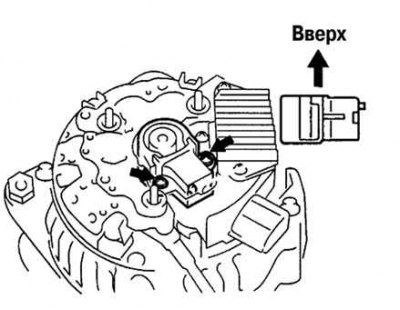
Pic. 7.30. Installing the brush holder
Install the brush holder by securing it with two screws (pic. 7.30).
Tightening torque: 2.0 Nm.
Install the brush holder cover.
Install the rear cover and rectifier plate.
Install the terminal insulator by securing it with the nut.
Tightening torque: 4.1 Nm.
Install the pulley on the toe of the rotor shaft and hand-tighten the pulley nut.
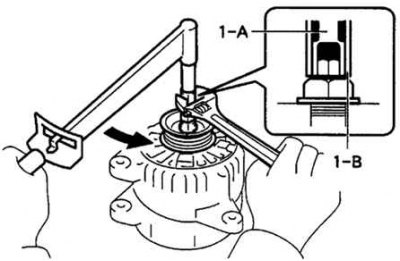
Pic. 7.31. Installation of the rotor shaft pulley
Holding a special tool «1-A» torque wrench, tighten the special tool «1-B» (pic. 7.31).
Tightening torque: 39 Nm.
Check that the special tool «1-A» was securely fixed to the rotor.
Clamp special tool «1-C» in a vise and place the generator on it.
To tighten the pulley mounting nut, turn the special tool (1-A) clockwise.
Tightening torque: 111 Nm.
Remove the alternator from the special tool «1-C».
Loosen the special tool «1-B» and remove the special tools «1-A» and «1-B».
Make sure the rotor rotates smoothly without binding.