



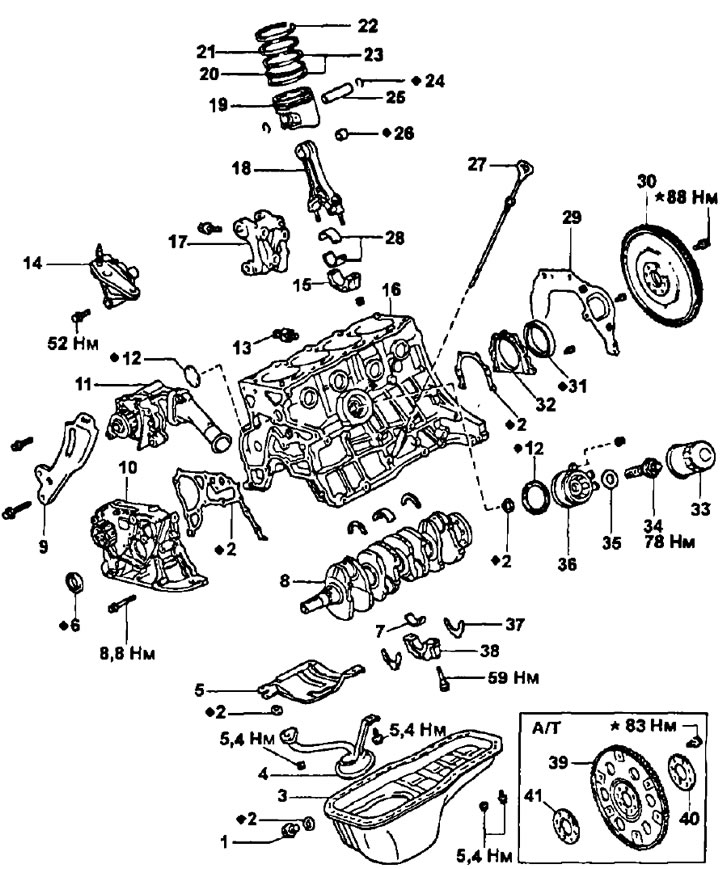
Cylinder block; parts for disassembly and assembly. 1 - drain plug; 2 - gasket; 3 - oil pan; 4 - oil receiver 5 - oil separator; 6 - front crankshaft oil seal; 7 - main bearing; 8 - crankshaft; 9 - generator drive belt adjusting bracket; 10 - oil pump; 11 - Coolant pump and coolant pump cover assembly; 12 - O-ring seal; 13 - knock sensor; 14 - right engine mount support; 15 - lower connecting rod cover; 16 - cylinder block; 17 - power steering pump bracket; 18 - connecting rod; 19 - piston; 20 - oil scraper ring expander; 21 - compression ring No.2; 22 - compression ring No.1; 23 - oil scraper ring scrapers; 24 - retaining ring; 25 - piston pin; 26 - connecting rod upper head bushing; 27 - oil dipstick; 28 - connecting rod bearing; 29 - back plate; 30 - flywheel (models with manual transmission); 31 - rear crankshaft oil seal; 32 - rear oil seal holder; 33 - oil filter; 34 - safety valve; 35 - plate washer; 36 - oil cooler; 37 - thrust half ring; 38 - main bearing cap; 39 - torque converter drive plate; 40 - back plate; 41 - spacer sleeve.
Operations before disassembly
1 Remove the flywheel (models with manual transmission) or torque converter drive plate (models with automatic transmission).
Note: Before removing the flywheel or torque converter drive plate, place marks to avoid disturbing the balance when installing them.
2. Remove the back plate by unscrewing the bolt.
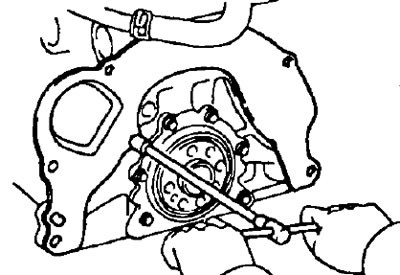
3. Place the engine on the disassembly stand.
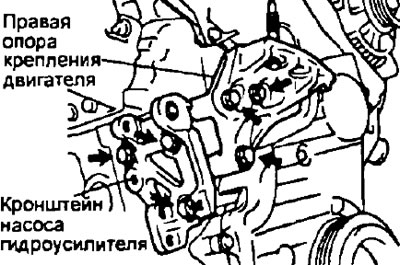
4. Unscrew the three bolts and remove the right engine mount support.
5. Unscrew the three bolts and remove the power steering pump bracket.
6. Remove the timing belt and pulleys.
7. Remove the cylinder head.
8. Remove the oil pan and oil pump.
- a) Remove the oil dipstick and unscrew the bolts and nuts.
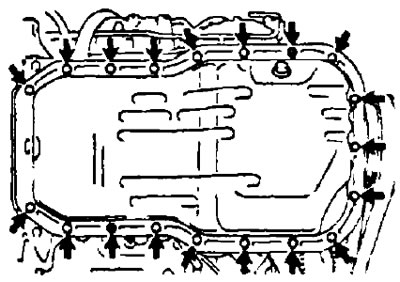
- b) Remove the oil pan by inserting a blade between the cylinder block and the oil pan, being careful not to damage the contact surfaces.
- c) Unscrew the two bolts and two nuts and remove the oil receiver, oil separator and gasket.
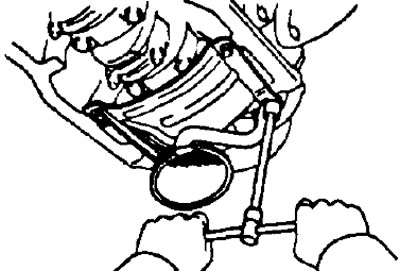
- d) Unscrew the bolts.
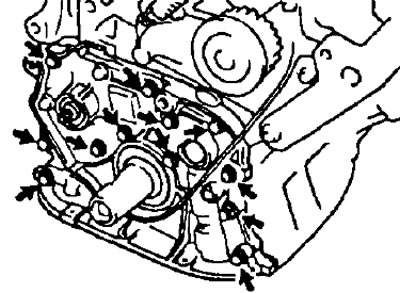
- d) Using a plastic-headed hammer, tap the oil pump housing to remove the oil pump.
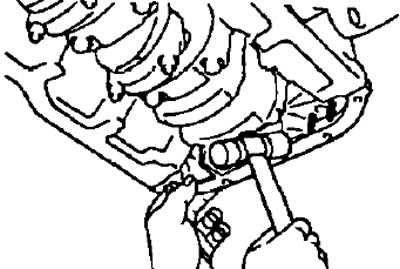
- e) Remove the gasket.
9. Remove the alternator drive belt adjusting bracket, coolant pump and coolant pump cover assembly.
- a) Loosen the bolt and remove the adjusting bracket.
- b) Loosen the three bolts in the sequence shown in the figure, remove the coolant pump assembly, coolant pump cover and O-ring.
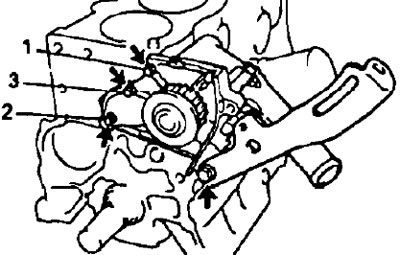
10. Remove the oil filter.
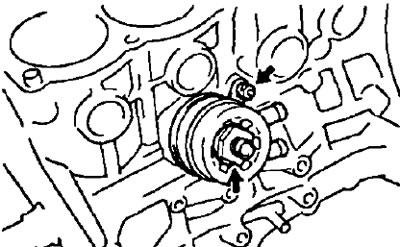
11. (Models with oil cooler) Remove the oil cooler.
- a) Remove the safety valve and plate washer.
- b) Unscrew the nut and remove the oil cooler.
- c) Remove the O-ring and gasket from the oil cooler.
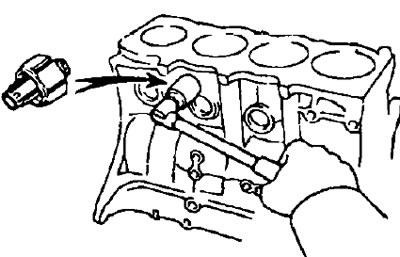
12. Remove the knock sensor.
Final assembly
1. Install the knock sensor.
- Tightening torque:
- 3S-FE, 4S-FE — 37 Nm
- 3S-GE — 44 Nm
2. (Models with oil cooler) Install the oil cooler.
- a) Clean the contact surface of the cylinder head and the cylinder block.
- b) Install a new O-ring and gasket onto the oil cooler.
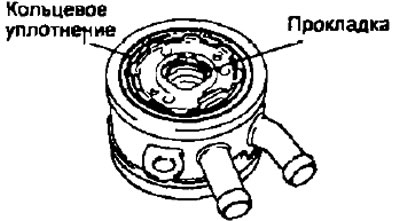
- c) Apply a thin coat of engine oil to the threads and under the relief valve head.
- d) Temporarily install the oil cooler by lightly tightening the nut.
- d) Install the plate washer and safety valve.
- Tightening torque - 78 Nm
- e) Tighten the nut (M3=8 Nm).
3. Install the oil filter.
4. Install the coolant pump, coolant pump cover assembly.
(3S-FE, 4S-FE)
- a) Install a new O-ring on the coolant pump cover.
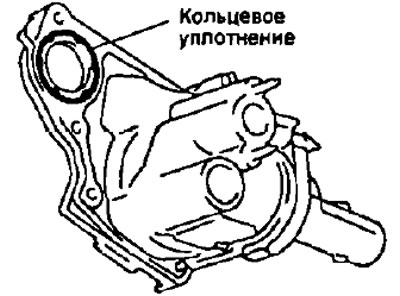
- b) Install the coolant pump by tightening the three bolts. Tighten the bolts in the sequence shown in the figure (M3=8 Nm).
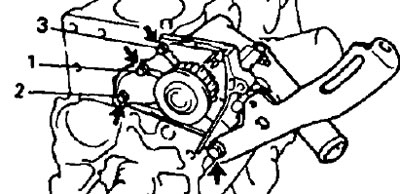
- c) Install the adjustment bracket by tightening the bolt (M3=27 Nm).
(3S-GE)
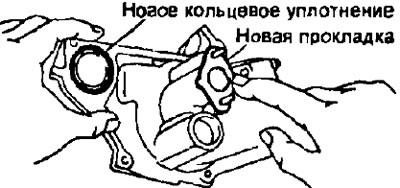
- a) Install a new O-ring and gasket onto the coolant pump cover.
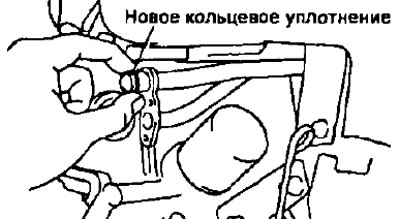
- b) Install a new O-ring onto the coolant bypass pipe and apply soapy water to the seal.
- c) Connect the bypass tube to the coolant pump cover.
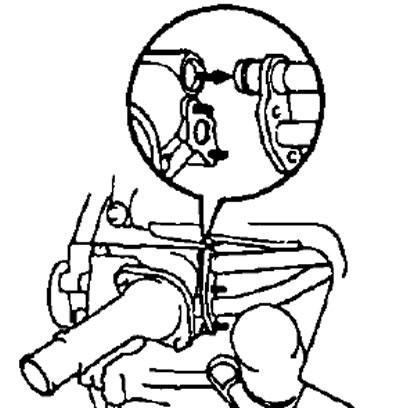
- d) Install the coolant pump by tightening the three bolts in the sequence shown in the figure (M3=9 Nm).
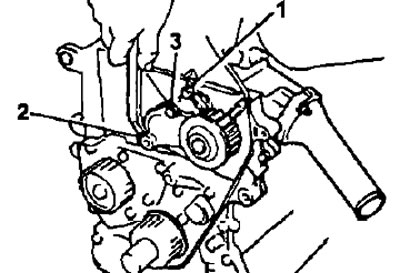
- d) Tighten the two bypass pipe mounting bolts (M3=9 Nm).
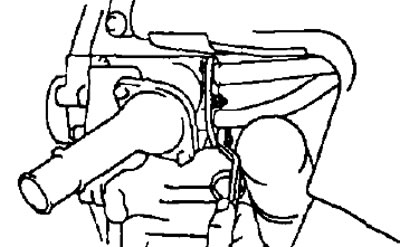
5. Install the oil pump and oil pan
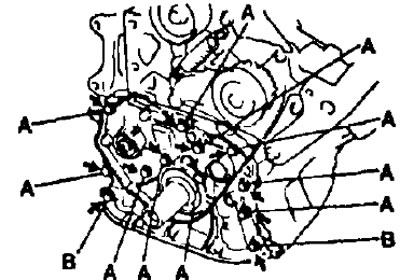
- a) Install a new gasket and oil pump. Tighten the bolts in several passes (M3=9 Nm).
Note: The length of the bolts varies:
- bolt "A" - 25 mm
- bolt "B" - 35 mm
- b) Install the new gasket, oil pan and oil separator by tightening the two nuts and two bolts.
- Tightening torque - 6 Nm
- c) Remove any remaining sealing material and prevent oil from coming into contact with the contact surfaces of the oil pan and cylinder block.
- Using solvent, clean the contact surfaces.
Note: Do not use solvent as it may damage painted surfaces.
- d) Apply sealant to the contact surface of the oil pan as shown in the figure.
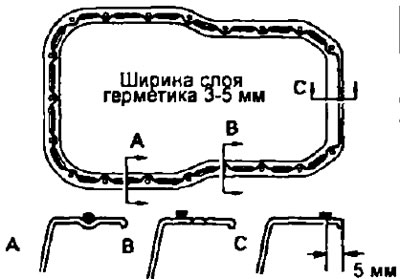
Note: Mating parts must be assembled within 5 minutes after application of the sealant. Otherwise the material must be removed and reapplied.
- e) Install the oil pan and tighten the two nuts and eight bolts.
- Tightening torque - 5.5 Nm
- g) Install the oil dipstick.
6. Install the cylinder head.
7. Install the timing belt and pulleys.
8. Install the right engine support by tightening three bolts (M3=52 Nm).
9. Install the power steering pump bracket by tightening the three bolts.
- Tightening torque - 43 Nm
10. Remove the engine from the stand.
11. Install the rear plate by tightening the bolt (M3=9 Nm).
12. (Models with manual transmission) Install the flywheel.
- a) Apply special fixing glue to 2 or 3 threads of the bolts.
- b) Install the flywheel on the crankshaft
- c) Install and tighten the 8 bolts evenly in several passes in the sequence shown in the figure (M3=88 Nm).
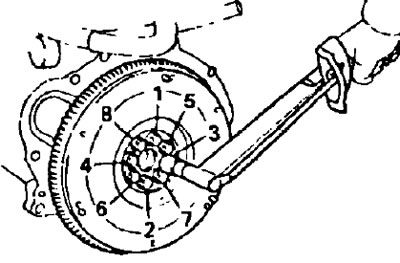
13. (Models with automatic transmission) Install the torque converter drive plate (M3=83 Nm)