
Attention! Wear gloves to avoid cutting your hands on the edges of the technological windows in the door frame!
Removing
1. On models equipped with power windows, disconnect the negative cable from the battery.
Attention! If the stereo system installed in the car is equipped with a security code, before disconnecting the battery, make sure that you have the correct combination to activate the audio system!
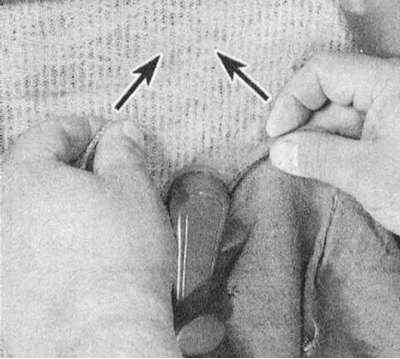
2. On models with manual power windows, remove the regulator handle (refer to accompanying illustration), to release the locking ring, slide the edge of a rag between the handle and the door panel (alternatively, you can use a suitable hook).
3. Remove a door armrest, if necessary having removed plastic plugs. If equipped, remove the door mirror control knob, remove the inner lining of the door mirror.
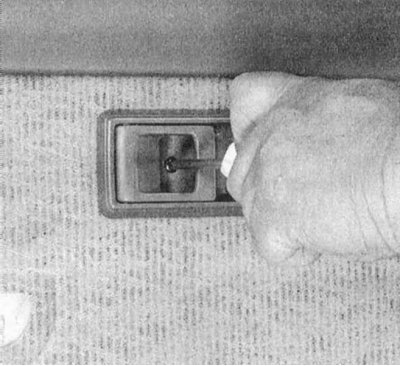
4a. Remove the screw. remove the inner handle assembly by sliding it forward (refer to accompanying illustration).
4b. Remove the inner handle assembly by sliding it forward (refer to accompanying illustration).
5. On models equipped with power windows/single lock actuators, gently pry the control switch panel out of the door armrest. Disconnect wiring from panel.
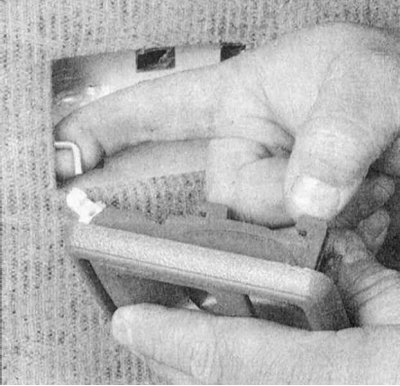
6. On most modifications of the models under consideration, one of the screws for fastening the door interior upholstery panel is located under the rear-view mirror support. Another screw is located either slightly below or in the rear upper corner of the panel (refer to accompanying illustration). Bolts are under plastic plugs.
7a. On some models, you will have to remove the decorative trim panel of the door mirror support (see Section Removal and installation of external rear-view mirrors). To separate the panel of the inner upholstery of the door, release the clamps located along its perimeter (refer to the illustration in paragraph 6), by prying the edges of the panel.

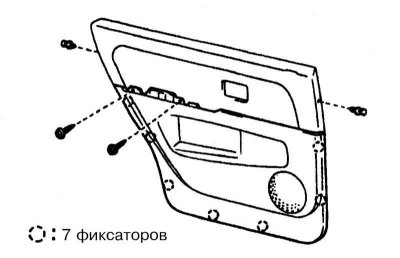
7b. The rear door upholstery panels are secured using two side clips, two screws and seven more clips along the outer edge of the panel (refer to accompanying illustration).
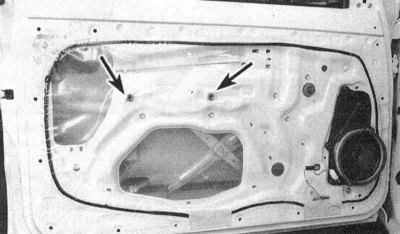
8. Carefully peel off the polyethylene moisture barrier by releasing the two grommets (refer to accompanying illustration).
Installation
1. Check that the moisture shield is installed correctly. If necessary, restore the integrity of the torn screen with adhesive tape. If necessary, use silicone sealant to seal the edges of the screen. Reinstall the bushings, clips and other fasteners that fell out during the dismantling of the upholstery.
2. Get the panel of an internal upholstery of a door on the regular place and accurately latch all provided clamps. Where required, screw in the fixing screws.
3. Further installation is carried out in the reverse order.