
Attention! See the warnings at the beginning of the Section Depressurizing the supply system.
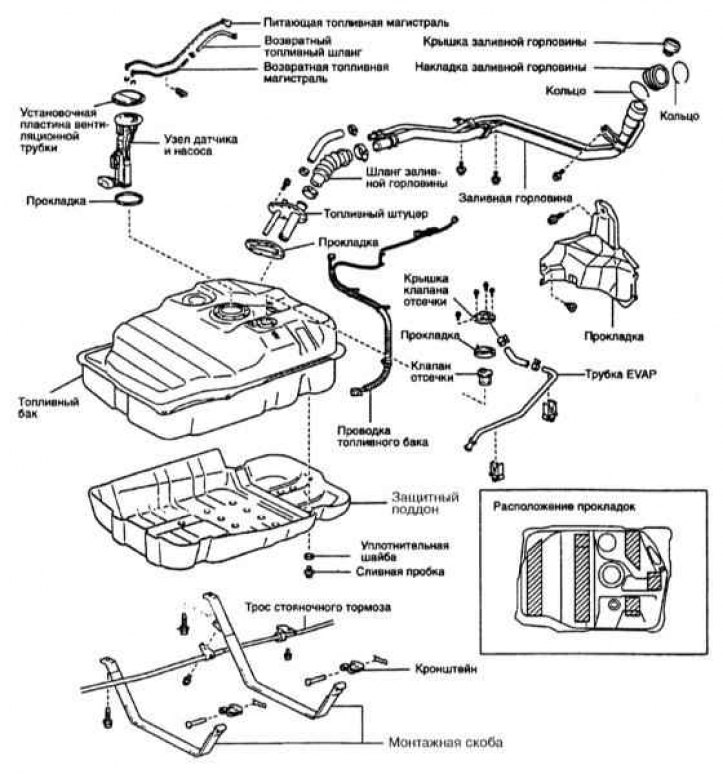
Fuel tank installation details
1. To relieve excess pressure in the tank, remove the filler cap.
2. Disconnect the negative cable from the battery.
Attention! If the stereo system installed in the car is equipped with a security code, before disconnecting the battery, make sure that you have the correct combination to activate the audio system!
3. Jack up the car and put it on stands.
4. Unscrew the drain plug and drain the fuel into a prepared container of a suitable volume (refer to illustration above).
5. Disconnect the fuel pump/fuel flow sensor wiring and remove them.
6. Remove the protective pallet of a fuel tank.
7. Disconnect the fuel lines and the fuel vapor return line.
Note. Each of the mentioned lines has a unique diameter, which guarantees the uniqueness of their connection during assembly. If in doubt, label the detachable components. Seal the open ends of the tubes immediately.
8. Turn out fixing screws and disconnect a jellied mouth and a ventilating tube of a fuel tank.
9. Support the tank with a trolley jack, laying a wooden block between the head of the latter and the bottom of the tank to distribute the load.
10. Release the fasteners and lower the tank mounting brackets, then slowly lower the tank down.
11. Installation is carried out in the reverse order. Make sure that the tubes and hoses are not pinched.