
Attention! See the warnings at the beginning of the Section Depressurizing the supply system.
Components to be removed to gain access to the fuel pump

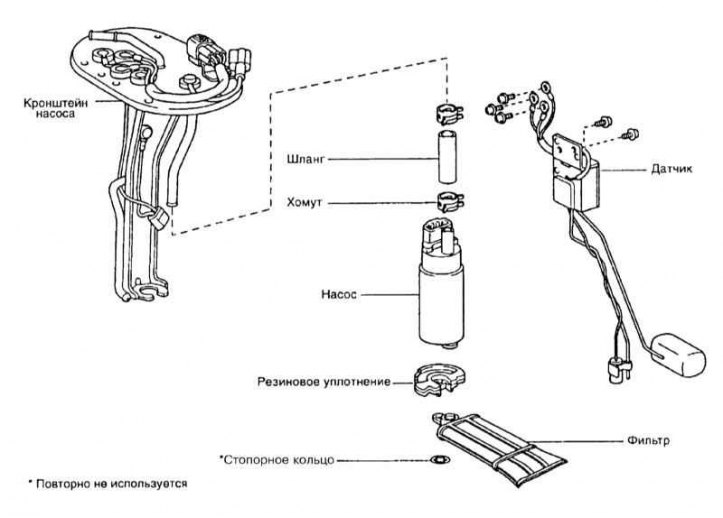
Installation Details of Fuel Pump/Fuel Flow Sensor Assembly
Removing
1. Relieve the pressure in the supply system (see Section Depressurizing the supply system).
2. Disconnect the negative cable from the battery.
Attention! If the stereo system installed in the car is equipped with a security code, before disconnecting the battery, make sure that you have the correct combination to activate the audio system!
3. For access to the pump in the cabin, under the rear mat, there is a removable cover (refer to illustration above).
4. Remove the rear seats by unscrewing their mounting bolts, having previously removed the covers from them.
5. Remove the sill trim, side trim and step trim. Then remove the carpets.
6. Remove the access hatch cover.
7. Disconnect the fuel lines from the pump bracket, having previously removed dirt from them (refer to accompanying illustration).
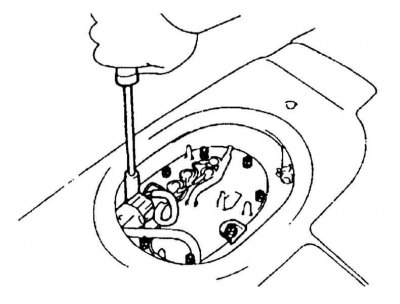
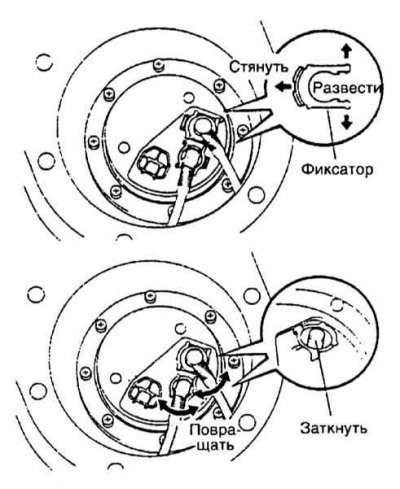
8. Loosen the eight screws and carefully remove the pump assembly with the fuel flow sensor from the gas tank (refer to accompanying illustration). The gasket can be discarded - a new one is required for installation.
Note. Be careful not to bend the sensor float leg.
9. Release the bottom section of the pump assembly from the support bracket (refer to illustration Installation Details of Fuel Pump/Fuel Flow Sensor Assembly). Disconnect the wiring from the fuel pump/fuel flow sensor assembly and remove the fuel hose.
10. Remove the rubber seal and retaining ring from the fuel intake strainer.
11. Remove the mesh filter and assess the degree of contamination, if necessary, replace.
Installation
Installation is in the reverse order. Do not forget to replace the sealing gasket of the mounting flange, if equipped, replace both sealing washers of the hollow bolt of the in-line connector. Tighten fasteners to the required torque.