
Check and adjustment
Check and adjust the valve clearances on the 1FZ-FE engine every 96,000 km, or every 4 years.
Attention! The valves on this engine are regulated by the selection of washers in thickness, so you will need a special tool to push the pushers.
To adjust the valves of the 6th cylinder, you will need to remove the camshafts. Therefore, first check the clearances in these valves with special care.
1. Disconnect the battery from the ground.
2. Turn out the candles (see subsection 2.28), remove the cylinder head cover and set the piston of the 1st cylinder to TDC on the compression stroke.
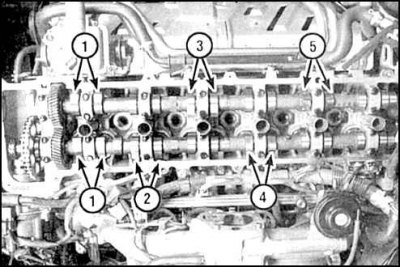
3. Measure the clearance between the camshaft cam and the tappet in the indicated valves, recording each result.
4. When checking the gaps, a feeler gauge of this thickness should pass with little effort.
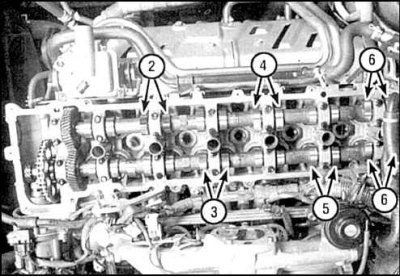
5. Turn the crankshaft 1 revolution relative to the TDC of the compression stroke in the 1st cylinder and measure the clearances in the valves indicated in the illustration.
6. After measuring the clearances, turn the crankshaft so that the camshaft cam of the first adjustable valve is facing up.
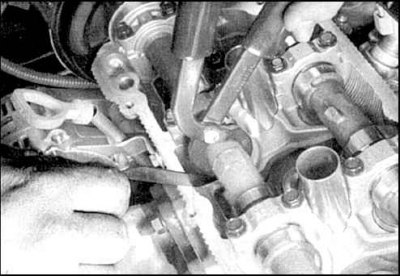
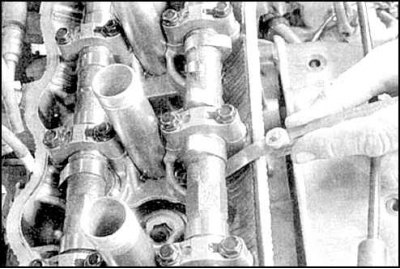
7. Squeeze out the pusher and remove the adjusting washer. To do this, install the fixture so that the long jaw of the fixture pincers captures the lower tide under the pusher, and the short one rests against the upper edge of the pusher itself. Squeeze the pliers, push the small stop of the device (or attach the hook to the handles of the tongs), fixing the pusher.
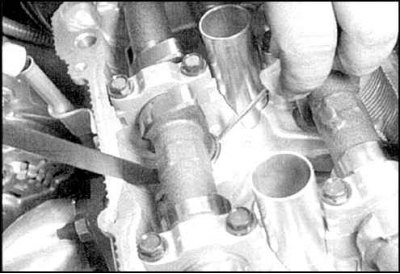 | 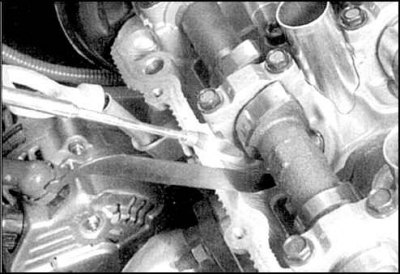 |
8. Remove ticks. While holding the pusher, remove the adjusting washer with a screwdriver (photo on the left) or magnetic tweezers (photo on the right).
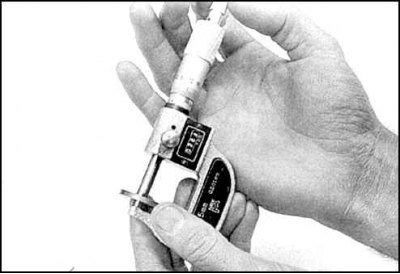
9. Measure the thickness of the removed shim with a micrometer.
10. Determine the thickness of the spacer at which the clearance in the valve will correspond to the standard:
N=T+ (A-V),
T is the thickness of the removed adjusting washer,
A is the measured gap,
N is the thickness of the new shim,
V - required clearance (see subsection 2.2).
11. Adjusting washers of 17 size groups are supplied as spare parts by the manufacturer. Select the washer so that the thickness of the shim to be installed is as close as possible to the calculated one. You can also rearrange a washer of a suitable thickness, removed from the pusher of another valve, the gap in which requires adjustment. This reduces the number of washers purchased.
12. Wring out the pusher (see higher) and install a new shim.
13. Repeat the procedure for the remaining washers to be replaced. Install all removed parts in reverse order.
Table of size groups of shims
| 1 | 2.500 |
| 2 | 2.550 |
| 3 | 2.600 |
| 4 | 2.650 |
| 5 | 2.700 |
| 6 | 2.750 |
| 7 | 2.800 |
| 8 | 2.850 |
| 9 | 2.900 |
| 10 | 2.950 |
| 11 | 3.000 |
| 12 | 3.050 |
| 13 | 3.100 |
| 14 | 3.150 |
| 15 | 3.200 |
| 16 | 3.250 |
| 17 | 3.300 |