



Contents: Check on the car ↓ Removal the turbocharger ↓ Checking the turbocharger ↓ Installing a turbocharger ↓
Check on the car
1. Checking the intake system.
Check the condition of the air filter and air duct. Replace if necessary. Eliminate any leaks in the connections.
2. Check the condition of the exhaust system for the absence of:
- deformation of parts;
- foreign objects in the channels;
- cracks.
3. Checking the boost pressure.
a) Warm up the engine.
b) Install a pressure gauge in the gap of the fuel injection pump boost corrector hose.
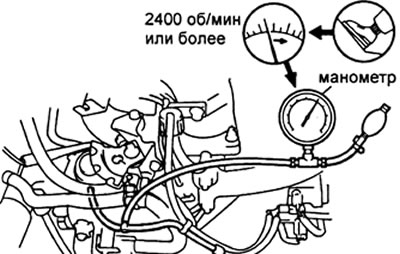
L-series engines
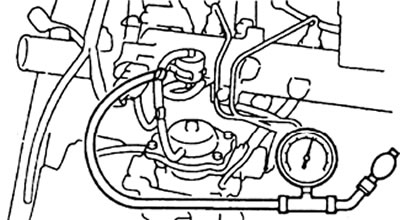
Engine 1KZ-T
c) (2L-T) Disengage the clutch and press the accelerator pedal sharply. Measure the boost pressure at 2400 rpm (or higher).
Pressure - 0.61-0.81 bar
d) (1KZ-T) Press the clutch pedal and bring the engine to 4600 rpm. Measure the boost pressure.
Pressure - 0.51 - 0.67 bar
If the pressure is less than the specified value, check the tightness of the intake and exhaust systems. If there are no leaks, replace the turbocharger.
If the pressure is higher than the specified value, check the condition of the vacuum hose of the bypass valve drive.
If the hose is normal, replace the turbocharger.
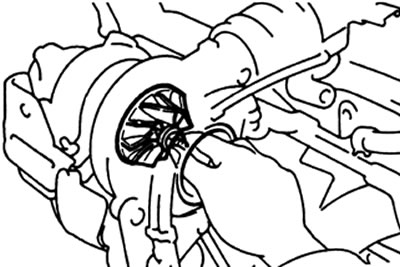
4. Checking the rotation of the compressor wheel.
a) Disconnect the air cleaner hose.
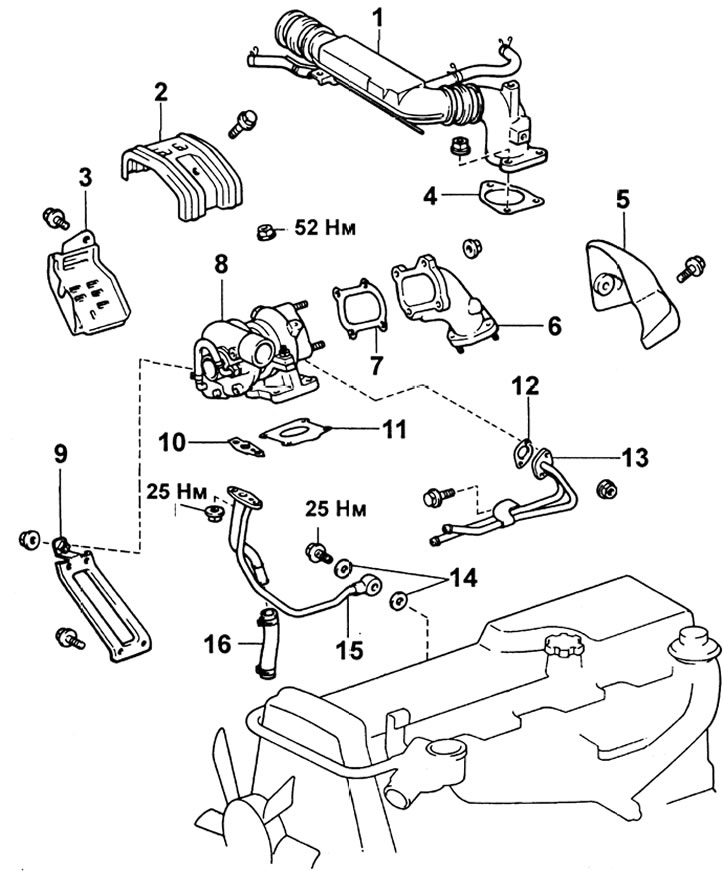
Parts for removal and installation (2L-T): 1 - air intake duct, 2 - heat shield #1, 3 - heat shield #2, 4 - gasket, 5 - heat shield #3, 6 - outlet pipe, 7,10,11,12,14 - gasket, 8 - turbocharger, 9 - exhaust manifold support, 13 - turbocharger cooling system pipes, 15 - oil supply pipe, 16 - oil drain hose.
b) Turn the wheel by the mounting nut. If the wheel does not turn or turns with difficulty, replace the turbocharger.
Removal the turbocharger
1. Drain the coolant from the engine.
L-series engines
2. Remove the air intake duct.
a) Disconnect the vacuum hoses from the boost corrector.
b) Loosen the bolts of the air duct mounting clamps.
c) Unscrew the three nuts, the inlet pipe and the gasket.
3. Disconnect the water hoses.
4. Remove the heat shields (four bolts and three nuts).
5. Remove the exhaust manifold bracket.
6. Turbocharger lubrication system.
a) Remove the hollow banjo bolt of the oil supply pipe from the cylinder block and remove the two sealing washers.
b) Disconnect the oil drain hose.
c) Unscrew the two nuts and remove the oil supply pipe and gasket from the turbocharger.
7. Remove the turbocharger from the exhaust manifold by unscrewing the four nuts.
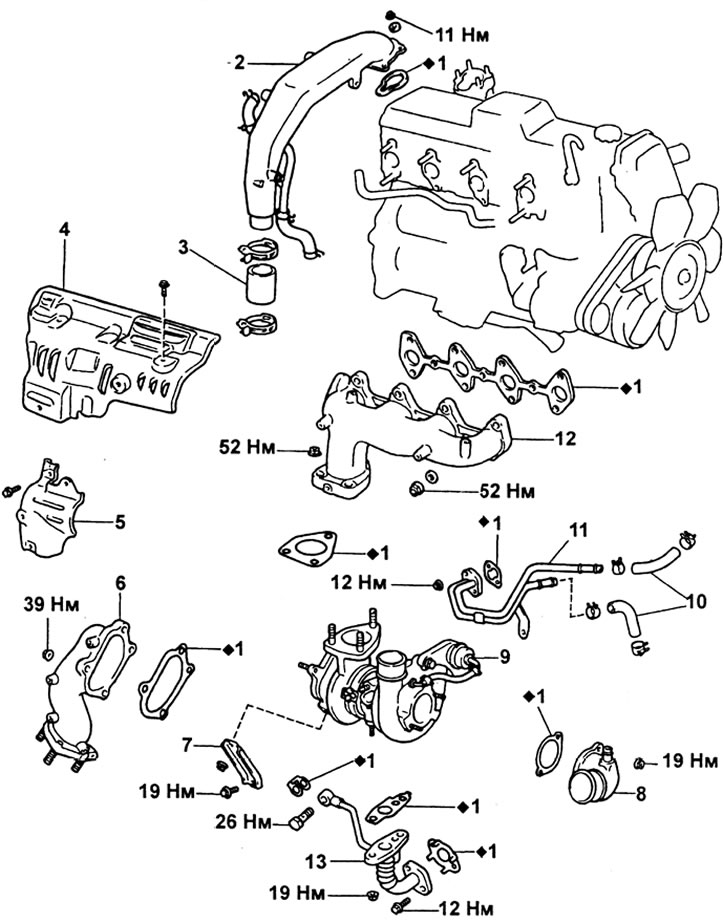
Parts for removal and installation (1KZ-T):1 - gasket, 2 - air intake duct, 3 - hose, 4 - exhaust manifold heat shield, 5 - turbocharger heat shield, 6 - outlet pipe (turbine), 7 - stand, 8 - inlet pipe (compressors), 9 - turbocharger, 10 - turbocharger cooling hoses, 11 - turbocharger cooling tubes, 12 - exhaust manifold, 13 - turbocharger oil drain tube.
8. Remove the water pipe from the turbocharger.
9. Remove the exhaust pipe (four nuts) and gasket.
Engine 1KZ-T
2. Remove the air intake duct.
a) Disconnect the vacuum hoses from the boost corrector and vacuum switch.
b) Disconnect the wire fastening clamps.
c) Unscrew the four nuts and remove the sealing washers.
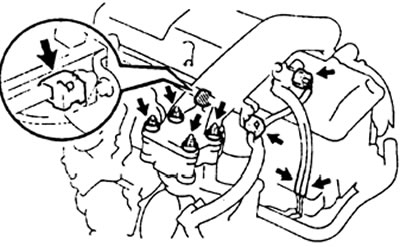
d) Disconnect the two crankcase ventilation hoses.
d) Using pliers, bring the ends of the clamp together until the clamp latch disengages.
e) Remove the air duct and gasket.
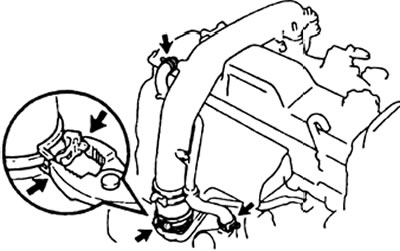
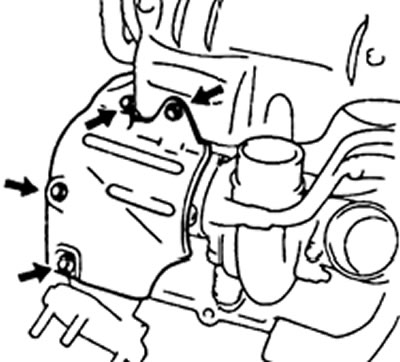
3. Unscrew the four nuts and remove the turbocharger heat shield.
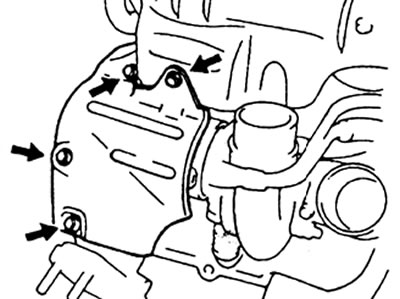
4. Unscrew the four nuts and remove the exhaust manifold heat shield.
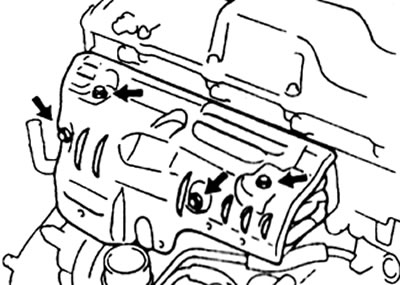
5. Disconnect the water hoses.

6. Unscrew the four nuts and remove the turbine outlet pipe and gasket.
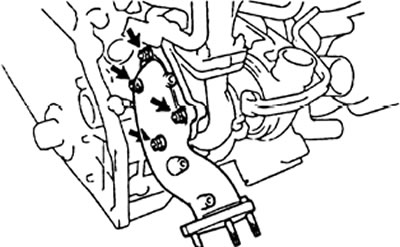
7. Remove the turbocharger mount.
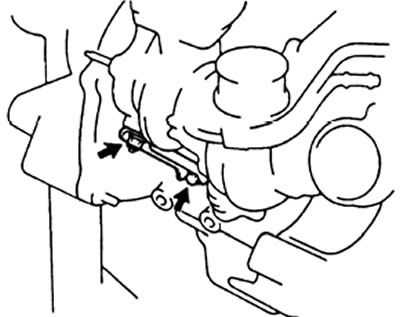
8. Removing the turbocharger and exhaust manifold.
a) Unscrew the hollow union bolt of the oil supply pipe from the cylinder block and remove the two sealing washers.
b) Unscrew the two bolts and disconnect the oil drain pipe.
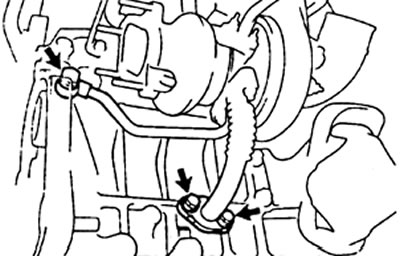
c) Remove six nuts and two bolts, turbocharger, exhaust manifold and three gaskets.
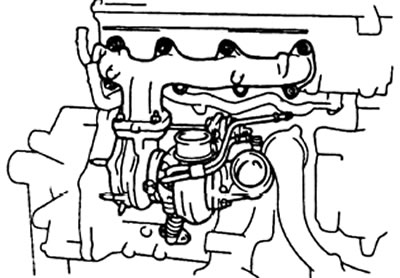
9. Unscrew the two nuts and remove the oil drain/supply pipe.
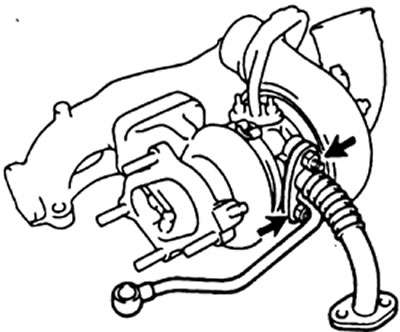
10. Unscrew the three nuts and remove the turbocharger from the exhaust manifold.
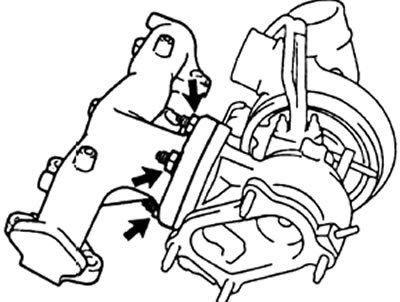
11. Unscrew the two nuts and bolt, remove the cooling pipes from the turbocharger.
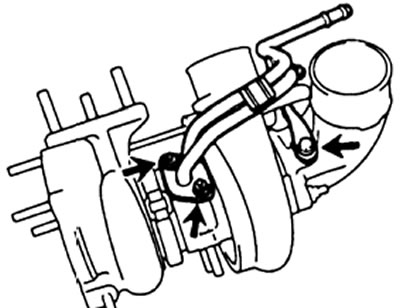
12. Unscrew the two nuts and remove the compressor inlet pipe from the turbocharger.
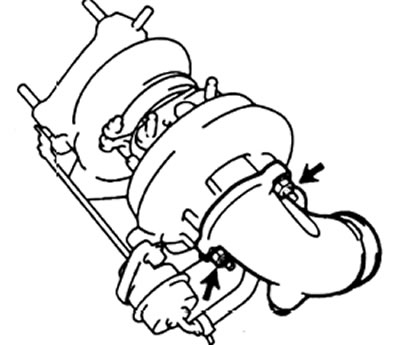
Checking the turbocharger
1. Check the wheel rotation. Make sure the wheel rotates smoothly. If the wheel does not rotate or rotates with resistance, replace the turbocharger.
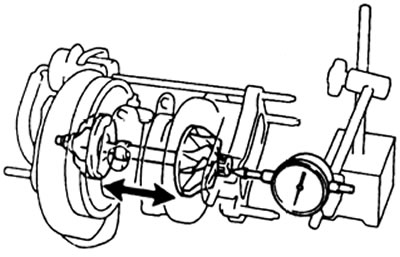
2. Check the axial clearance of the compressor shaft.
Install the indicator on the compressor side, move the turbine wheel by hand, measure the axial clearance.
Axial clearance:
- 2L-T — no more than 0.13 mm
- 1KZ-T — no more than 0.173 mm
If the axial clearance is outside the permissible limits, replace the turbocharger.
3. Check the radial clearance of the compressor shaft.
a) Install the indicator on the compressor shaft through the turbocharger oil drain hole.
b) Move the shaft in the radial direction and measure the radial clearance.
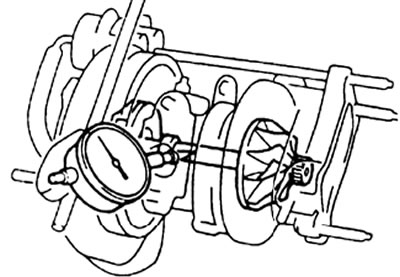
Radial clearance:
- 2L-T — no more than 0.18 mm
- 1KZ-T — no more than 0.11 mm
If the radial clearance is outside the permissible limits, replace the turbocharger.
4. Checking the operation of the bypass valve drive.
a) Disconnect the actuator diaphragm hose.
b) Create pressure above the diaphragm. The actuator rod should move. If not, replace the turbocharger.
Pressure:
- 1KZ-T — 1.18 bar
- 2L-T — 0.8 bar
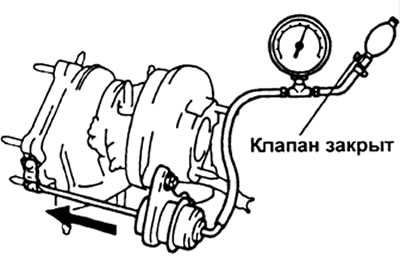
Caution: Never apply pressure to the diaphragm greater than the maximum.
Maximum pressure:
- 1KZ-T — 1.27 bar
- 2L-T — 0.95 bar
Installing a turbocharger
Note: After installing the turbocharger, pour 20 - 30 cm³ of fresh oil into the bearing housing and turn the compressor shaft by hand.
Engine - 2L-T
1. Install a new gasket and secure the outlet pipe with four nuts.
Tightening torque - 25 Nm
2. Install the new gasket and water pipe using the two bolts and nuts.
Tightening torque 8 Nm
3. Installing the turbocharger on the exhaust manifold.
a) Place a new gasket on the manifold.
b) Secure the turbocharger with four nuts.
Tightening torque 52 Nm
4. Install the oil pipe.
a) Install a new gasket and secure the oil supply pipe with two nuts.
Tightening torque 19 Nm
b) Connect the oil drain hose.
c) Replace the sealing washers and tighten the union bolt securing the oil supply pipe to the block.
Tightening torque 25 Nm
5. Install the exhaust pipe bracket.
Tightening torque of fasteners 19 Nm
6. Install the heat shield.
Tightening torque 12 Nm
7. Connect the water supply pipe.
8. Install the air intake duct.
a) Install a new gasket and secure the air duct with three nuts.
Tightening torque 12 Nm
b) Connect the boost corrector vacuum hoses.
9. Fill the cooling system
10. Start the engine and check for leaks.
11. Check the oil level.
Engine 1KZ-T
1. Install a new gasket and secure the outlet pipe with two nuts.
Tightening torque 19 Nm
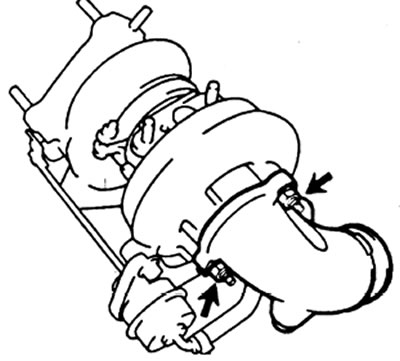
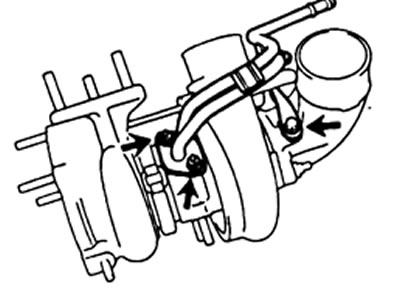
2. Install a new gasket and coolant pipe. Tighten the bolts and nuts.
Tightening torque:
- Bolts - 12 Nm
- Nuts - 8 Nm
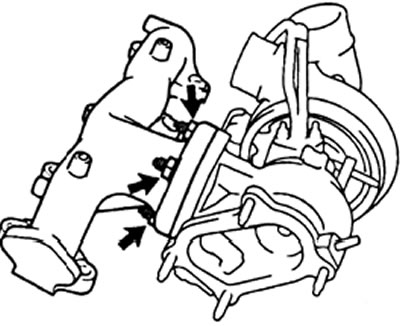
3. Installing the turbocharger on the exhaust manifold.
a) Place a new gasket on the manifold.
b) Secure the turbocharger with three nuts.
Tightening torque 52 Nm
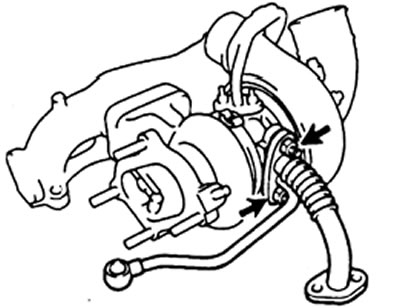
4. Install the oil supply/drain pipe.
a) Install a new gasket and secure the oil supply pipe with two nuts.
Tightening torque 19 Nm
b) Connect the oil drain hose.
5. Installing the manifold and turbocharger on the engine.
a) Replace the oil supply sealing washers and oil drain pipe gasket.
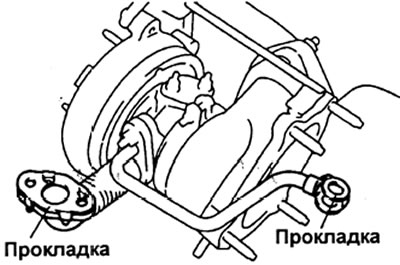
b) Install a new manifold gasket.
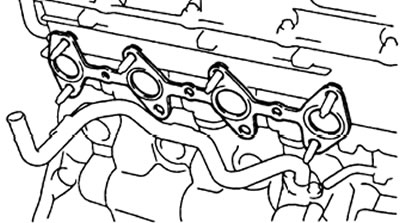
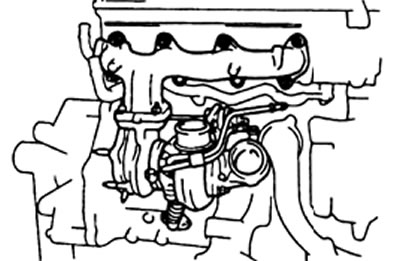
c) Install the manifold with the turbocharger by tightening the 6 nuts and two manifold mounting bolts.
Tightening torque - 52 Nm
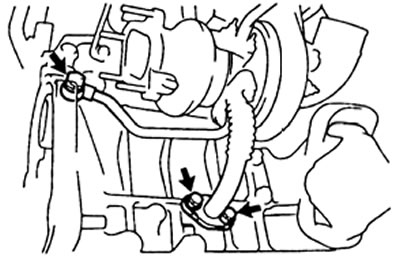
d) Tighten the hollow bolt and two tube flange nuts.
Tightening torque:
- Bolt - 26 Nm
- Nuts - 12 Nm
6. Install the TCR rack, tighten the fasteners
Tightening torque: 19 Nm
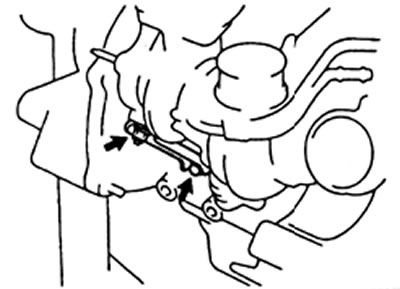
7. Install the new gasket and the turbo outlet pipe. Tighten the 4 mounting nuts.
Tightening torque - 39 Nm
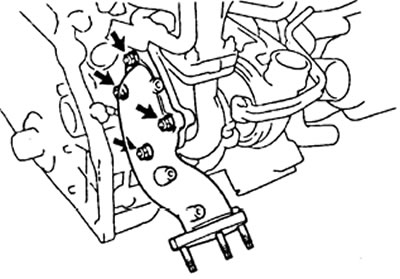
8. Connect the water supply hoses.
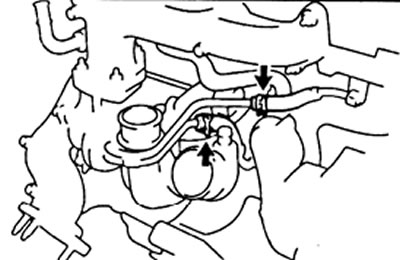
9. Install the exhaust manifold heat shield.
Tightening torque - 8 Nm
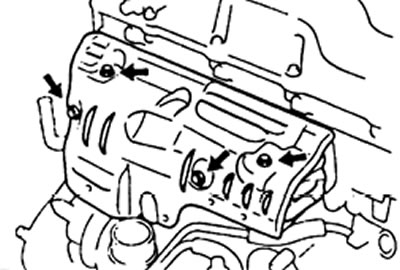
10. Install the TCR heat shield.
Tightening torque - 8 Nm
11. Installation of the intake air duct.
a) Install a new gasket on the intake manifold.
b) Install the air hose.
c) Squeeze the ends of the hose clamp and engage the clamp latch.
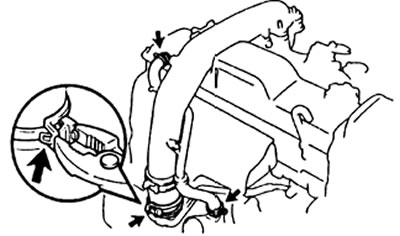
d) Connect the two crankcase ventilation hoses
d) Install 4 sealing washers. Tighten the mounting nuts.
Tightening torque - 11 Nm
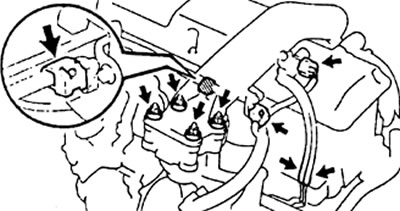
e) Secure the wires with two clamps.
g) Connect the vacuum cut-off valve connector and the two vacuum hoses.
12. Fill the cooling system
13. Start the engine and check for leaks.
14. Check the oil level.