



Removal and checking the steering rod (DYNA 100)
1. Remove the front wheel.
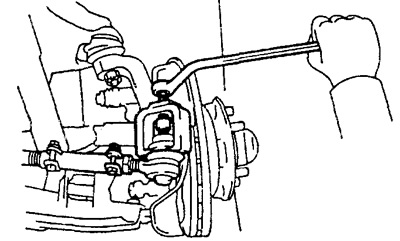
2. Remove the steering rod assembly.
a) Remove the cotter pin and unscrew the fastening nut.
b) Disconnect the steering rod from the steering knuckle arm and the center steering rod.
3. Check the ball joint.
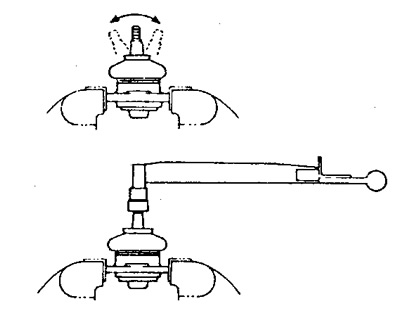
a) Clamp the hinge in a vice.
b) As shown in the figure, click the ball joint pin back and forth five times until the nut is installed.
c) Using a torque wrench, continuously rotate the ball stud by the nut one revolution in 2-4 seconds, then measure the torque value at the fifth revolution.
- Torque - 2.0 Nm
5. Check the steering rod for wear and damage.
6. Replace the tie rod end if necessary.
a) Loosen the steering rod clamp.
b) Disconnect the steering rod end.
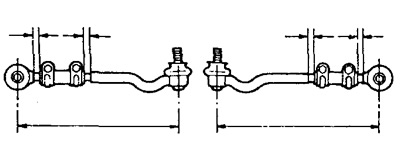
c) Screw in the new end. The length of the steering rod should be about 295.2 mm.
d) Rotate the tips 90°.
Installing the steering rod (DYNA 100)
The original can be found on this resource (ToyotaMan.ru)
1. Install the tie rod to the center tie rod and steering knuckle arm, then tighten the nuts and install a new cotter pin.
2. Install the front wheel.
3. Adjust the toe-in.
4. Tighten the steering rod clamp.
- Tightening torque - 15 Nm
5. Check the steering wheel center position.