
Installation of the FJ60 electrical equipment relay

1. Ignition system relay; 2. Relay for switching on lighting devices; 3. Relay for turning on the rear lights; 4. Heater fan relay; 5. Wiper relay; 6. Engine cooling fan relay; 7. Breaker turns; 8. Processor system for reducing the toxicity of exhaust gases; 9. Preheating timer; 11. Socket for portable lamp; 12. Belt processor; 13. Relay of a control lamp of a charge of the battery; 14. Signal lamp resistor
Installation of the relay of electrical equipment of cars FJ62
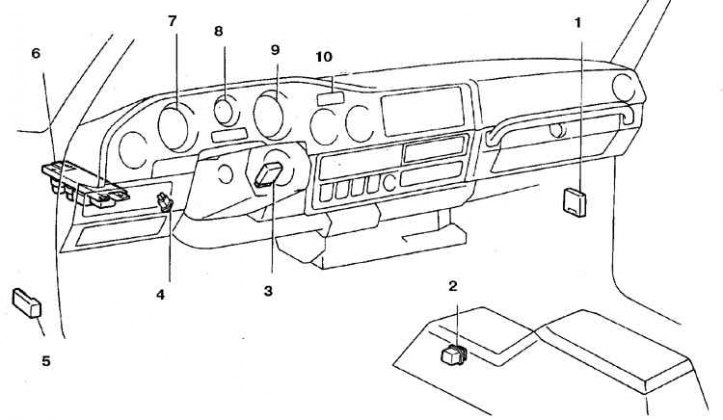
1. Relay for seat belts; 2. Rear heater relay; 3. Windshield wiper relay; 4. Breaker; 5. Headlight cleaner relay; 6. Relay block; 7. Instrument cluster; 8. Tachometer; 9. Speedometer; 10. Clock
Installation of the relay of electrical equipment of cars FJ80
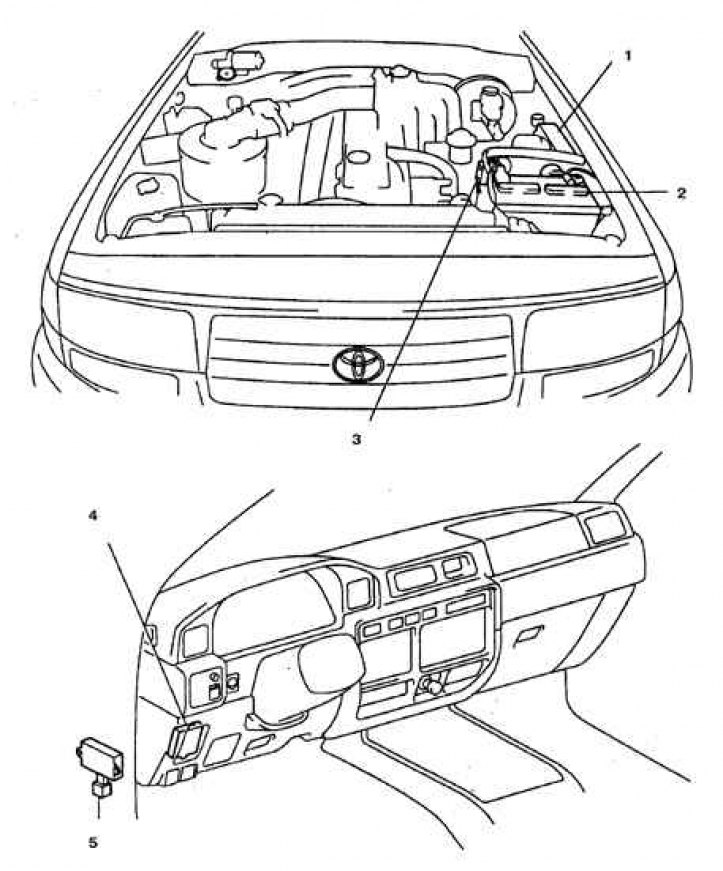
1. Relay box 2; 2. Battery; 3. Fusible link (main, AM1 and AM2); 4. Fuse block; 5. Relay box 1
Examination
1. The most reliable results are obtained by testing using a relay switching circuit. If there is no wiring diagram, check with the following information.
2. A pair of terminals of any relay is connected to a coil that provides the operation of the relay. The remaining outputs in pairs close or open when the coil is energized.
3. As a rule, the pin assignment is indicated on the relay housing.
4. Connect one of the terminals of the relay coil to the positive terminal of the battery through a wire with thin wire as a fuse. Connect the second output to ground. Once connected, you should hear a click. If there is no click, then reverse the connection polarity (connection polarity matters on some relays).
5. Check the presence of a circuit between the relay outputs in accordance with the markings on the case.
6. If the test results are negative, replace the relay.