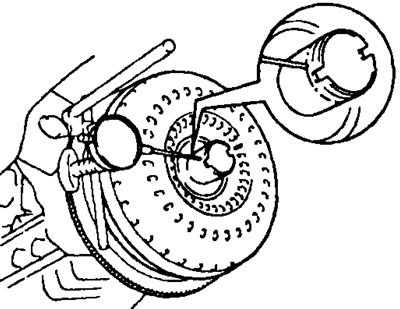
2. Checking the freewheel.
- A) Install the special tool in the inner race of the freewheel.
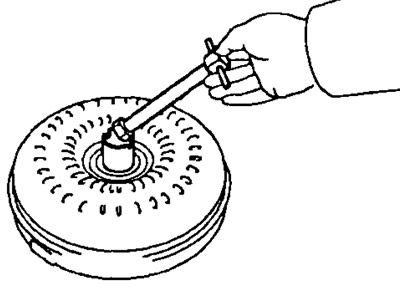
- b) Install the special tool so that the marks on the torque converter hub and the freewheel outer race are aligned.
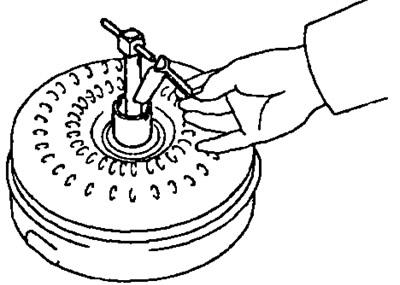
- V) With the torque converter stationary, the clutch must not rotate counterclockwise, but rotate freely and smoothly clockwise.
- G) If necessary, flush the torque converter and recheck the freewheel. If the clutch is defective, replace the torque converter.
3. Checking the ring gear and runout of the torque converter drive plate.
- A) Install a dial indicator and measure the runout of the torque converter drive plate.
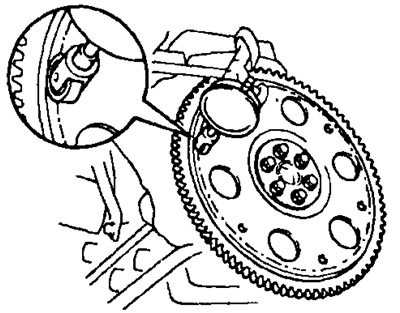
- b) If the torque converter drive plate runout exceeds 0.20 mm, if the ring gear is damaged, replace the torque converter drive plate. When installing a new plate, pay attention to the orientation of the spacers. Tighten the bolts. Bolt tightening torques:
- models up to 1996 and 4WD: 83 Nm
- models since 1996: 64 Nm
3. Checking the runout of the torque converter bushing.
- A) Temporarily install the torque converter on the torque converter drive plate. Install a dial indicator and measure the runout.
- b) If the runout exceeds 0.30 mm, then try to eliminate this defect by reorienting the torque converter. If this defect cannot be eliminated, the torque converter must be replaced.
Note: Apply alignment marks to ensure correct subsequent installation of the torque converter.
- b) Remove the torque converter.
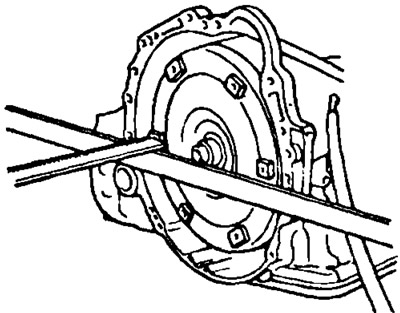
Checking the installation of the torque converter
Using a vernier caliper and straightedge, measure from the torque converter bosses to the transaxle housing front flange. Normal distance:
- pre-1996 models: 13.0 mm
- A241E: 12.8 mm
- A245E: 22.8 mm
- A540H: 13.7 mm