
Clutch master cylinder parts
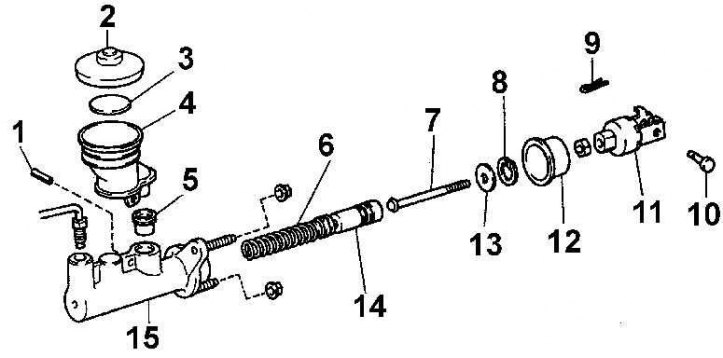
1 - spring pin; 2 - cover; 3 - float; 4 - reservoir; 5 - sealing ring; 6 - spring; 7 - pusher; 8 - retaining ring; 9 - bracket; 10 - cotter pin; 11 - thrust; 12 - protective cover; 13 - washer; 14 - piston; 15 - clutch master cylinder housing
1. Remove the cap from the reservoir and drain the fluid from the master cylinder. Using a hammer and drift, knock out the mounting pin and remove the reservoir from the clutch master cylinder (see fig. Clutch master cylinder parts).

2. Remove the dust cover from the body and remove the retaining ring.
3. Remove the washer and tappet from the cylinder body.
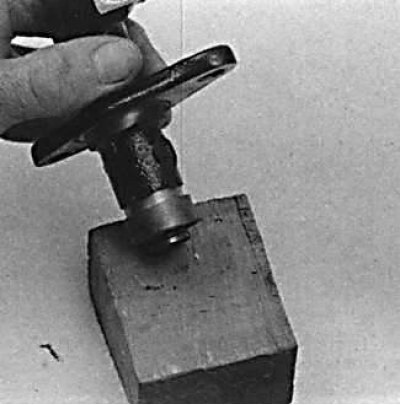
4. Tap the clutch cylinder on a block of wood to remove the piston from the master cylinder body.
5. Remove the spring from the piston.
6. Remove the o-ring from the piston.
7. Wash all parts of the clutch master cylinder in clean brake fluid and check their condition.
8. Install the sealing ring in the piston groove, while the working edges of the sealing ring should be on the side opposite the pusher.
9. Install the spring on the piston.
10. Lubricate the cylinder bore and lip of the O-ring with fresh brake fluid and, being careful, install the piston into the cylinder.
11. Install pushrod with washer, compress spring and install new circlip.
12. Install the dust cover and reservoir on the clutch master cylinder.