



Contents: Removal ↓ Installation ↓
Removal
1. Disconnect the cable from the negative terminal of the battery.
2. Remove the air filter.
3. Remove the accessory drive belt.
4. Remove the ignition coils.
5. Set the piston of the first cylinder to TDC of the compression stroke.
6. Turn the crankshaft 90° in the direction of rotation to avoid collision of the piston and valves.
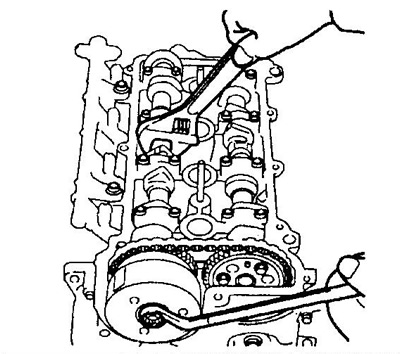
7. Loosen the DVVT sprocket mounting bolt while holding the intake camshaft with a wrench at the hexagonal section.
Note: Do not remove the bolt.
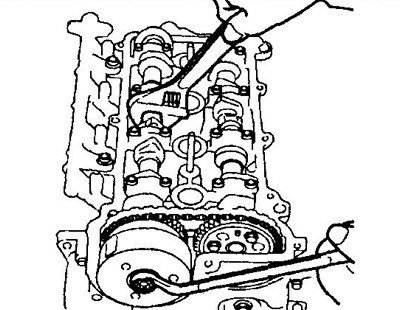
8. Using a hex key, unscrew the service hole plug.
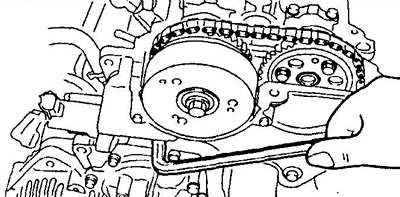
9. Move the locking plate down through the service hole and press the plunger into the tensioner.
Note: If it is difficult to lock the lock plate, use a wrench to turn the camshaft left and right a little.
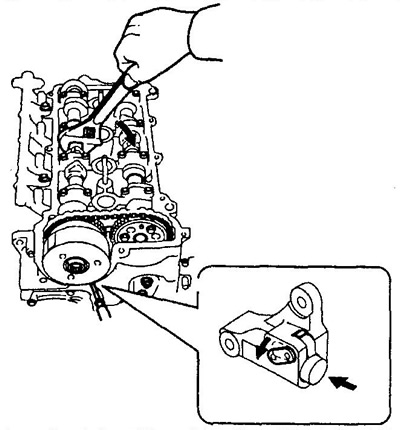
10. Align the hole in the lock plate and tensioner, install a 2.5mm Allen key.
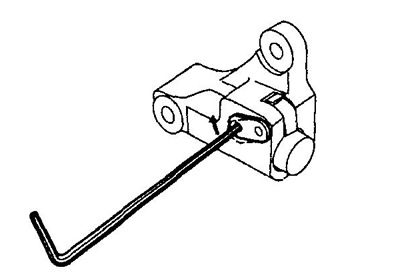
11. Remove the tensioner with the hex key installed.
12. Remove the timing chain from the camshaft sprockets.
13. Remove the bolts in the sequence shown in the figure and remove the camshaft bearing caps.
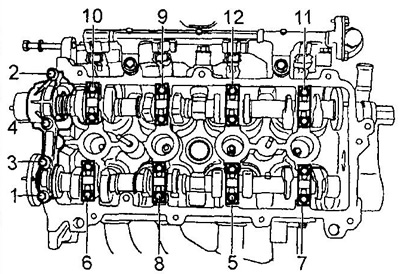
14. Remove the camshafts and secure the chain from falling.
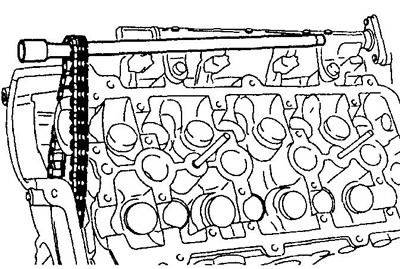
15. Check the DVVT system sprocket.
a) Fix the camshaft in a vice.
b) Tighten the DVVT sprocket mounting bolt.
c) Wrap the camshaft with electrical tape, then make a hole in one of the advance ports.
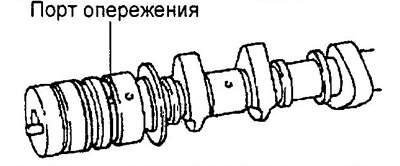
d) Apply air pressure to the advance port. This will release the lock.
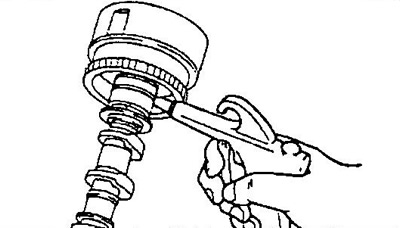
Note: This operation may cause oil to splash.
d) Make sure that the DVVT sprocket is unlocked and that the sprocket can be turned by hand without binding to an angle of approximately 30°.
Note: The DVVT sprocket will be locked when turned to a greater retard angle.
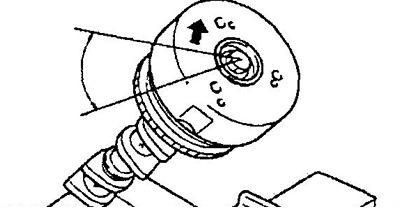
e) After checking, fix the sprocket in the delay position. Remove the bolt.
Installation
Note: Below are the basic camshaft installation procedures.
1. Turn the crankshaft clockwise by 90° from the TDC of the compression stroke of the first cylinder. This is necessary to avoid collision of the valves and piston when installing the camshafts.
2. Install the camshafts.
a) Apply engine oil to the camshaft lobes, camshaft seats on the cylinder head and the top of the tappets.
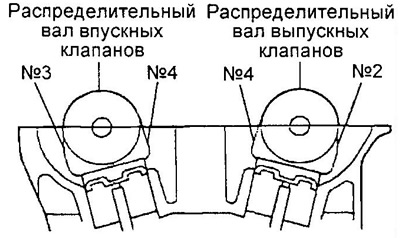
b) Install the camshafts with their cams oriented as shown in the figure.
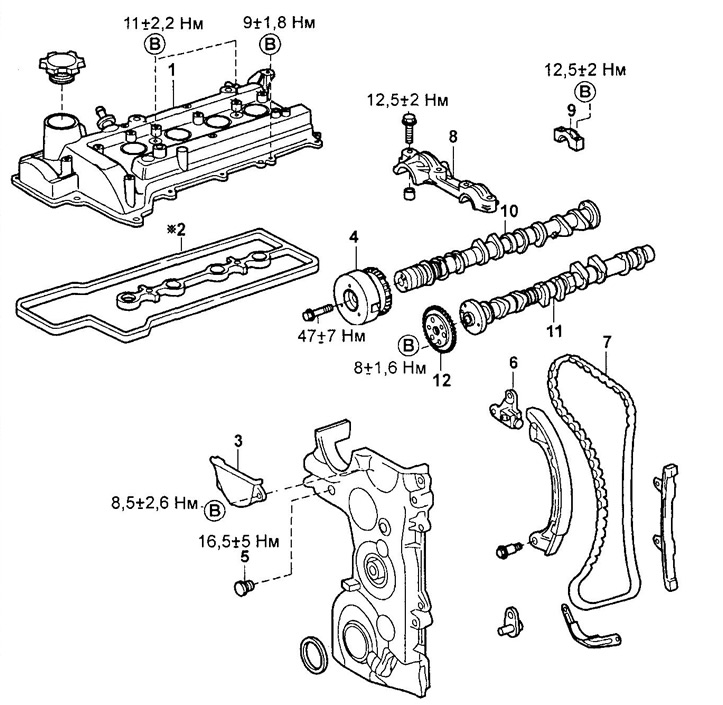
Removal and installation of camshafts.
1 - cylinder head cover,
2 - gasket,
3 - timing chain cover No.2,
4 - DVVT system sprocket,
5 - plug,
6 - chain tensioner,
7 - timing chain,
8 - cover No.1 of the camshaft bearing shells,
9 - covers No.2 of the camshaft bearing shells,
10 - intake camshaft,
11 - exhaust camshaft,
12 - camshaft sprocket.
c) Install the camshaft bearing shell caps and tighten their mounting bolts in the sequence shown in the figure.
- Tightening torque - 12.5 + 2.0 Nm
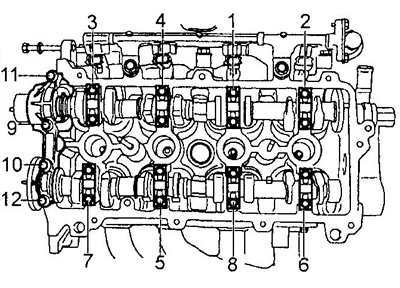
Note: Make sure the arrows on the covers are facing the front of the engine.
3. Install the DWT system sprocket.
a) Install the DVVT sprocket onto the camshaft, aligning the pin with the pin hole.
Note: Turn the sprocket slightly to ensure the pin is securely seated in the mounting hole.
b) Install the timing chain, aligning the marks on the sprockets and the chain.
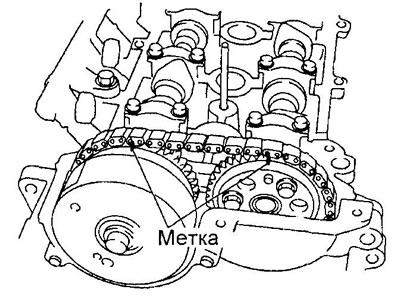
c) Install the chain tensioner and remove the hex key from it.
d) Secure the camshaft with a wrench by the hexagonal section from turning and tighten the sprocket mounting nut.
- Tightening torque - 40 - 54 Nm
d) Clean the service hole plug and hole, apply fresh sealant to the plug and screw it into the timing chain cover.
- Tightening torque - 12.5 - 21.5 Nm
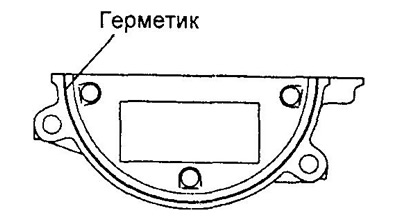
4. Apply sealant to timing chain cover No.2 and install it.
5. Install the cylinder head cover.
a) Install the gasket into the cylinder head cover.
b) Apply sealant to the areas shown in the figure.
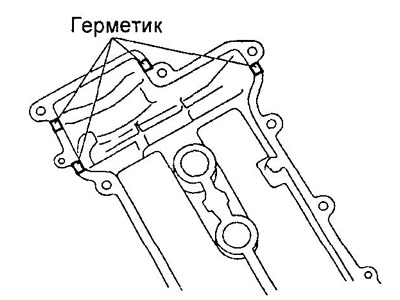
c) Install the cylinder head cover and tighten its mounting bolts in the sequence shown in the figure.
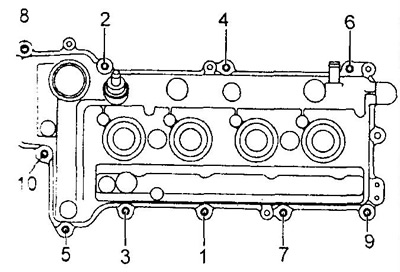
d) Install two nuts with gaskets on the cover.
5. Install the ignition coils. Install the accessory drive belts.
3. Install the air filter.
9. Connect the cable to the negative terminal of the battery.