



Contents: Disassembly ↓ Assembly ↓
Disassembly
1. Remove the traction relay.
a) Unscrew the nut and disconnect the wiring harness from the traction relay terminal.
b) Loosen the 2 nuts securing the traction relay to the starter cover on the gear side and remove the relay.
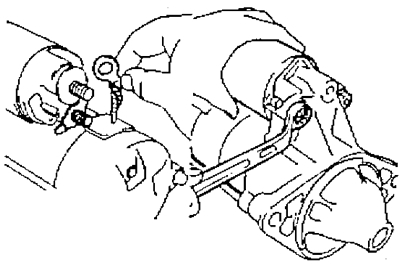
2. Unscrew the two tie bolts and pull out the housing assembly with the stator winding together with the anchor.
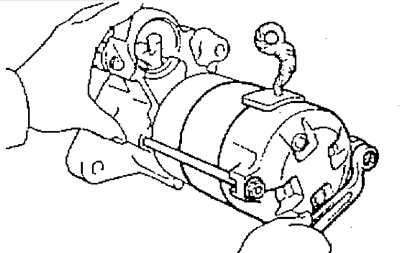
3. Remove the two O-ring screws and remove the manifold side cover while holding the wiring harness.
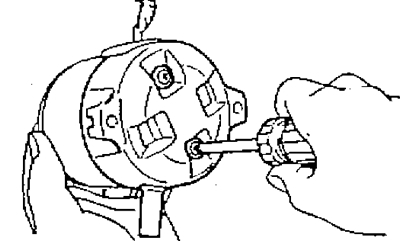
4. Remove the brush holder.
a) Using a screwdriver, press the spring and detach the brush holder.
b) Disconnect the 4 brushes and remove the brush holder.
5. Disconnect the anchor from the starter housing.
6. Remove the 2 O-rings from the starter housing.
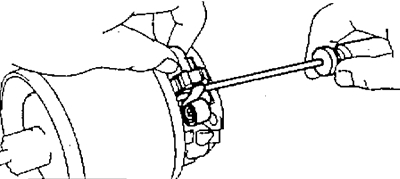
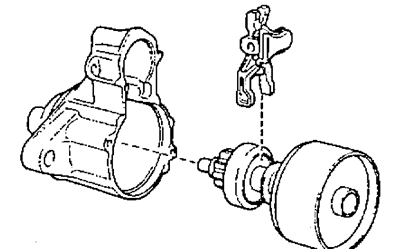
7. Disconnect the drive lever and the overrunning clutch with the drive gear together with the shock absorber from the cover on the drive gear side.
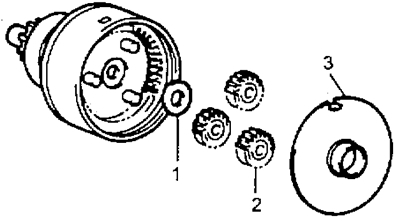
8. Remove the satellites.
Disconnect the washer (1), 3 satellites (2) and plate (3) from the shock absorber.
9. Remove the overrunning clutch from the drive gear.
a) Using a screwdriver, move the limiting sleeve towards the overrunning clutch.
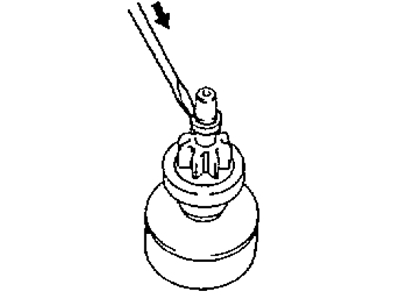
b) Use a screwdriver to remove the retaining ring.
c) Remove the limiter sleeve and overrunning clutch.
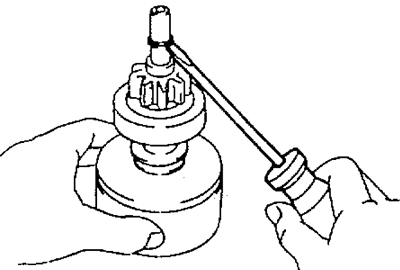
10. Remove the carrier and epicycle.
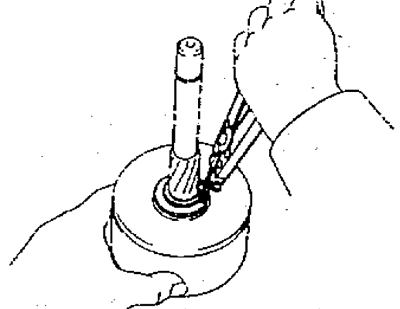
a) Using pliers, remove the retaining ring and washer.
b) Remove the carrier and washer.
Assembly
Note: Use high temperature grease on the bearings and gears of the starter assembly.
Install the epicycle and carrier.
a) Apply grease to the epicycle at the points of contact with the shock absorber and satellites.
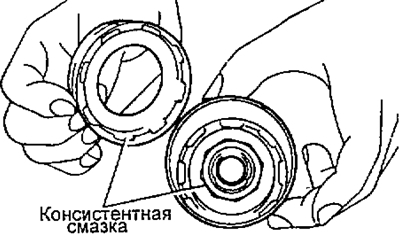
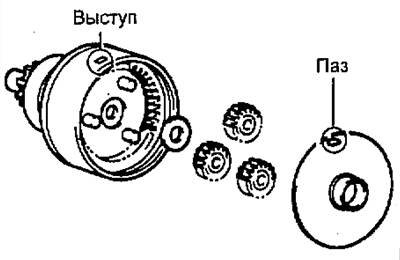
b) Align the groove of the epicycle with the protrusion inside the shock absorber.
c) Insert and rotate the epicycle to secure the shock absorber.
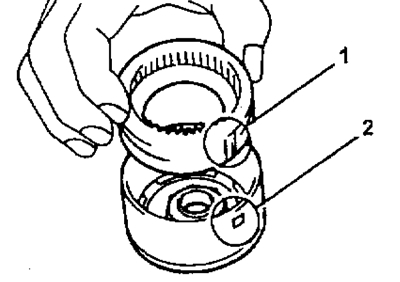
d) Apply high quality grease with additives to the bearing.
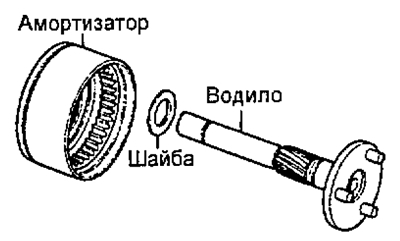
d) Apply grease to the washer and install it on the carrier.
f) Install the carrier into the shock absorber.
See the source on the internet resource www.TOYOTAMAN.ru
g) Using pliers, install the washer and snap ring.
2. Install the traction relay.
a) Apply grease to the sleeve and into the groove of the limit sleeve of the overrunning V clutch.
b) Install the overrunning clutch and limiter sleeve on the planet carrier.
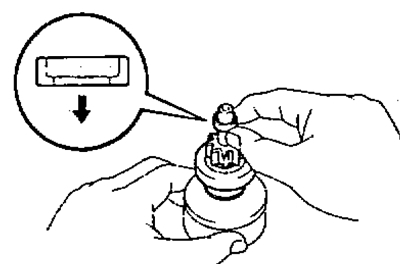
c) Apply grease to the retaining ring and install it into the groove of the carrier.
d) Using a vice, tighten the retaining ring.
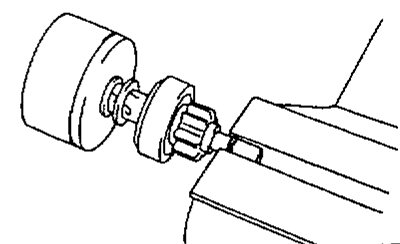
d) Holding the overrunning clutch, seat the carrier and install the limiting sleeve on the retaining ring using a plastic-faced hammer.
3. Install the satellites.
a) Apply grease to the satellites and the carrier flange with guides.
b) Install the washer and 3 satellites.
c) Install the plate, aligning its opening with the protrusion inside the shock absorber.
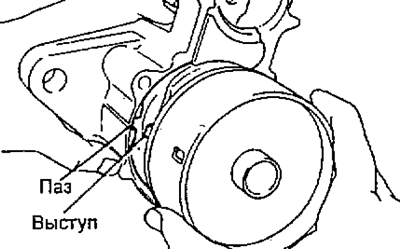
4. Install the drive lever and overrunning clutch together with the shock absorber.
a) Apply a high quality grease with additives to the bearing in the drive side cover.
b) Apply grease to the drive lever at the fulcrum,
c) Install the drive lever onto the overrunning clutch.
d) Align the shock absorber protrusion with the groove in the cover on the drive side.
5. Install new O-rings onto the starter housing.
6. Install the anchor into the starter housing.
7. Install the brush holder.
a) Install the brush holder on the armature in the appropriate position.
b) Using a screwdriver, press the brush spring and connect the brush to the brush holder. Install 4 brushes in this way.
Note: Make sure that the (+) brush wires do not come into contact with the ground.
8. Install the manifold.
a) Apply turbine oil with additives to the bearing in the cover on the manifold side.
b) Install the cover using 2 new screws with O-rings.
9. Install the starter housing and armature assembly.
a) Align the groove in the starter housing with the projection on the shock absorber.
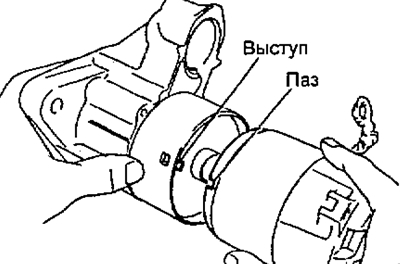
b) Install the starter housing with the anchor assembly and secure it with 2 bolts.
10. Install the traction relay.
a) Install the cover on the traction relay.
b) Install the traction relay and secure it with 2 nuts.
c) Connect the wiring to the starter terminal C and tighten the nut.