
Removing
Remove rear rack see previous section.
To remove the shock absorber, you must first compress the spring. In workshops, special devices are used for.
Attention: Never remove the shock absorber if the spring is not compressed.
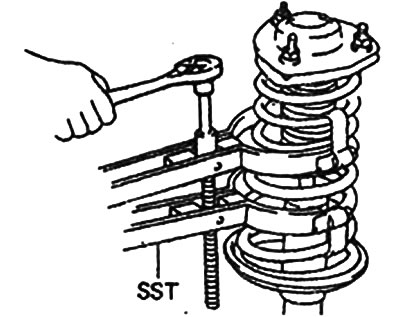
Install the strut into the spring compressor. For this purpose, the TOYOTA SST 09727 tool, or some other standard tool, is used. Slowly compress the spring in the fixture until the top nut is relieved.
Caution: If a standard spring compressor is used, be careful that the coils of the spring are securely gripped. Compress the spring at three opposite points. The spring force is very strong. Do not use wire for this purpose. There is a risk of injury!
Attention: Remove the spring tightening bolt only when the spring is securely fixed in this state.
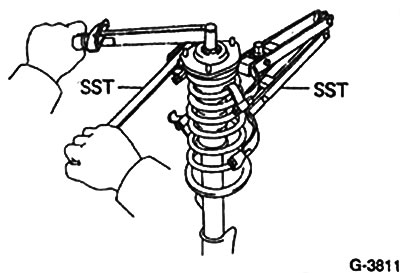
Release the fixing nut. If the nut was not loosened before removing the rack, then when unscrewing the nuts securing the rack support bearing, hold the support bearing with a lever. TOYOTA branded workshops use a special tool for this.
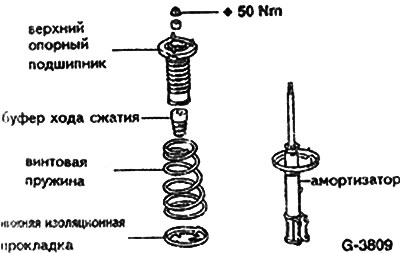
Remove the upper support bearing, coil spring, compression stroke buffer and lower insulating gasket.
Attention: If it is necessary to replace only the spring - slowly release it. If it is necessary to replace the shock absorber, the spring does not need to be decompressed.
Installation
Check shock absorber before installation. For disposal - release the gas.
If necessary, install a new spring.
Install the bottom insulation pad.
Install spring. Make sure the spring is in the correct position.
Set compression stroke buffer.
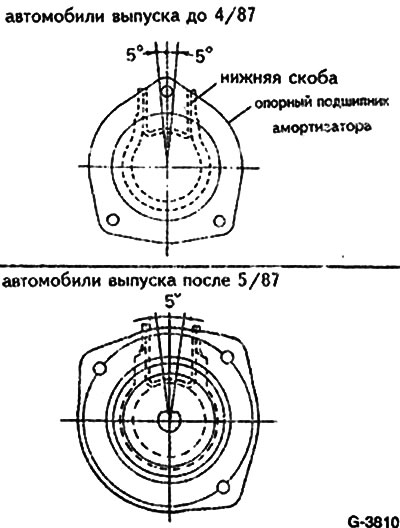
Install the upper suspension strut bearing and align it with the lower bracket, see fig. G-3810.
Screw on a new self-locking nut and tighten it to 50 Nm, keeping the support from turning. If there is no special tool for holding the support, then tighten the nut by hand, and tighten later, when installing the shock absorber strut.
Slowly release the spring. At the same time, make sure that the ends of the spring take their places on the supports.
Install shock absorber bottom.