
Removing
Remove gearbox.
Mark with a marker or scriber the position of the pressure plate in relation to the flywheel.
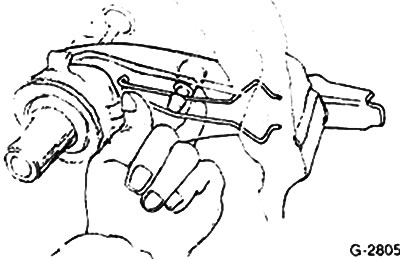
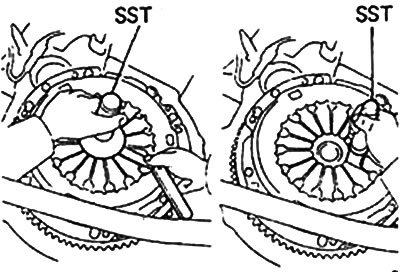
To prevent the flywheel from turning when the bolts are released, hold the flywheel by the ring gear with a screwdriver or mandrel.
Loosen the pressure plate mounting bolts sequentially by 1-1.5 turns until the pressure of the diaphragm spring on the disc is relieved.
Attention: If the bolts immediately come out without force, this is a sign of a damaged diaphragm spring.
Loosen screws completely.
Remove the pressure plate and driven plate.
Caution: Do not drop discs. This can lead to damage to the clutch and, as a result, to difficulties in disengaging it.
Wipe the flywheel with a rag soaked in gasoline.
Remove the clutch release bearing together with the fork. Then take out the bearing.
Examination
Replace oily clutch disc and clutch disc with mechanical damage.
Measure the thickness of the friction lining of the driven disk with a columbus. The distance from the lining surface to the rivet heads must be at least 0.3 mm. Otherwise, replace the pads. If there are cracks, also replace the lining.
Check the end face of the friction linings. It should not exceed 0.8 mm. For verification, special equipment is used.
If there were malfunctions in the operation of the clutch, it is necessary to check the end face of the flywheel with an indicator. It should not exceed 0.1 mm.
Check flywheel for burns and cracks.
Measure the depth and width of the wear marks on the diaphragm spring with a Columbus. The depth must be at least 0.6 mm, the width - no more than 5.0 mm. Otherwise, replace pressure plate.
Check the elastic connections between the pressure plate and the clutch basket for cracks and the reliability of the rivet connections. If rivet connections are loose, replace as a set.
Check pressure plate bearing surface for cracks, burns and wear. Discs with deflections of more than 0.3 mm can be used in the future. Checking is carried out with a ruler and a probe.
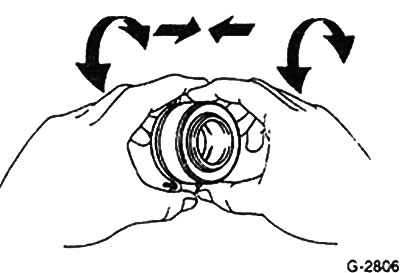
Compress the clutch release bearing and rotate at the same time. If the bearing rotates noisily and seizes, it must be replaced.
Installation
Clean the clutch pressure plate and flywheel with fine sandpaper.

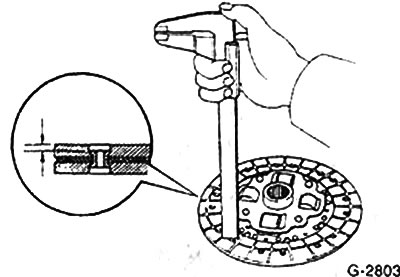
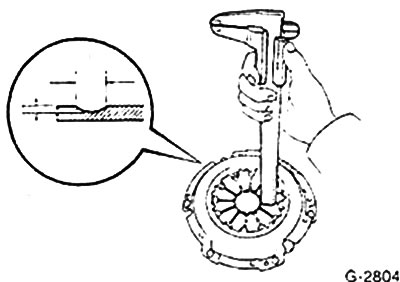
Insert driven plate and pressure plate into flywheel. In this case, the flat part of it should be facing the flywheel, see Fig. G-2807. Align the driven disk by eye in the center of the pressure disk, center the disk with a suitable mandrel, for example, HAZET, the input shaft of the gearbox. If the driven plate is not centered, the transmission input shaft cannot be inserted.
If a used pressure plate is inserted, it must be installed in accordance with the marked marking.
Screw in the pressure plate mounting bolts.
Tighten the bolts sequentially until the pressure plate is fully secured. Then remove the centering mandrel.
Attention: Make sure that the pressure plate evenly enters the flywheel when tightening the bolts. Torque for bolted connections 20 Nm.
Remove the anti-rotation stopper from the flywheel.
Check the position of the tops of the pressure diaphragm spring. Toyota specialized workshops use a special tool for this purpose. However, you can do without it. If the maximum deviation of the spring plates from each other exceeds 0.5 mm, bend the springs.

Coat the surfaces adjacent to the clutch release bearing and fork with a thin layer of MoS grease2.
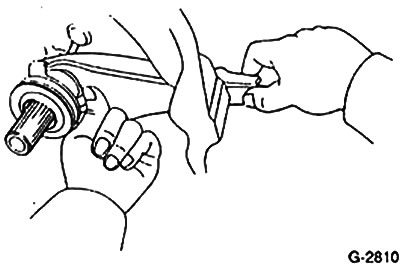
Install the clutch release bearing on the fork and, together with the fork, install on the gearbox input shaft.
Attach the fork boot to the clutch dome.
Install gearbox.