
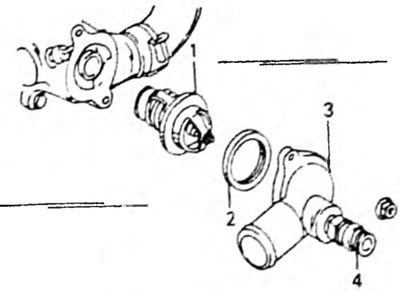
Pic. 125. Installation position of the thermostat on the 1.6 liter engine. 1. Thermostat; 2. Gasket; 3. Inlet fitting body; 4. Temperature switch connection location
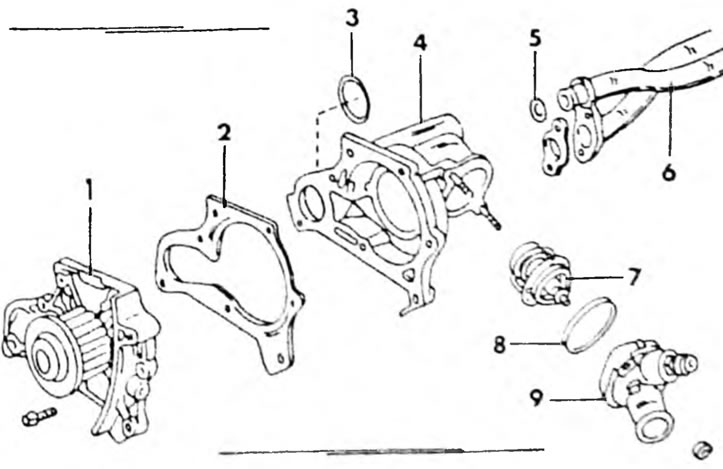
Pic. 126. To remove and install the water pump and the position of the thermostat on the 2.0 liter engine.1. Water pump; 2. Gasket; 3. O-ring; 4. Water pump cover; 5. O-ring; 6. Outlet pipe; 7. Thermostat; 8. Gasket; 9. Housing in dim fitting
To remove, partially drain the coolant, unscrew the two fitting nuts and disconnect the upper water hose. Remove thermostat. The average opening temperature of the thermostat is marked on its body. "82" means that the thermostat is used in Central European countries. "88" This means that we are talking about a thermostat intended for Northern Europe.
The thermostat can be checked by hanging it on a piece of wire in a container filled with cold water. Do not allow the thermostat to touch the bottom and walls of the vessel. Hang the thermometer in the same way (see fig. 127). Gradually heat the water and control at what temperature the thermostat begins to open. This should occur at a temperature of 80-84 C. At a temperature of 95°C, the thermostat should open completely. The thermostat valve should then lift away from the thermostat, as can be seen in Figure 128. This measurement is extremely important, as it affects the perfect circulation of the coolant.
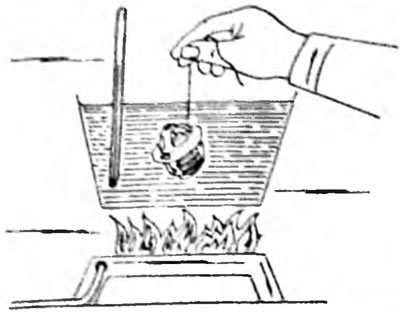
Pic. 127. Checking the thermostat

Pic. 128. After opening the thermostat, the pin comes out 8 mm (size between arrows).
When installing, lubricate both sides of the gasket with sealant. The thermostat pin should be on the top side and fit into the recess in the inside of the fitting, as can be seen in Figure 129, that is, the pin should be located on top after the thermostat is inserted into the hole. Add coolant and check the system for leaks.
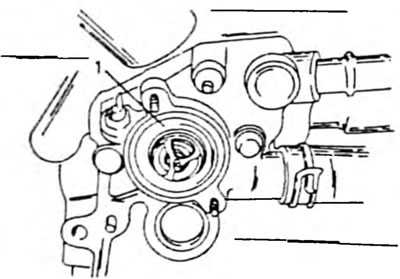
Pic. 129. Pin position (1) after installation on a 1.6 liter engine. On the 2.0 liter engine the picture is similar.