
Remove the clutch basket assembly.
Remove the clutch disc assembly.
Removing the flywheel
Hold the crankshaft with SST 09213-54015.
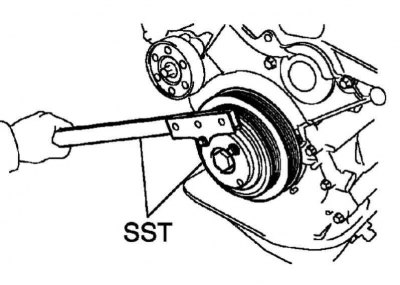
Pic. 2.385. Removing the flywheel
Using a TORX T55 socket wrench, remove the 8 studs and remove the flywheel (pic. 2.385).
Remove 2 screws and remove the back cover.
Removal of a back epiploon of a cranked shaft
Use a knife to cut the working edge of the gland.
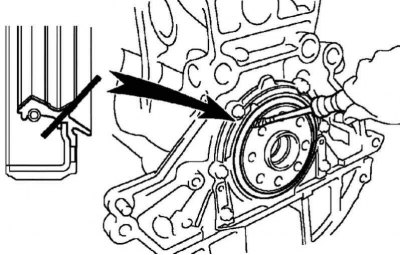
Pic. 2.386. Oil seal removal
Remove the seal with a screwdriver (pic. 2.386).
Note. After removing the oil seal, check that the crankshaft is not damaged.
Note. If damaged, sand the surface of the crankshaft with 400 grit sandpaper.
Installation of a back epiploon of a cranked shaft
Apply multipurpose grease to the edge of the new oil seal.
Note. The seating surface of the seal must be free of sand, dirt and other foreign particles.
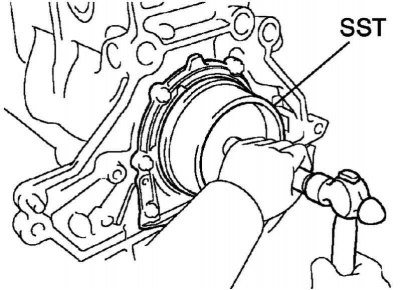
Pic. 2.387. Installing a new oil seal
Using an SST tool and a hammer, drive in the new oil seal until its surface is flush with the edge of the rear oil seal cover (pic. 2.387).
Note. Remove excess grease from crankshaft.
Install the back cover.
Tightening torque: 8.4 Nm.
Flywheel Installation
Hold the crankshaft with SST 09213-54015.
Clean bolts and bolt holes.
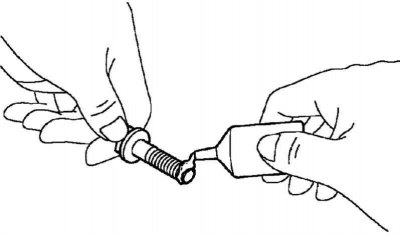
Pic. 2.388. Applying a fixing lubricant
Apply threadlocker to 2 or 3 bolt threads (pic. 2.388).
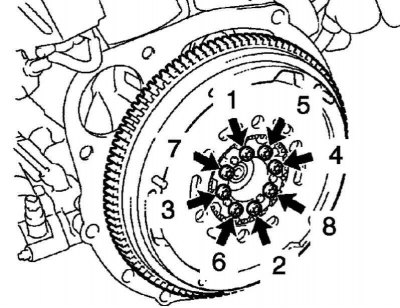
Pic. 2.389. Flywheel tightening sequence
Head Torx T55 in several steps, evenly, tighten 8 Torx bolts, acting in the sequence shown in Figure 2.389.
Tightening torque: 71 Nm.
Install the clutch disc assembly.
Install the clutch basket assembly.
Install the manual transmission assembly.