



Contents: Removal ↓ Installation ↓
Removal
Torsion Bar Assembly Components
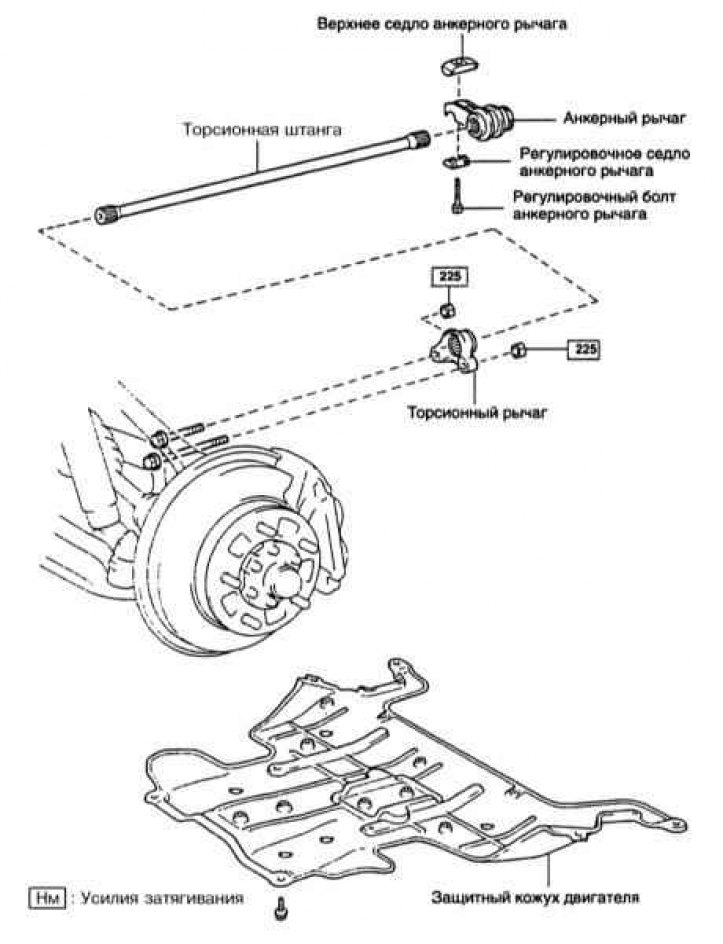
1. Torsion bars are used as elastic elements on Land Cruiser Amazon models, using the principle of torsional elasticity. Torsion bars are installed parallel to the road. This allows for more compact suspension designs and better suspension control, since there is no need for large strokes of the elastic element. Torsion bars are usually in a loaded state and require caution when removing them.
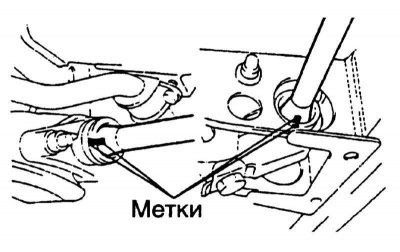
Attention! After removing the torsion bars, it is very important not to mix them up; if necessary, apply paint marks indicating the front and rear ends of the torsion bar and the side of the vehicle from which it was removed (refer to illustration).
The official source is on the portal ToyotaMAN
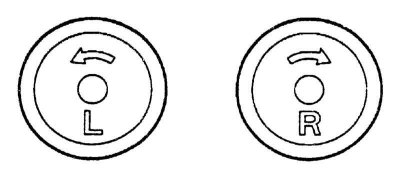
Warning! If installed in the wrong place or "backwards", the torsion bars may break. New torsion bars are marked with the letters L (left) or R (right) and an arrow pointing in the direction of the torsional load (refer to illustration).
2. Set the parking brake. Loosen the nuts of the corresponding front wheel, jack up the front of the car and place it on supports. Remove the wheel.
3. If equipped, remove the crankcase guard.
4. Mark the torsion bar, anchor arm and torsion arm (refer to the illustration at the beginning of the Section).
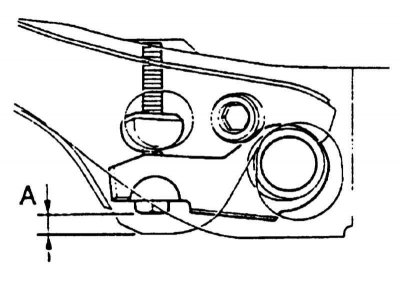
5. Measure the distance "A" between the anchor arm adjusting bolt and the frame (refer to the accompanying illustration). This will be required during assembly.
6. Loosen the anchor lever until the torsion bar is completely loose.
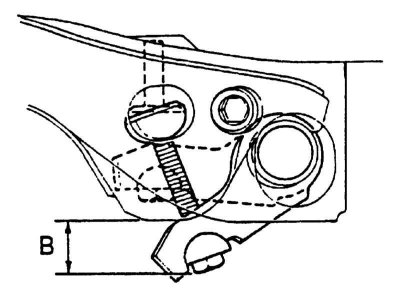
7. Measure the distance "B". This will be needed during assembly (refer to the accompanying illustration).
8. Remove the adjusting bolt from the anchor lever.
9. Remove the anchor lever seats.
10. Remove the torsion bar with the anchor arm.
11. Remove the anchor arm from the torsion bar and transfer it to the new bar.
12. Remove the two nuts and bolts and remove the torsion bar.
Installation
1. Install the torsion arm by tightening the bolts and nuts to the required torque.
2. Install the bar into the torsion arm.
3. Install the seats and adjusting bolt.
4. Compare the length of the adjusting bolt with the one measured during removal.
5. Tighten the adjusting bolt so that the distance "A" meets the requirements Specifications.
6. If you are installing an old torsion bar, install it into the anchor arm, align the previously applied marks. Then, aligning the marks on the bar and the torsion bar, install the torsion bar.
7. Tighten the adjusting bolt so that the distance "A" is equal to that measured during removal.
8. Further installation is carried out in reverse order.