
Front shock assembly
1. Loosen the wheel nuts. Jack up the car and place it on jack stands. Remove the front wheels.
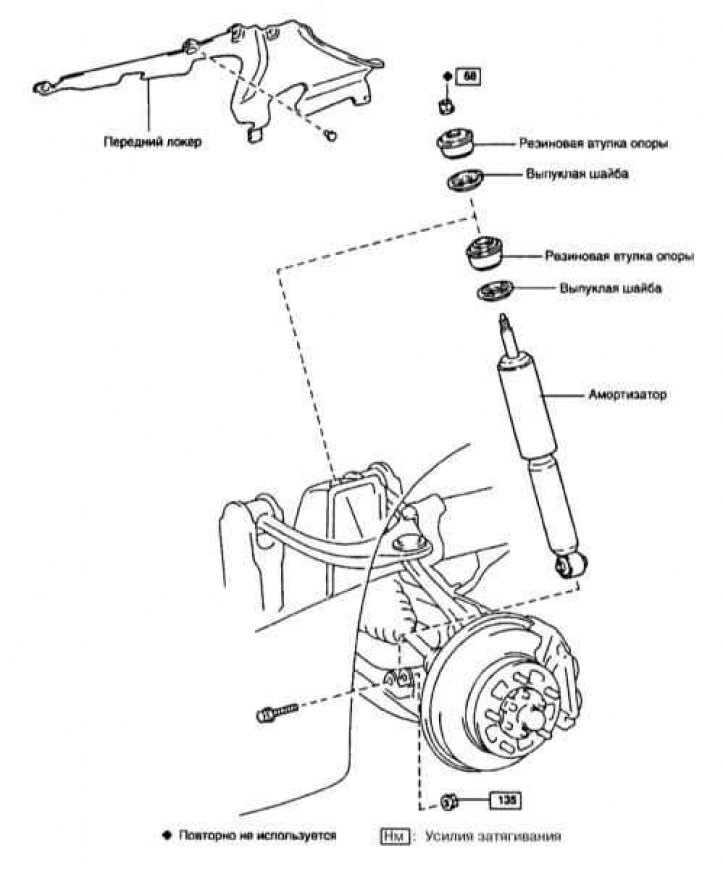
2. While holding the shock absorber rod from turning with a socket wrench, give the fixing nut of the upper support of the assembly (refer to illustration above).
3. Trying to remember the installation position of the components, remove the rubber bushings and washers.
4. Give a nut of a through bolt of fastening of the lower support of the shock-absorber to the lower suspension arm.
5. Turn away bolts of fastening of the bottom support of the shock-absorber.
6. Lower the assembly down and remove it through the wheel arch.
7. Check up a condition of rubber plugs of the top support of the shock-absorber, replace defective components.
8. Rock the unloaded car down on the side of the suspicious shock absorber. The corner of a car with a working shock absorber, after being released, should return to its place without making oscillatory movements. A tendency to bounce up and down, or the inability of the car to return to its original position after a couple of nods, hints at a faulty shock absorber.
9. Installation is carried out in the reverse order. Make sure all fasteners are tightened to the correct torque.