
Attention! The bulbs of the lamps remain hot for about 20 minutes after switching off the lighting fixtures. Make sure the components are completely cool before starting work.
Disconnect the negative cable from the battery.
Attention! If the stereo system installed in the car is equipped with a security code, before disconnecting the battery, make sure that you have the correct combination to activate the audio system!
Front position lights and direction indicators

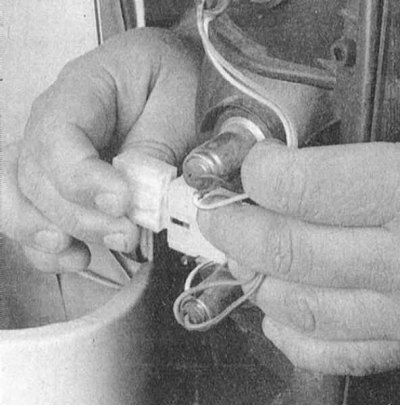
1. Turn out the top screw of fastening of assembly of forward dimensional light (refer to accompanying illustration).
2. Remove assembly of dimensional fire and disconnect from it an electroconducting.
3. Turn the lamp socket counterclockwise to remove it from the lamp assembly housing.
4. To remove the lamp from the socket, pull it parallel to the axis of the assembly.
5. Installation is carried out in the reverse order.
Rear combination lamps

1. Remove the lens assembly (refer to accompanying illustration).
2. To replace a turn signal or brake light bulb, simply turn it counterclockwise and remove it from the bulb holder.
Note. On some models, the lamps are removed from the back of the lamp assembly, for which the latter must be dismantled.
3. In order to provide access to the reverse lamp, remove the plastic cover (refer to accompanying illustration).

4. To remove the combined lamp assembly, disconnect the electrical wiring from it (refer to accompanying illustration).
5. Installation is carried out in the reverse order.
License plate light
1. If desired, jack up the rear of the vehicle and support it on jack stands. Locate the license plate light on the back of the bumper assembly, use a flashlight if necessary.
2. To remove the cartridge, turn it counterclockwise and pull it out of the lamp housing. On 4Runner models, remove the headlight lens mounting screws.
3. To remove the lamp, pull it strictly parallel to the axis of the socket.
4. Installation is carried out in the reverse order.
Illumination of the control panel for the operation of heating / air conditioning systems
1. Remove the appropriate trim section of the instrument panel (see chapter Body).
2. Pull out the failed lamp from its socket.
3. Installation is carried out in the reverse order.
Dashboard illumination
Note. Make sure replacement bulbs match their performance specifications (power consumption) out of order. Remember that meter backlights are more wattage than indicator lights.
1. Remove the instrument cluster (see Section Removal and installation of a combination of devices).
2. Turn the lamp assembly with the cartridge counterclockwise and remove it from the instrument cluster assembly.
3. Pulling the bulb outward, remove it from the socket.
4. Installation is carried out in the reverse order.