
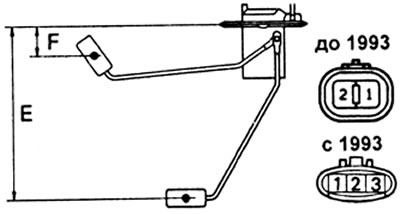
A) Disconnect the connector from the fuel level sensor in the tank.
b) Turn on the ignition. The fuel gauge needle should move to the position "EMPTY" (empty).
V) Connect test lamp (3.4 watts) to terminals 1 and 2 of the connector on the wire side.
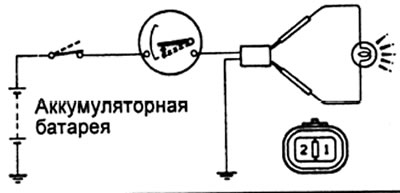
G) Turn on the ignition. The control lamp should light up, and the arrow of the fuel gauge should move towards the mark "FULL" (full tank).
Note: The fuel gauge is filled with silicone oil, so the gauge needle moves slowly and settles down quickly.
d) If the pointer does not work as indicated, check the resistance of the device.
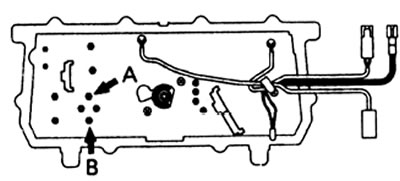
2. Checking the resistance of the pointer, and) Measure resistance between terminals "A" And "IN".
Resistance - 55 Ohm
b) Replace the pointer if the resistance is not as specified.
3. Checking the voltage regulator.
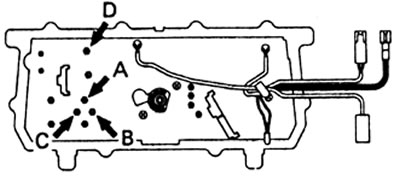
A) Connect "plus" battery to terminal A (for 24 V models: to terminal D), A "minus" - to terminal B.
b) Connect "plus" voltmeter to terminal C, and "minus" - to terminal B. Check that the voltage value fluctuates around 7 V.
V) Replace the pointer if the voltage value differs from the specified value.
4. Checking the operation of the fuel level sensor.
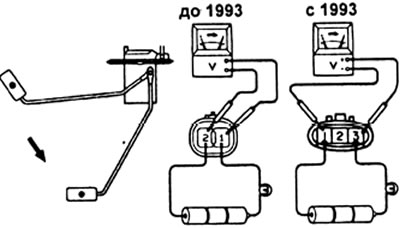
A) Connect three 1.5 V batteries in series.
b) Connect a 3.4 W test light to "plus" battery pack, connect the second output of the bulb to terminal 1 of the connector. "Minus" battery pack, connect to terminal 2 of the connector.
V) Connect a voltmeter to terminals 1 and 2 of the connector.
Note: for models from 1993, the test is carried out on terminals 1 (-) and 3 (+) sensor connector.
G) The voltage recorded by the voltmeter should increase with the movement of the sensor float from the position "FULL" (full tank) up to the position "EMPTY" (empty).
5. Checking the resistance of the fuel level sensor.
A) Measure the resistance between terminals 1 and 2 of the sensor connector.
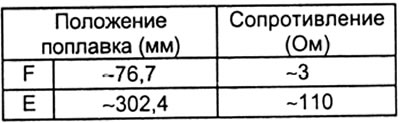
b) Replace the sensor if the resistance differs from that indicated in the table.