



A. Check the protrusion of pistons No.1 and No.4.
a) Align the TDC mark on the crankshaft pulley with the reference mark.
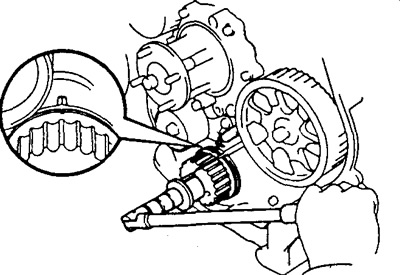
b) Install the dial indicator on the cylinder block, place the tip of the indicator on the piston bottom.
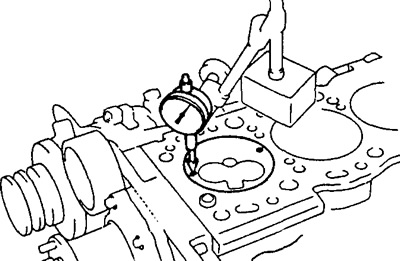
c) Slowly turn the crankshaft clockwise and counterclockwise to find the point where the piston crown protrudes the maximum distance.
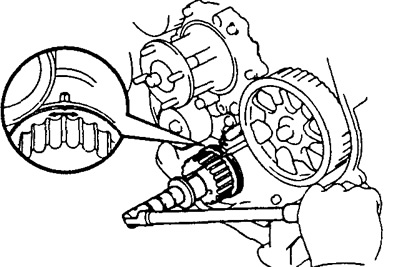
d) Set the dial indicator to zero readings - 0 mm.
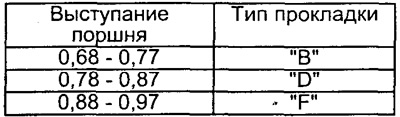
d) Measure the piston protrusion from the cylinder block by moving the dial indicator.
- Protrusion - 0.68 - 0.97 mm
Note: Check the protrusion at least at two points.
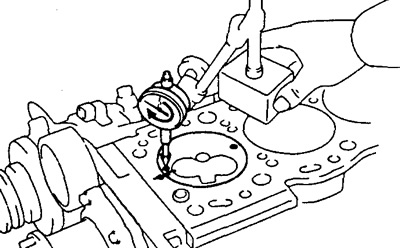
If the protrusion does not correspond to the specified one, remove the connecting rod and piston group and replace it.
B. Check the protrusion of pistons No.2 and No.3.
a) Turn the crankshaft half a turn (180°).
b) Measure the piston protrusion as described above.
B. Select a new cylinder head gasket.
Note: There are three sizes of new cylinder head gaskets, which are marked with either the letters "B", "D" or "F" or the location of the cutout.
Thickness of new cylinder head gasket:
- Marking B - 1.40 - 1.50 mm
- Marking D - 1.50 -1.60 mm
- Marking F - 1.60- 1.70 mm
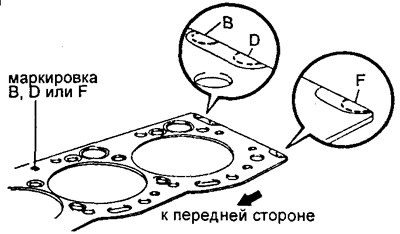
When selecting a new head gasket, use the highest protrusion value.
Recommendation: There are 6 types of cylinder head gaskets installed at the factory (marked from A to F), but only three types are supplied as spare parts (B, D and F), so when replacing the gasket you need to choose from the three types listed above.
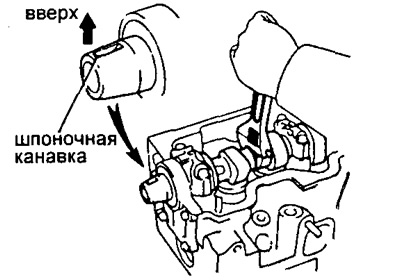
2. Set the piston position in cylinder No.1 to TDC.
a) Install the camshaft with the keyway facing up.
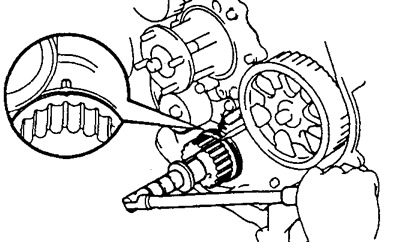
b) Align the TDC mark on the crankshaft pulley with the reference mark.
3. Install the cylinder head.
A. Place the head on the cylinder block.
a) Place the new one on the cylinder block.
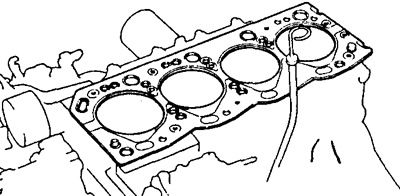
Note: Orient the gasket correctly.
b) Install the cylinder head on the pins.
B. Install the cylinder head bolts.
Note: The cylinder head bolts are tightened in three successive stages.
If any of the bolts are broken or deformed, replace them.
a) Apply a thin coat of engine oil to the threads and caps of the cylinder head bolts.
b) First, install and tighten the eighteen cylinder head bolts evenly in several passes, in the sequence shown in the figure.
- Tightening torque - 78 Nm
Note: The bolts of types A and B shown in the figure have lengths: Type A - 107 mm; type B - 127 mm.
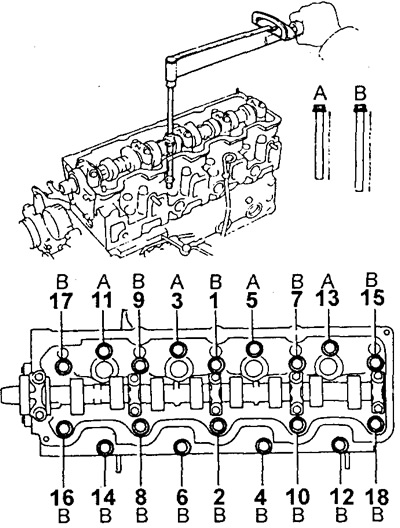
If any of the bolts does not meet the tightening torque requirements, replace them.
c) Mark the cylinder head bolts.
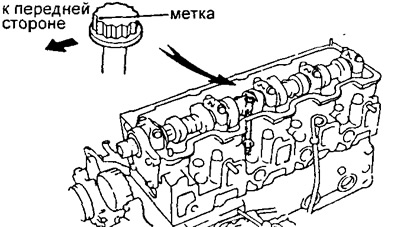
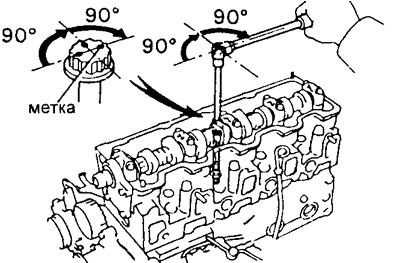
d) On the second pass, tighten the cylinder head bolts by an additional 90° in the same sequence as described above.
d) On the third pass, tighten the cylinder head bolts an additional 90°.
e) The mark should now be facing the back side.
4. Install the valve cover.
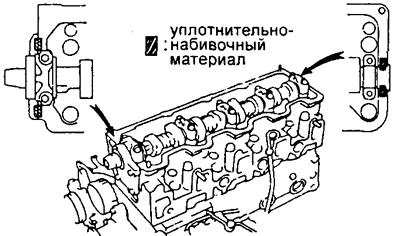
a) Place the packing material in the cylinder head as shown in the figure.
b) Place the gasket on the cylinder head cover.
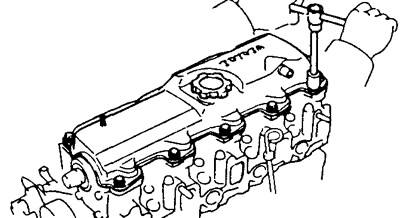
c) Install the cylinder head cover with eight bolts and two nuts.
- Tightening torque - 4.9 Nm
5. Install the right engine mount bracket.
- Tightening torque - 37 Nm
6. Install the exhaust manifold.
a) Install a new gasket and exhaust manifold.
- Tightening torque - 52 Nm
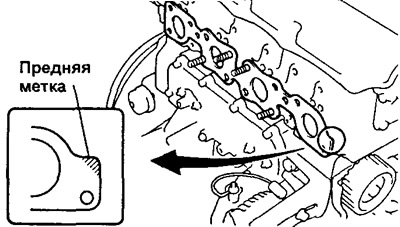
b) Install the heat shield with four bolts.
7. Install the intake manifold.
a) Place the new gasket on the cylinder head with the protrusion facing up.
The original can be found on this resource ToyotaMan.ru
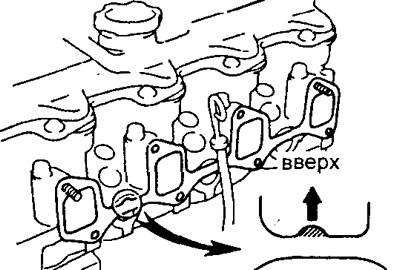
b) Install a new gasket and intake manifold.
c) Tighten the intake manifold nuts and bolts.
- Tightening torque - 24 Nm
8. Install the left engine mount bracket.
- Tightening torque - 37 Nm
9. Install the water pipe and water pipe body.
a) Install a new gasket, water pipe and water pipe housing.
- Tightening torque - 19 Nm
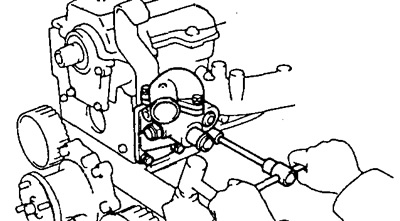
b) (With heating control device). Connect the bypass hose to the thermostat block.
10. Install the upper timing belt cover with four bolts.
- Tightening torque - 18 Nm
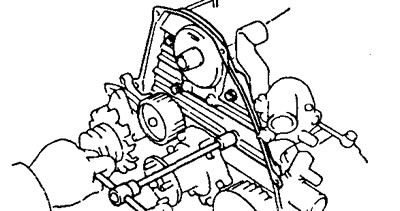
11. Install the camshaft pulley.
12. Install the injectors.
13. Install the timing belt (see the relevant section).
14. Fill the engine with coolant (see the relevant section).
15. Start the engine and check for leaks.
16. Check the coolant and oil levels.