
Removing
Raise the hood.
Disconnect the fluid supply hose to the washer nozzle.
Mark the operating position of the hood. To do this, circle the bolts on the hinge with a felt-tip pen.
Loosen the hood hinge bolts and remove the hood. An assistant is required to perform this operation. Before loosening the hinge bolts, place a rag between the hood and the body to protect the paintwork.
Installation
Install the hood. Screw in the bolts. Expose the hood and tighten the bolts.
Hood adjustment
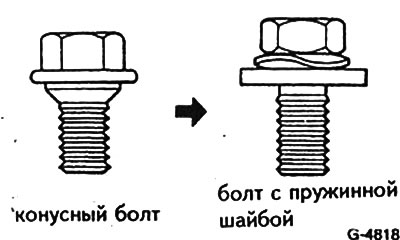
Attention: Cone bolts are used to fasten the hood hinges. Therefore, the displacement of the hood is not possible. When adjusting the position of the hood, it is necessary to replace them with conventional ones with a spring washer.
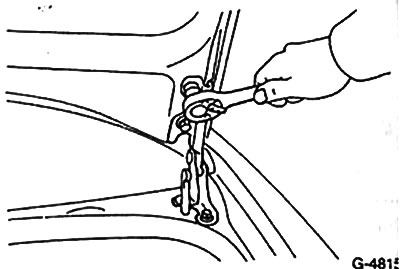
To give bolts of fastening of the lock of a cowl and loops.
If necessary, adjust the height of the hood. Screw in the two adjusting buffers as far as possible.
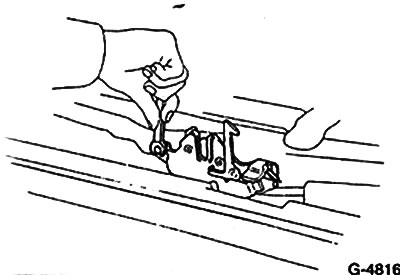
Place washers under the hinges and thus adjust the position of the hood in height at the rear.
Slide the lock so that in the closed position the front hood fits snugly with the fenders. After adjustment, tighten the bolts tightly.
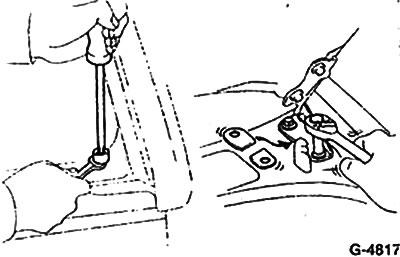
Move the hood in the transverse and longitudinal directions, setting it parallel to the wings.
Tighten the hinge bolts to 20 Nm.
Finally, adjust the position of the buffers. To do this, press plasticine rollers or rubber against the stops and close the hood. Open the hood and measure the thickness of the compressed rollers. Unscrew the buffers by the appropriate amount. In the closed position, the hood should rest effortlessly on both buffers.
Connect the fluid supply hose to the washer nozzles.