
Attention! Work should be done by two people.
Removing
1. Open the hood and cover the adjacent body panels with a blanket.
2. Disconnect all wires that may interfere with the removal of the hood, as well as the wiper tube.
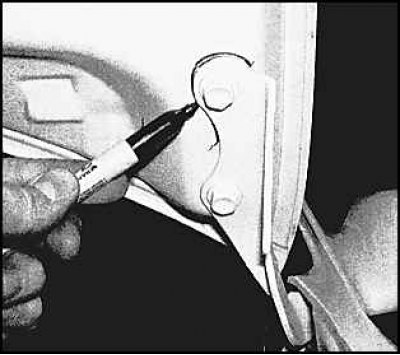
3. Outline the hood hinges.
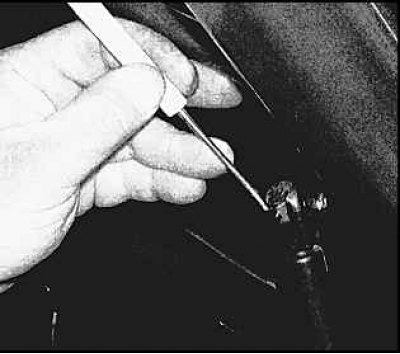
4. On Avalon models, remove the retainer clips and disconnect the hood stays. The assistant at the same time holds the hood.
5. Loosen the hinge bolts and remove the hood with an assistant.
Installation
6. Installation is carried out in the reverse order. When installing, align the contours of the loops applied earlier.
Adjustment
Adjustment of the position of the hood is ensured by moving it in the holes for the bolts of the hinges after loosening the bolts and nuts.
Attention! The factory installed hood bolts are "centering" and no adjustment is required. To adjust the position of the hood relative to the hinges, these bolts should be replaced with standard flat and spring washers.
1. Outline the loops.
2. Loosen the bolts and move the hood slightly to the desired position. Tighten the bolts and carefully close the hood to check the adjustment.
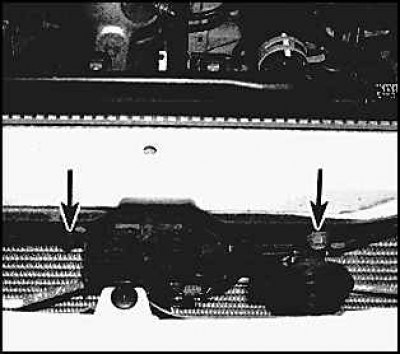
3. Adjust the position of the hood latch if necessary. To adjust the position of the lock horizontally or vertically, loosen the bolts securing the lock (arrows), having previously outlined the contours of the bolts, and move the hood in the desired direction. Tighten the screws after adjustment.
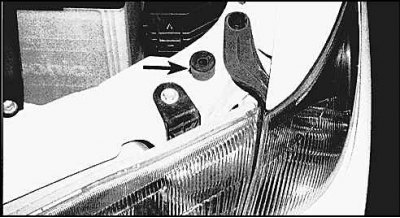
4. Lastly, the position of the buffers is adjusted so that the hood is flush with adjacent panels when closed. The position is adjusted by rotating these buffers located on the bulkhead (counterclockwise rotation raises the hood and vice versa).
5. Periodically lubricate the lock with lithol.