
Second: Stop the engine and turn on the hazard warning lights.
Third: Apply the parking brake firmly and set the position «R» (Automatic transmission) or reverse gear (Manual Transmission).
Fourth: Disembark passengers on the side opposite to traffic.
Fifth: Read the following instructions carefully and follow them. They are described and compiled in such a way as to help anyone who has never changed a wheel.
Precautions when lifting the car with a jack
To reduce the possibility of injury:
- Strictly follow the instructions for the jack.
- Only use the jack to raise the vehicle when changing a wheel.
- Never get under the car when it is jacked up.
- Do not start the engine or leave it running while the vehicle is jacked up.
Necessary tools and spare wheel
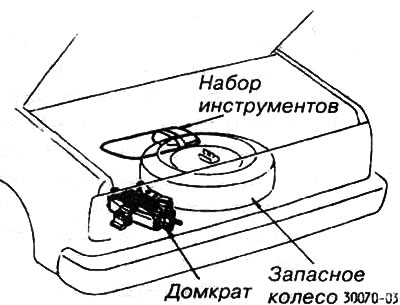
1. Tool kit, jack and spare wheel are in the trunk.
Wheel lock
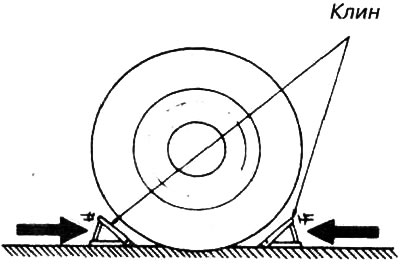
2. Block the wheel diagonally from the flat tire to prevent the vehicle from rolling when it is jacked up. This is a good security measure.
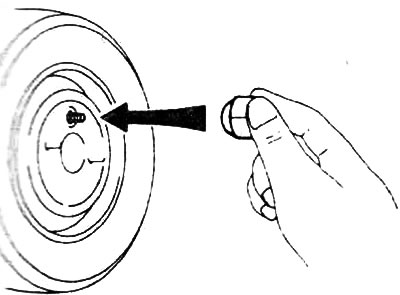
Removing the wheel cap or hub
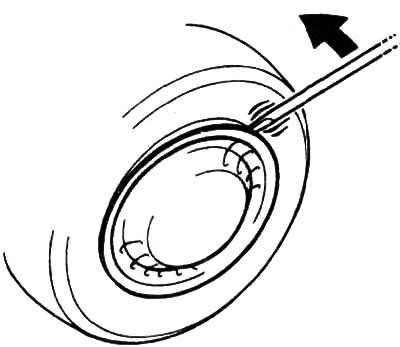
3. In order to pry off the wheel or hub cap, use the spark plug handle as a puller (vehicles with petrol engines) or special puller (vehicles with diesel engines).
Insert the flat end of the puller under the edge of the cap and push it away from the wheel. Never try to remove the wheel cap or hub by hand.
With aluminum wheels, first remove the wheel and only then lightly tap the facing washer on the inside with a wheel nut wrench.
While removing the hub cap when replacing an aluminum wheel is only recommended, remove it to avoid damaging it.
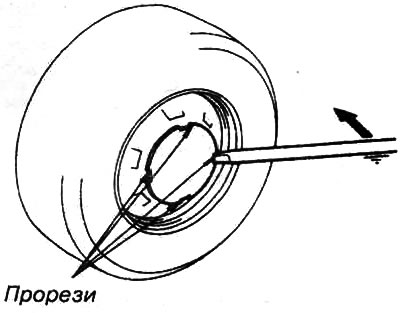
For small caps, insert the flat end of a puller into each cap slot and press it away from the wheel. Never try to remove the cap with your hands.
Loose wheel nuts
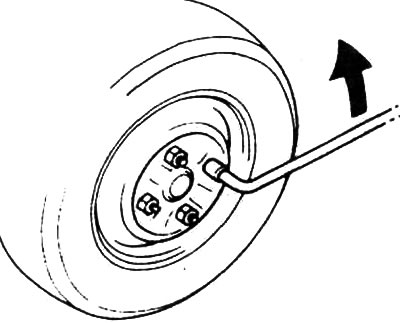
4. Loosen all wheel nuts.
Always loosen the wheel nuts before lifting the vehicle.
To loosen, turn the wheel nuts counterclockwise. Due to the high tightening torque, install the wrench on the wheel nut with the wrench handle pointing to the right. Grasp the key near the end of the handle and pull up. Make sure the key does not turn.
Do not remove the nuts, but unscrew about half a turn.
Jack installation
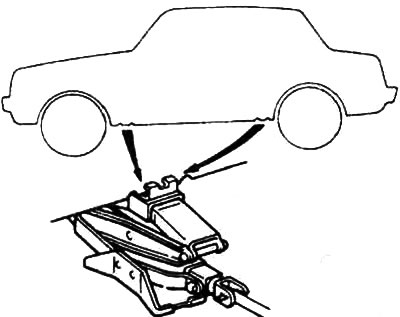
5. Install the jack only in the correct installation locations as shown in the figure.
Make sure the jack is resting on a level and firm surface.
Vehicle lifting
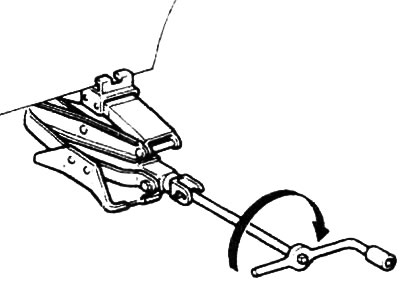
Raise the vehicle just enough to fit the spare wheel.
Please note that installing a spare tire requires more clearance from the road than removing a flat tire.
Attach the extension to the jack to raise the vehicle (it is easy: inserted) and turn the knob clockwise. When the jack touches the vehicle and begins to lift it, double check that the jack is in the correct position.
Never crawl under a car when it is only supported by a jack.
Wheel replacement

7. Remove wheel nuts and replace wheel.
Remove the wheel with a flat tire forward and lay it on its side.
Roll the spare wheel into place and align the wheel disc holes with the screws. Raise the wheel and insert at least the top screw into the appropriate hole. While moving the wheel back and forth, align the wheel holes with the rest of the screws and insert them.
indication: Before installing the wheel, remove (e.g. with a wire brush) traces of corrosion from the upper surface of the brake drum or from the wheel hub. When installing the wheels, the contact surfaces must be in close contact with each other, otherwise the wheel nuts may get stuck, and as a result, the wheel may fall off during the journey. Therefore, after the first 1600 km, check the wheel nuts for a secure fit.
Installing the wheel nuts
8. Tighten all wheel nuts by hand.
Install wheel nuts (beveled end inward) and, as far as possible, tighten them by hand. Press the wheel firmly again and see if the nuts can be tightened further by hand.
Lowering the car
9. Lower the vehicle completely and tighten the wheel nuts.
To lower the car, turn the jack handle counterclockwise.
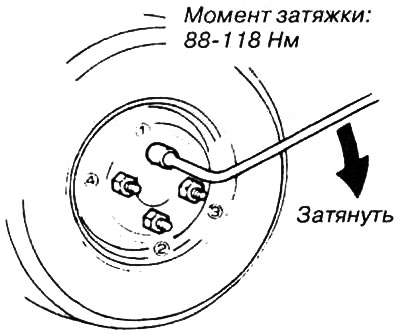
Use only the special wrench to tighten the wheel nuts. Do not put your foot on the wrench or use a piece of pipe to extend it. Make sure the wrench is securely on the nut.
Tighten each nut in the order shown in the figure. Continue this process until all nuts are securely tightened.
After changing a wheel, check the tightening torque of the wheel nuts with a torque wrench as soon as possible and change it if necessary.
For aluminum wheels, use only a Toyota wheel nut wrench and hand-tighten the nuts. Do not use a hammer or other tools for this. Other tools or too much tightening torque can damage the wheel nuts or bolts.
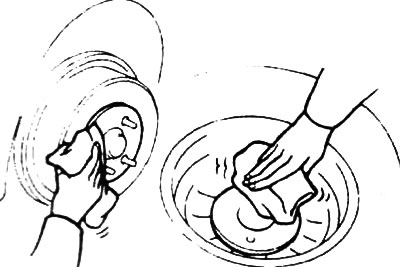
Installing the wheel cap or hub cap
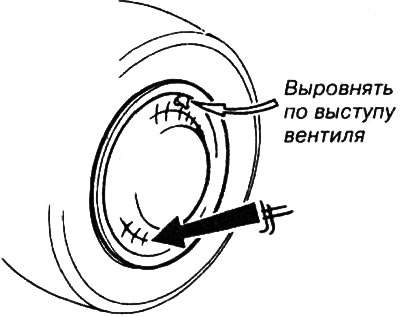
10. Reinstall the wheel or hub cap.
Position the wheel or hub cap in the correct position and hammer securely with the edge or inside of your hand until it snaps into place.
Check the tire pressure of the installed wheel and set to the prescribed pressure. If it is less and there is no pump, drive slowly and at the nearest gas station inflate the tire to the prescribed pressure. Remember to put the valve cap back on to prevent the valve from getting dirty or getting water in, which could cause air leakage. If the valve cap is lost, install a new one as soon as possible.
After changing a wheel
Actually, that's all. Carefully place the wheel with the damaged tire, the jack and all used tools back into the vehicle.
When replacing a tire, the process is similar to that described above.