
The distribution drive is usually adjusted only after repairs, in which the toothed belt was removed or the engine was disassembled. If it is necessary to check the adjustment of the distribution drive, this can be done without removing the toothed belt.
Removing
Remove the lower mudguard of the engine compartment.
Remove reinforced V-belt.
Remove the servo pump, if present.
Remove glow plugs.
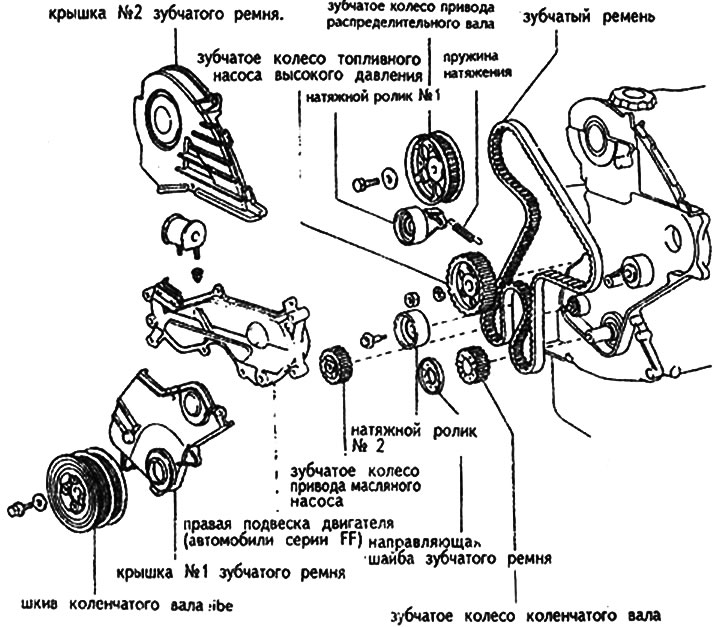
Remove timing belt cover #2.
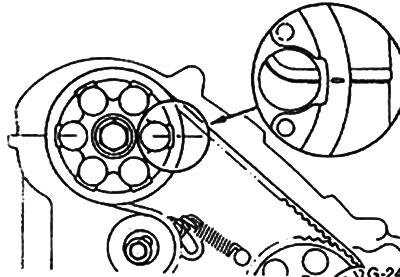
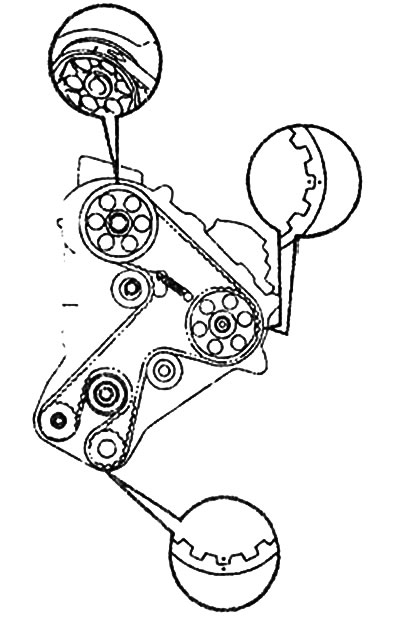
Set the piston of the first cylinder to TDC on the compression stroke. To do this, rotate the engine by the crankshaft clockwise until the markings on the camshaft wheel coincide with the upper edge of the cylinder head, see fig.
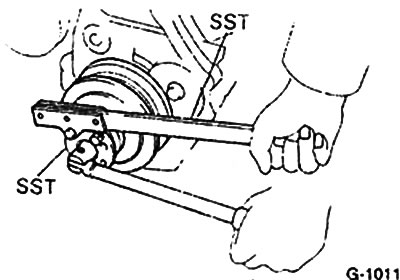
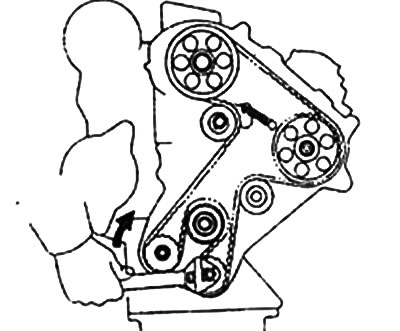
Loosen the mounting bolt and remove the crankshaft pulley. To prevent crankshaft rotation, TOYOTA specialized workshops use a special tool SST 09213-14010 and SST 09330-00020. If these tools are not available, engage first gear and engage the handbrake, thus blocking the engine.
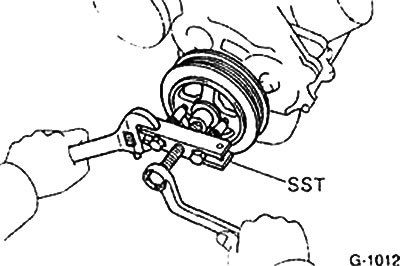
Remove pulley. TOYOTA specialist workshops use the SST 09213-31021 tool for this. If this tool is not available, then the pulley can be removed with a universal puller, for example, HAZET 787N-16.
Attention: Before removing the pulley, put the gearbox in neutral and check again that the marking on the camshaft wheel matches the edge of the cylinder head (Pic. G-2402). If necessary, achieve this match. Do not change the position of the crankshaft under any circumstances.
Caution: Never turn the crankshaft with a toothed belt by turning the camshaft wheels or the injection pump. This causes the toothed belt to be overloaded.
Unscrew the fastening bolts and remove the toothed belt cover No. 1 and the guide washer together with the gasket.
Support the engine from below in the sump with a mobile lift, laying a wooden spacer.
Remove right engine mount. To do this, unscrew the bolts of the engine mount on the body and on the suspension and remove the mount. Loosen the mounting bolts and remove the engine mount.
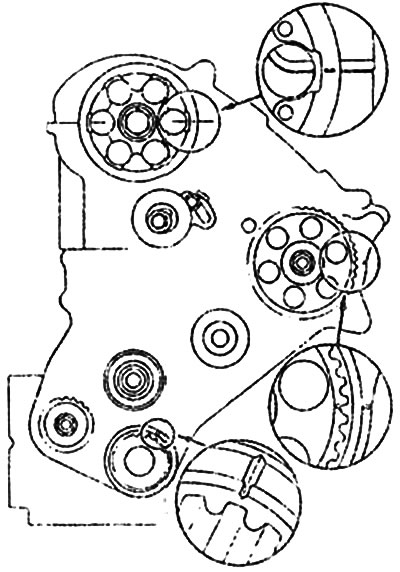
If the same belt is subsequently installed in place, it should be marked with the direction of rotation. The motor rotates clockwise. In addition, the relative position of the pulleys and the toothed belt should be marked, as shown in fig. G-2405.
Remove the tension spring with a screwdriver.
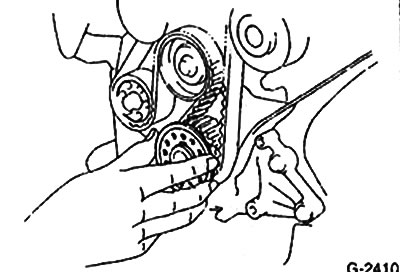
Unscrew the bolt securing the tension roller No. 1 and loosen the toothed belt. Tighten the idler pulley bolt.
Remove toothed belt.
Caution: If the camshaft rotates when the toothed belt is removed, do not allow any piston to be at TDC. This can cause severe damage to valves and pistons.
Before turning the camshaft, it is first necessary to set all the pistons to the middle position in terms of the height of the cylinders.
To do this, mark with chalk on the top of the crankshaft pulley (while the piston of the first cylinder should be at TDC). Then turn the crankshaft pulley 90°to the left or right. After that, the chalk marking will be turned to the right or left, respectively.
Installation
Before installing the toothed belt, the engine must be cooled down to room temperature.
Attention: Do not break or twist the belt. A dirty or damaged belt must be replaced. Tension rollers should be checked for ease of rotation.
Check whether the position of the markings of all pulleys shown in fig. G-2407. If not, then adjust according to the drawing. Instructions for turning the crankshaft are given in the section "Withdrawal".
Put on the toothed belt. If a previously used belt is installed, take into account the direction of its rotation.
If a new belt is installed, put it on so that the inscription on the belt can be read.
Put the belt on the camshaft wheel first.
Holding the injection pump wheel with pliers or adjustable wrenches, put a toothed belt on it.
Attention: Make sure that the toothed belt is correctly connected to the wheel.
Put the timing belt on the wheel in the following order: 1. Coolant pump wheel and crankshaft wheel; 2. Tension roller No. 2 and oil pump wheel.
Attention: Make sure that the belt is correctly positioned on the wheel.
Tension
Attach the tension spring to the pin with a screwdriver.
Unscrew the bolt of the tension roller and press the roller against the toothed belt.
Temporarily insert the crankshaft wheel bolt.
Rotate the crankshaft two turns clockwise until the markings on the camshaft wheel coincide with the top edge of the cylinder head. Check the coincidence of all markings, as shown in fig. G-2407.
Loosen the camshaft wheel bolt again.
Tighten the tensioning roller mounting bolt No. 1 with a force of 35 Nm.
Attention: Do not move the tension roller holders while doing this.
Install and secure engine mounts. Tightening torques: bolts with a wrench size of 14 mm - 35 Nm; bolts with a wrench size of 17 mm - 65 Nm.
Install and secure engine mounts.
Lower the mobile lift.
Install the guide washer on the crankshaft wheel with the recess outward.
Install wedge key on crankshaft. To facilitate the installation of the pulley, set the key so that it sits slightly deeper in front than in the back. Put the pulley on the key. Use a pipe if necessary.
Fasten pulley to crankshaft with 100 Nm. TOYOTA workshops use special tool SST 09213-14010 and SST 09330-00020 to prevent crankshaft rotation when tightening the pulley bolt. If these tools are not available, engage first gear and engage the handbrake, blocking the engine.
Install timing belt cover #2.
Install glow plugs.
Put on the V-belt and tension it.
Install a servo pump, if available.
Check injection timing (work of a specialized workshop).