
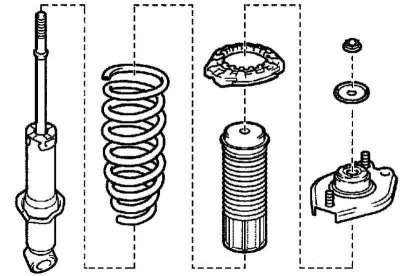
Removing the rear coil spring shock absorber
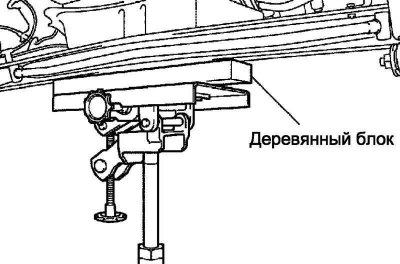
Pic. 4.35. Wooden block installation
Raise the rear axle beam with a jack. Place a wooden block between the jack and the rear axle beam to prevent damage to the rear axle beam (pic. 4.35).
Remove the 2 nuts from the top side of the rear shock spring assembly.
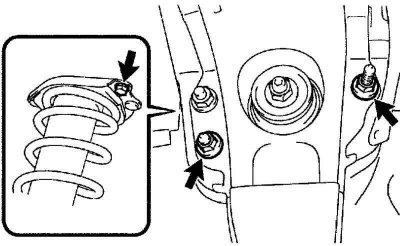
Pic. 4.36. Bolt removal
Pull down the bolt from the top of the rear coil spring shock absorber (pic. 4.36).
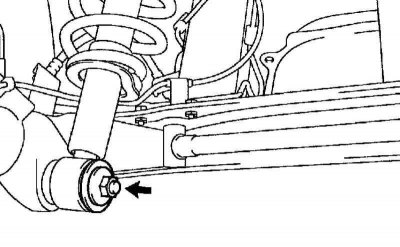
Pic. 4.37. Rear shock absorber lower mounting nut with spring assy
Remove the nut and bushing washer from the rear shock spring assembly (from below) (pic. 4.37).
While carefully lowering the jack, remove the coil spring rear shock assembly.
Disassembly of the rear left shock absorber assembly
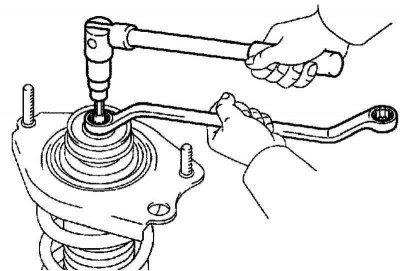
Pic. 4.38. Nut loosening
Holding the shock absorber rod with a hexagon (6 mm), use a wrench to loosen the nut (pic. 4.38).
Note. Do not loosen the nut completely.
Note. Insert the hex all the way in.
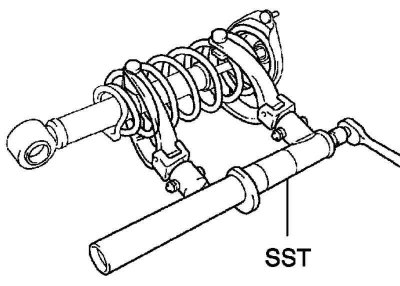
Pic. 4.39. Installing a special tool
Install the SST on the coil spring so that the top and bottom hooks are as wide apart as possible (pic. 4.39).
Compress the spring to take the load off the nut.
Note. Do not use an impact wrench. They can damage the SST.
Loosen the nut.
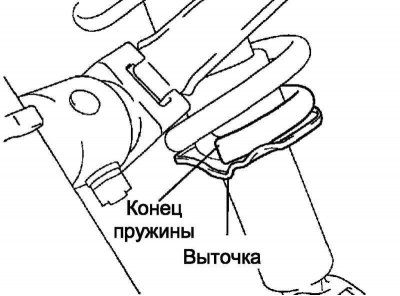
Pic. 4.40. C-pillar components
Remove the No. 1 washer and rear shock mount, left rear strut mount, upper rear spring pad, and No. 1 rear suspension compression buffer (pic. 4.40).
Remove the spring from the shock absorber, then remove the SST.
Checking the rear left shock absorber assembly
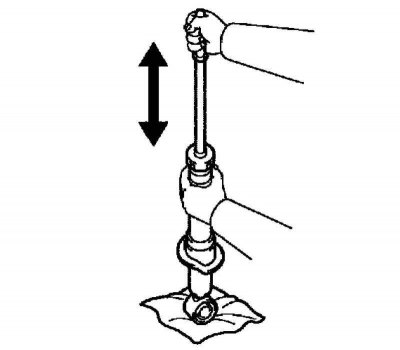
Pic. 4.41. Checking the shock absorber rod
Push in and out the damper rod, check for excessive resistance or abnormal noise. In case of unsatisfactory operation, replace the shock absorber assembly with a new one (pic. 4.41).
Installing the rear left shock absorber assembly
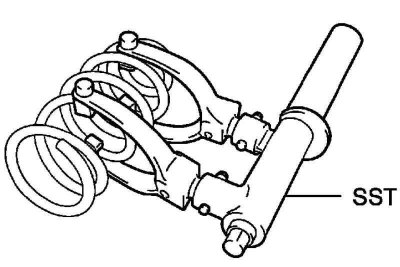
Pic. 4.42. Spring compression
Compress the spring with SST (pic. 4.42).
Note. The coil spring can also be removed/installed using a hydraulic spring compressor.
Pic. 4.43. Installing the spring in the recess in the lower cup
Insert the lower end of the spring into the recess in the lower spring cup (pic. 4.43).
Install the rear spring top pad onto the rear suspension strut mount.
Install the #1 rear suspension strut compression buffer, rear suspension strut support and #1 washer.
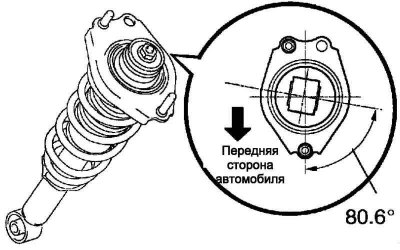
Pic. 4.44. Correct installation of the rear suspension strut support relative to the lower shock absorber bushing
Note. Orient the rear suspension strut support relative to the lower shock absorber bushing, as shown in Figure 4.44.
Install washer #1 with the concave side up.
holding hex (6 mm) damper rod, tighten the nut.
Tightening torque: 56 Nm.
Note. Insert the hex all the way.
Loosen the SST and remove it from the spring.
Note. Before removing the SST, check the position of the rear suspension strut support.
Installing a rear coil spring shock absorber
Install the coil spring rear shock absorber to the rear axle beam. Install the shock absorber bushing washer and screw on the nut.
Carefully lifting the rear axle beam with a jack, install the upper part of the rear shock absorber with the spring into the seat on the car body. Place a wooden block between the jack and the rear axle beam to prevent damage to the rear axle beam.
Note. Do not raise the rear axle carrier assembly more than necessary.
Insert the rear suspension strut studs securely into the holes in the vehicle body.
Tighten the bolt and 2 nuts on the top of the coil spring rear shock absorber.
Tightening torque: bolt: 55 Nm, nut: 80 Nm.
Install the rear wheel.
Tightening torque: 103 Nm.
After lowering the jack, rock the car several times by pressing on the body so that the suspension parts take a permanent position.
Tighten the bottom nut of the rear coil spring shock absorber.
Tightening torque: 80 Nm.
Note. Make sure the jack is fully down and the vehicle is on the ground.
Note. Check rear wheel alignment.