
Extraction
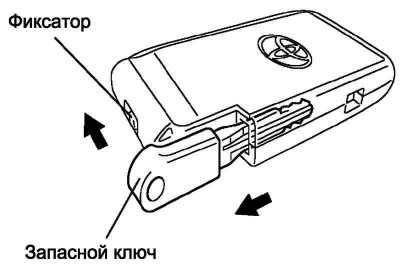
Pic. 1.75. Removing the spare key from the remote
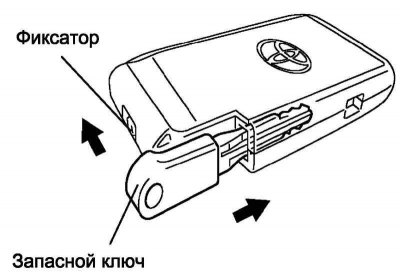
Take away a clamp in the direction specified by an arrow in drawing 1.75. Remove the spare key from the remote.
Note. Extreme care must be taken when handling these electronic components.
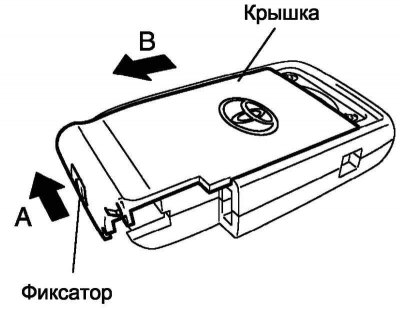
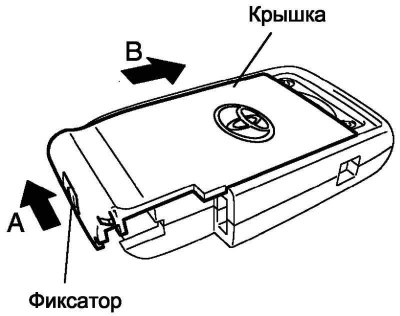
Pic. 1.76.
Take away and hold a clamp in the direction specified by an arrow And in drawing 1.76. Slide the cover in the direction indicated by arrow B in Figure 1.76 and remove the cover.
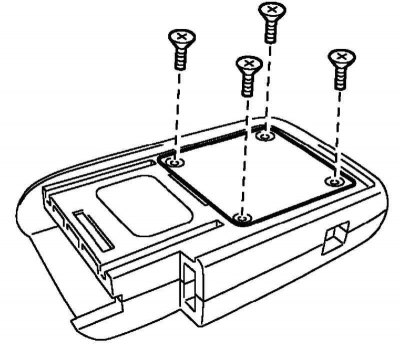
Pic. 1.77. Removing the battery cover
Turn out 4 screws with a screw-driver and remove a back cover, as it is shown in drawing 1.77.
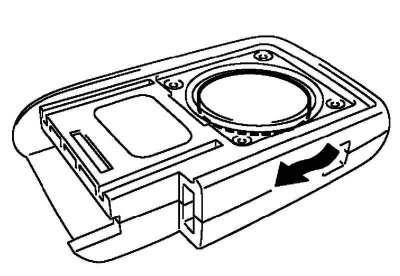
Pic. 1.78. Removing the battery
Remove the remote control battery as shown in Figure 1.78.
Note. Do not touch the terminals with your fingers.
Note. Do not use force to remove the lithium battery. This may damage the contacts.
Note. Do not handle the battery with wet hands. Moisture can cause corrosion.
Note. Do not touch or move the parts inside the remote control as this may damage it.
Installing a new element
Install a new positive lithium battery (+) side up as shown.
Note. Make sure it's positive (+) and negative (–) the battery poles are oriented correctly.
Note. Care must be taken not to bend the battery electrode when installing.
Note. Care must be taken to prevent dust and oil from getting inside the console.
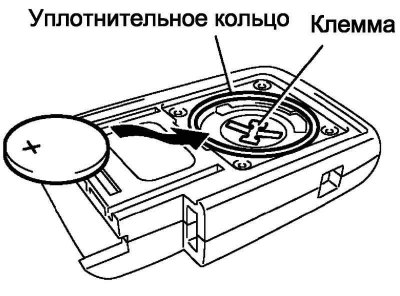
Pic. 1.79. Correct battery installation
Check that the O-ring is intact and in place, and install the cover (pic. 1.79).
Tighten the 4 screws with a screwdriver.
Note. Loose fastening of the cover may cause poor contact between the lithium battery and the terminal.
Pic. 1.80. Installing the console cover
Take away and hold a clamp in the direction specified by an arrow And in drawing 1.80. Install the cover by moving it in the direction indicated by arrow B in Figure 1.80.
Pic. 1.81. Spare key installation
Take away and hold a clamp in the direction specified by an arrow in drawing 1.81. Insert spare key.
Attention! After installing the battery, press any button on the remote control for door locks. Make sure the LED lights up.