
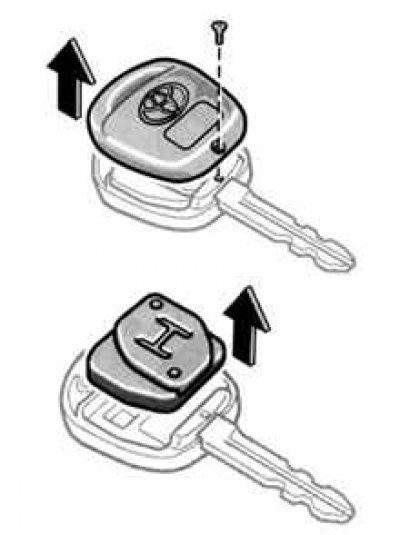
Pic. 1.30. Removing the module and key housing
Loosen the screw, then open the cover. Remove the module from the key housing (pic. 1.30).
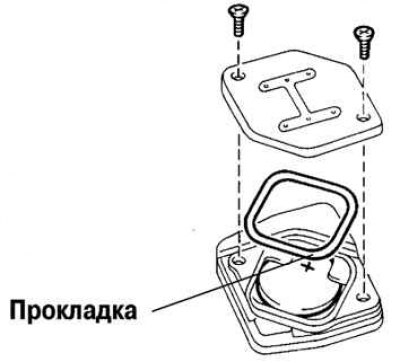
Pic. 1.31. Removing the cover from the wireless device module
Remove two screws to remove the module cover. Remove the dead battery (pic. 1.31).
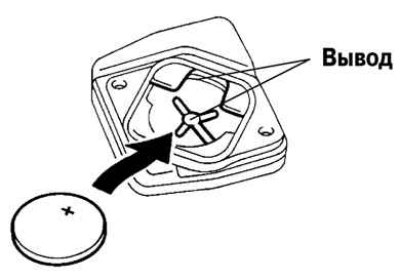
Pic. 1.32. Installing the battery in the wireless device
Install a new battery with the positive terminal up (pic. 1.32).
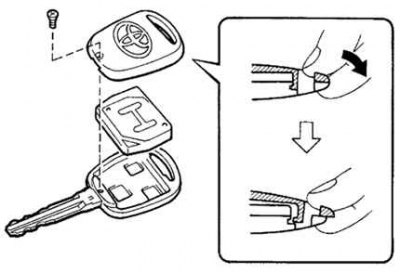
Pic. 1.33. Attaching the cover of the wireless remote control
Install the cover and secure it with two screws. Before doing this, make sure that the gasket is installed on the module. Install the module into the key body and secure the cover with the screw (pic. 1.33).
By pressing any switch on the wireless key, check that the indicator lamp turns on.
After replacing the battery, check that the key works properly.
Attention! Make sure the positive and negative battery terminals are aligned correctly with each other.
Do not replace the battery with wet hands. Moisture can lead to unwanted corrosion.
Do not touch or move the components inside the transmitter, otherwise it may prevent it from working properly.
Be careful not to bend the electrode when inserting the battery and to prevent dust or oil from adhering to the case.
Be careful not to lose the screws and O-ring.
Close the lid tightly.