
Examination
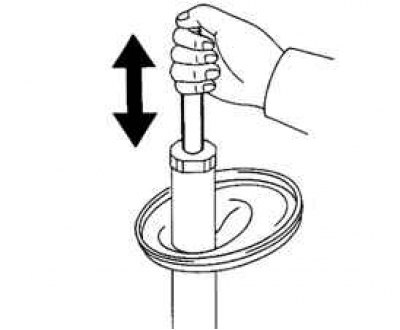
Pic. 4.27. Checking shock absorber travel
When pulling out and sinking the shock absorber rod, check that its stroke is smooth and there is no extraneous resistance or noise. If defective, replace shock absorber (pic. 4.27).
Installation
Install the lower spring insulator to the strut.
Install the spring compression travel stop on the stem.

Pic. 4.28. Compressing the strut spring with a special tool
Using the special tool, compress the spring and install the spring on the strut (pic. 4.28).
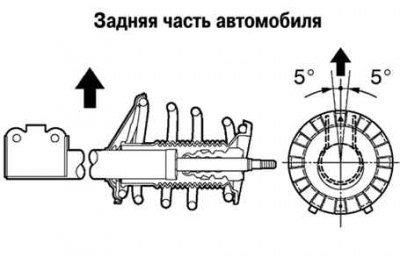
Pic. 4.29. Shock absorber insulator and spring cup installation diagram
Install the shock absorber and spring cup. Align label «OUT» on the upper spring cup with a mark on the shock absorber insulator, as shown in Figure 4.29.
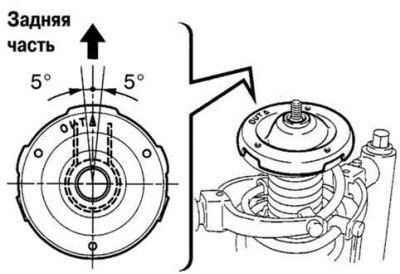
Pic. 4.30. Setting the spring cup to the correct position
Install the upper spring cup with the mark toward the rear of the vehicle (pic. 4.30).
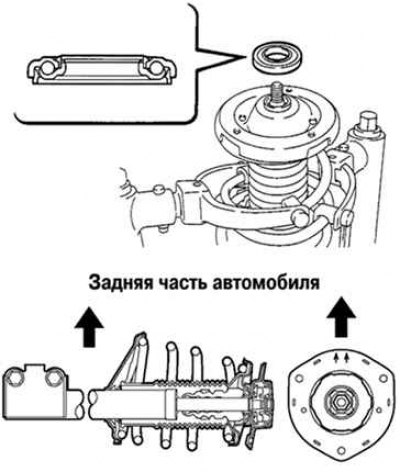
Pic. 4.31. Installing the Bearing and Upper Rack Support
Install the bearing and upper strut mount, aligning them correctly with respect to the rear of the vehicle. (pic. 4.31).
Note. Make sure the bearing is installed in the top leg of the strut.
Using the special tool, hold the upper spring seat and install a new nut.
Tightening torque: 49 Nm.
Install other parts in the reverse order of removal.