
Checking the A/C Switch on 80 Series Vehicles
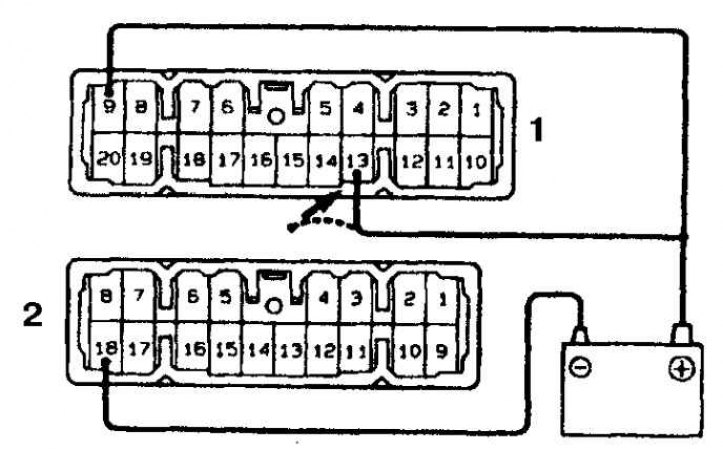
1. Connector A
2. Connector B
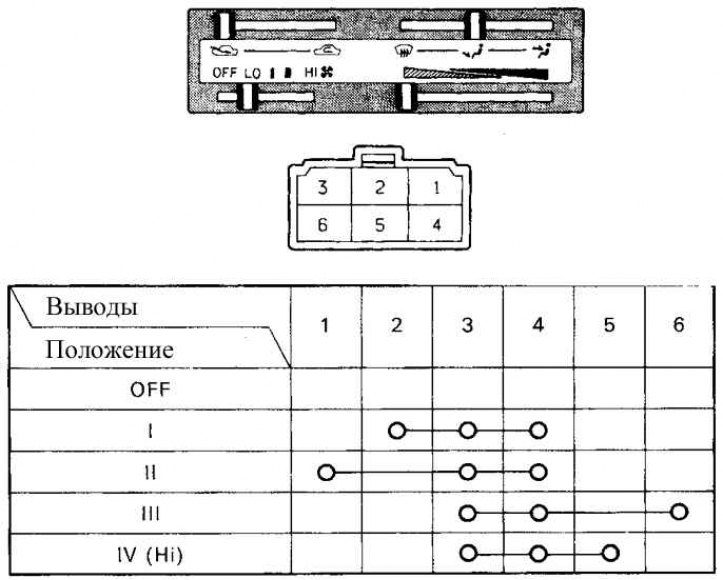
62 Series Heater Switch Test Table
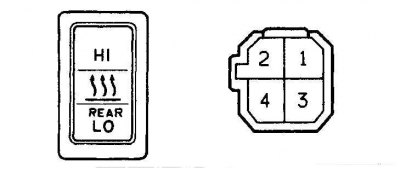
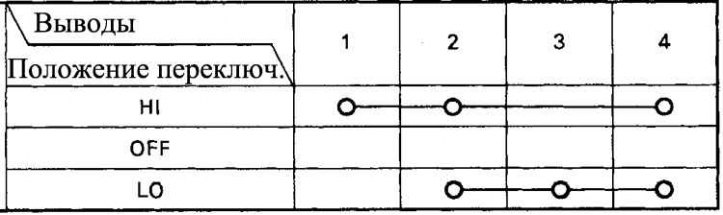
62 Series Rear Heater Switch Check Chart
1. Remove the air conditioner switch and check the contact closure according to the table (for cars series 60, 62).
2. Check fan speed switch (on 80 series vehicles).

3. Connect (+) battery pole with terminal 9 of connector A, and (-) pole - with terminal 16 of connector B. Press each button for selecting the speed of rotation (move to IN position) and check that the control lamp lights up. When connected (+) poles with terminal 13 control lamp goes out (1 - connector B, 2 - connector A).
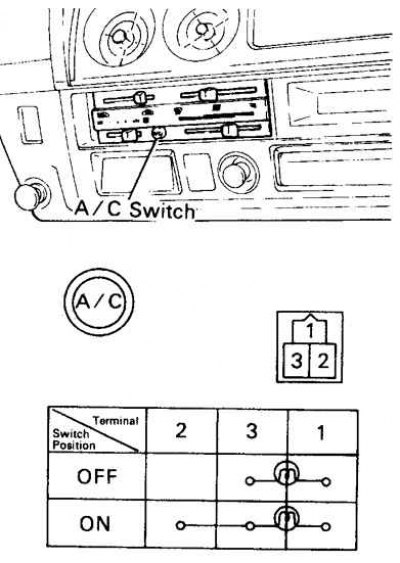
4. Check A/C Switch (on 80 series vehicles).
5. Connect (+) battery pole with terminal 9 of connector A, and (-) pole - with terminal 18 of connector B. Press the air conditioner button (move to IN position) and check that the control lamp lights up. When connected (+) poles with terminal 13 control lamp goes out (see fig. Checking the A/C Switch on 80 Series Vehicles).
6. Check the heater switch according to the table (see fig. 62 Series Heater Switch Test Table).
7. If the switch operation is different, replace the control panel assembly.
8. Check the rear heater switch according to the table (see fig. 62 Series Rear Heater Switch Check Chart).
9. If the switch operation is different, replace the control panel assembly.