
Note: The assembled parts should look like the picture shown.
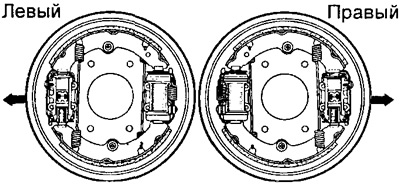
With automatic gap adjuster.
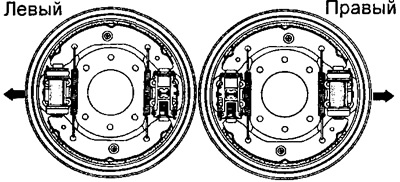
Without automatic gap adjuster.
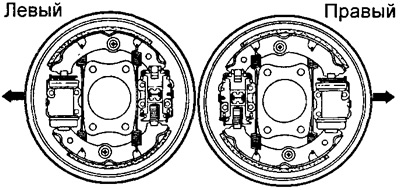
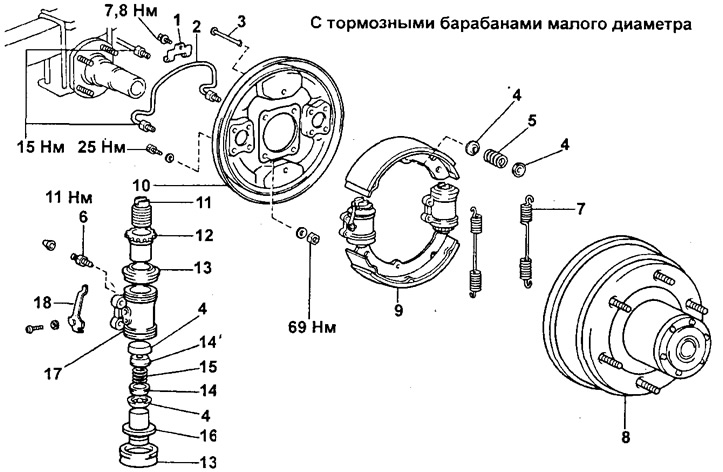
With small diameter brake drums.
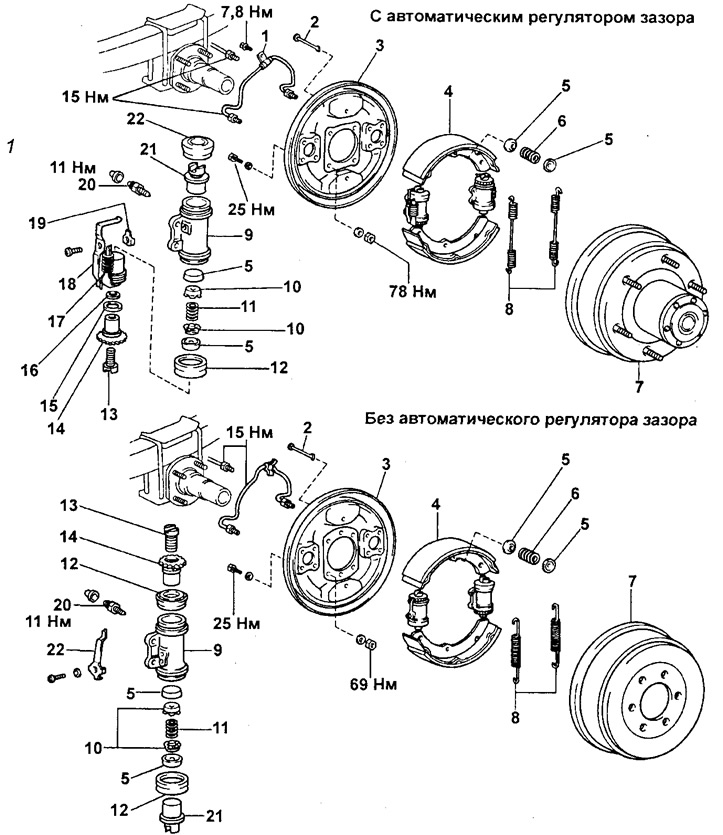
Rear brake (DYNA 150).
1, 19 - Retainer,
2 - Holder,
3 Brake shield,
4 - Upper and lower brake pads,
5 - cap,
6 - Retaining spring,
7 - Brake drum,
8 - Return spring,
9 - Wheel cylinder,
10 - Spring seat,
11 - Spring,
12 - duster,
13 - Adjusting bolt,
14 - Adjusting nut,
15 - Dust seal,
16 - Saddle,
17 - Wheel cylinder piston assembly,
18 - Automatic regulator lever,
20 - Bleeding fitting,
21 - Piston,
22 - Regulator lock lever.
Rear brake (DYNA 150).
1 - Bracket,
2 - Brake pipe,
3 - Holder,
4 - cap,
5 - Retaining spring,
6 - Bleeding fitting,
7 - Return spring,
8 - Brake drum,
9 - Brake pads,
10 - Brake shield,
11 - Adjusting bolt,
12 - Adjusting nut,
13 - duster,
14 - Spring seat,
15 - Spring,
16 - Piston,
17 - Wheel cylinder,
18 - Regulator lock lever.
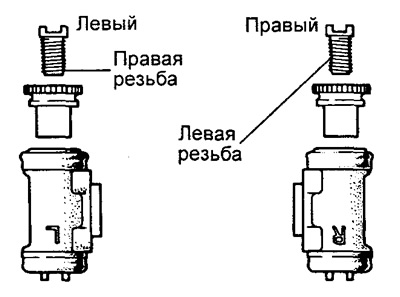
1. Assemble the wheel cylinder. (With automatic gap adjuster)
A) Apply lithium based grease as shown.
b) Apply high temperature grease to the adjusting bolt.
V) Assemble the wheel cylinder in the following sequence: return spring, two spring seats, two caps, piston, two boots, wheel cylinder piston assembly and auto adjust lever with spring, retainer, screw.
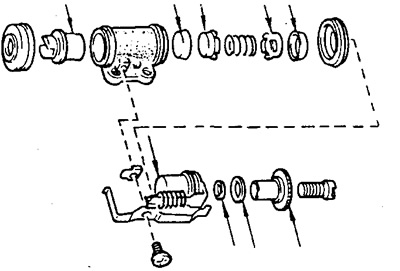
G) Install the seat and dust seal to the wheel cylinder piston assembly.
d) Install the adjusting nut and bolt to the wheel cylinder piston assembly.
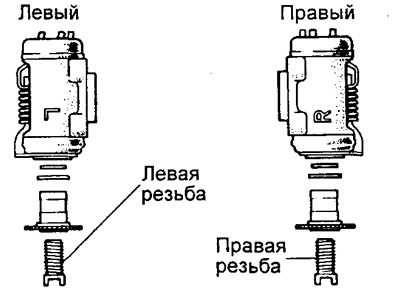
- Right wheel cylinder (R label): Right hand thread (Yellow)
- Left wheel cylinder (label L): Left hand thread (White color)
(Without automatic gap adjuster)
A) Apply lithium based grease as shown.
b) Apply high temperature grease to the adjusting bolt.
V) Assemble the wheel cylinder in the following sequence: return spring, two spring seats, two caps, piston, two anthers.
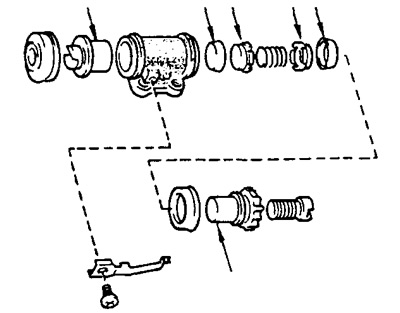
G) Install the adjusting nut and bolt to the wheel cylinder.
- Right wheel cylinder (R label): Left hand thread (Yellow)
- Left wheel cylinder (label L): Right hand thread (White color)
d) Install the regulator lock lever and tighten the screw.
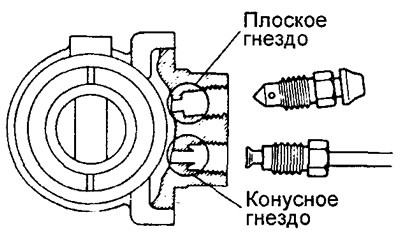
2. Install the bleeder valve as shown.
A) The sockets of the wheel cylinder fitting on the front side are made flat and conical in shape, as shown in the figure.
b) Both sockets of the fitting on the rear side of the wheel cylinder are made conical.
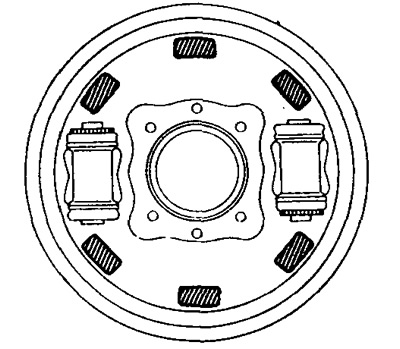
3. Install the wheel cylinder on the brake shield.
A) (With automatic gap adjuster) Install the front wheel cylinder with the adjuster down and the rear wheel cylinder with the adjuster up.
b) (Without automatic slack adjuster, with small diameter brake drums). Install the front wheel cylinder with the adjuster up and the rear wheel cylinder with the adjuster down.
V) Tighten four bolts.
- Tightening torque: 25 Nm
4. Reinstall the brake pipe and tighten the nuts by hand, then tighten them with a wrench.
- Tightening torque: 15 Nm
5. (With automatic slack adjuster, with small diameter brake drums). Install the brake pipe retainer and tighten with the bolt.
- Tightening torque: 7.8 Nm
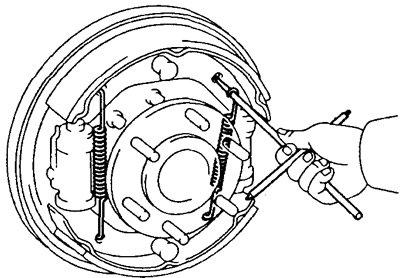
6. Install the brake shoes and return springs.
A) Apply high temperature grease to the brake pad contact surfaces as shown in the illustration.
b) (With automatic slack adjuster, with small diameter brake drums). Hook the return spring onto the brake shoe from the rear inner side.
V) Install both pads.

G) Using a tool, install the retaining spring, two caps, and the top shoe holder, then the bottom shoe.
d) (With automatic slack adjuster, with small diameter brake drums). Install the second return spring on the other side.

e) (Without automatic gap adjuster). Install two return springs.
7. Lightly sand the outer surface of the lining of the shoe and the working surface of the drum with sandpaper.
8. Install the brake drum in the reverse order of removal.
9. Fill the reservoir of the brake system with brake fluid and bleed the brake system.
10. Check for brake fluid leaks.
11. Check up a backlash between blocks and a drum.
12. Install the rear wheel.