Company Honda Company Ford Company Skoda Company Kia Company Mazda Company Mercedes Company Renault
English Русский
Български
Беларускі
Український
Српски
Hrvatski
Română
Polski
Slovenský
Magyar
Bookmark Articles Sitemap Contacts
ToyotaMan.ru


Camry Corolla Corona Carina Land Cruiser Highlander 4Runner RAV4 Others
Carina T190 (1992-1996) Carina T170 (1988-1992)

Power steering pump (3S-FE, 4S-FE) — removal and installation [Toyota Carina T190]

  • Main
  • Carina
  • T190 (1992-1996)
  • Chassis, running gear
  • Steering
  • Power steering pump (3S-FE, 4S-FE) — removal and installation
0
Contents: Removal ↓ Installation ↓

Removal


1. Remove the right front wheel.
  • Tightening torque - 105 Nm

2. Remove the lower right engine protection cover.

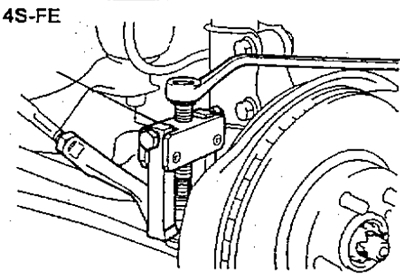
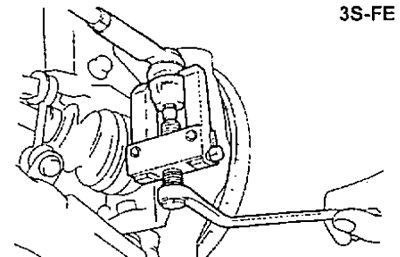
3. Disconnect the right steering rod end from the steering knuckle arm.

a) Remove the cotter pin and unscrew the nut.
  • Tightening torque - 50 Nm

Attention: when installing a new cotter pin, the nut may be turned at an angle of no more than 60°.


b) Using a special tool, disconnect the steering rod end from the steering knuckle arm.


4. Drain the power steering fluid.

5. Disconnect the vacuum tubes.
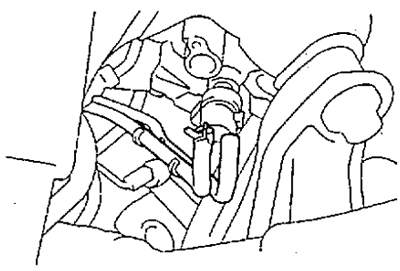


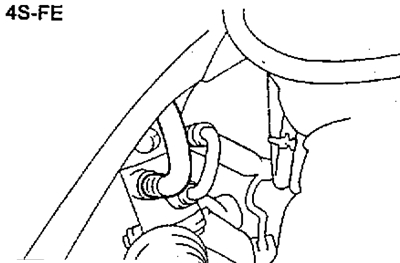
6. Disconnect the return line.
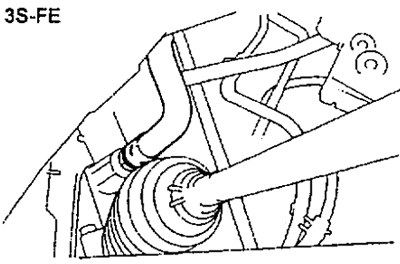


7. Disconnect the return line from the tank to the pump.
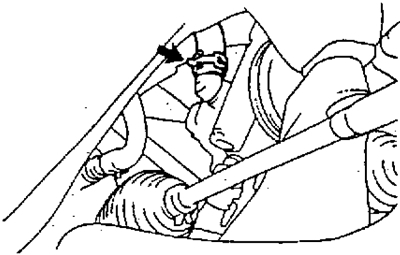


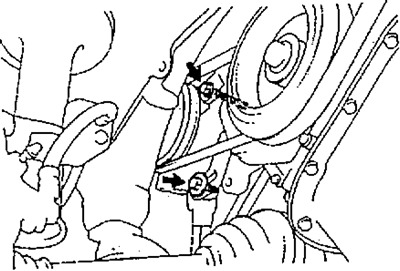
8. Remove the drive belt.

a) Loosen the adjusting bracket bolt.

Tightening torque:
  • 3S-FE — 44 Nm
  • 4S-FE — 40 Nm


b) Loosen the axle bolt and remove the belt.
  • Tightening torque - 40 Nm

9. Loosen the mounting bolts and disconnect the pump.

10. Disconnect the discharge line from the pump.

a) While holding the pump, unscrew the union bolt.
  • Tightening torque - 52 Nm

b) Remove the gasket.

Note: Avoid getting working fluid on the steering gear boots.
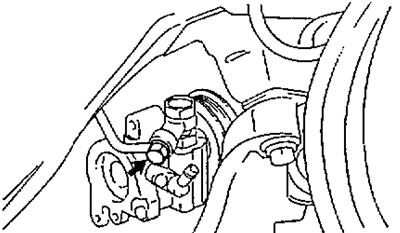


11. Turn the pump pulley to the left and remove the power steering pump.


Caution: The steering wheel must be turned all the way to the left.
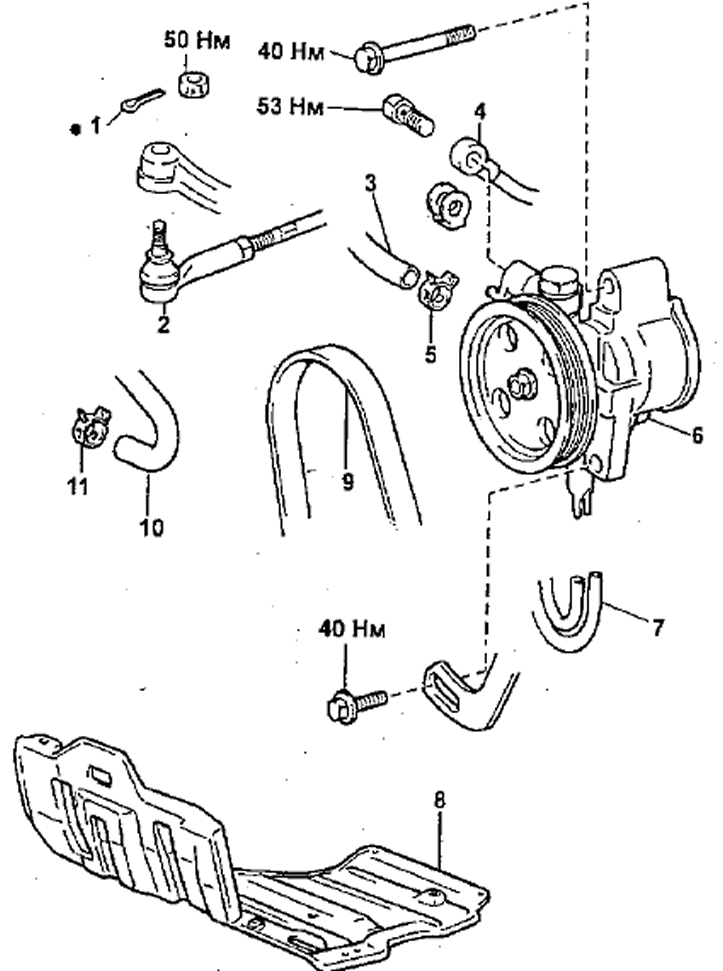


Removal the power steering pump (3S-FE, 4S-FE)
1 - cotter pin,
2 - right steering rod end,
3 - return pipeline from the tank to the pump,
4 - discharge pipeline,
5, 11 - clamp,
6 - pump assembly,
7 - vacuum tubes,
8 - lower right engine protection cover,
9 - drive belt,
10 - return pipeline.


Installation


Installation is carried out in the reverse order of removal, taking into account the following conditions:

1. Install the pump with the pulley on the left side of the vehicle.

Caution: Before installation, make sure the steering wheel is turned all the way to the left.


2. When connecting the discharge pipe, hold the pump.

3. When installing the drive belt, adjust its tension (see the relevant section).

3. After installing the pump:

a) Top up the power steering fluid.

b) Bleed the power steering system.

c) Check the working fluid level.
This article is available at: russian, bulgarian, belarusian, ukrainian, serbian, croatian, romanian, polish, slovak, hungarian
The article material has been checked: Kondratyeva Ulyana
Share information:
◀ Previous
Carina T190: Steering
Next ▶

Power steering pump (4A-FE, 5A-FE, 7A-FE) — removal and installation
Power steering pump device
Replacing steering rods
Steering gear — removal and installation
Steering mechanism device
Power steering pump (2C) — removal and installation
Steering column device
Steering column — removal and installation
Similar articles on other Toyota models

➥ Power steering pump — removal and installation Toyota Camry XV20 (1996-2001)
➥ Disassembling the power steering pump assembly Toyota Corolla Verso 3 (2004-2009)
➥ Checking the power steering pump drive belt Toyota Corona T190 (1992-1997)
➥ Power steering pump — removal and installation Toyota Cruiser 60/80 (1980-1997, petrol)
➥ Power Steering Pump — Removal and Installation Toyota Highlander 1 (2000-2007, petrol)
➥ Power steering pump — removal and installation Toyota 4Runner N120 (1989-1995)
Link in different formats to this article
Comments and feedback from visitors
No comments yet


Add two numbers 27 + 43


Carina T190 (1992-1996) 
  • General information
  • User manual
  • Maintenance
  • Power unit
  • Engines 4A-FE, 5A-FE, 7A-FE
  • Engines 3S-FE, 4S-FE
  • Diesel engines 2C
  • Engine repair
  • Cooling system
  • Lubrication system
  • Fuel system
  • Control system (diesel)
  • Fuel injection system
  • Engine electrical equipment
  • Transmission
  • Clutch
  • Mechanical gearbox
  • Automatic gearbox
  • Drive shafts
  • Chassis, running gear
  • Car suspension
  • Steering
  • Brake system
  • Body and interior
  • Exterior (external elements)
  • Interior (internal elements)
  • Air conditioning and heater
  • Electrical equipment
  • Equipment and devices
  • Headlights and lighting
  • Breakers and switches
  • Electrical circuits
Carina T170 (1988-1992) 
  • General information
  • Introduction to the manual
  • Power unit
  • Gasoline engines
  • Diesel engines
  • Lubrication system
  • Cooling system
  • Fuel system (carburetor)
  • Fuel system (injector)
  • Ignition system
  • Transmission
  • Clutch
  • Car gearbox
  • Drive shafts
  • Chassis, running gear
  • Front suspension
  • Rear suspension
  • Steering
  • Brake system
  • Electrical equipment
  • Power devices
  • Electrical circuits
ToyotaMan.ru © 2018–2026 • Mobile version • Interesting about Toyota • Administration • Sitemap: EN BG BY UA RS HR RO PL SK HU • Search system • Bookmark
Camry Vista-V40 • Camry XV10 • Camry XV20 • Camry XV30 • Corolla Verso-AR10 • Corolla E80 • Corona T190 • Carina T170 • Carina T190 • Land Cruiser J70 (diesel) • Land Cruiser J60 (petrol) • Land Cruiser J100 • Highlander XU20 (petrol) • 4Runner N120 • RAV4 XA10 • RAV4 XA20 • Duet M100 • Dyna Y50 •
We require cookies to enable some interactive features. Is that ok with you?