
Note. A failed GTZ must be replaced. It is not recommended to attempt to rebuild the brake master cylinder.
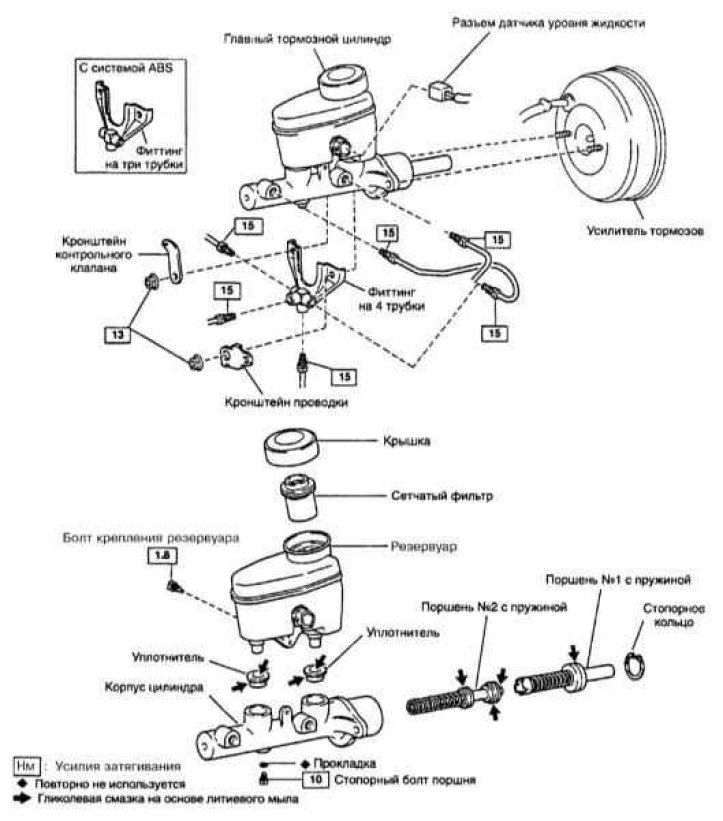
GTZ installation and assembly components
1. Put a rag under the fittings and prepare caps or plastic bags to plug the open ends of the brake lines in order to prevent dirt from entering the brake system.
Attention! Brake fluid is one of the aggressive chemical compounds and, in contact with body panels, destroys the paintwork. Before proceeding with the procedure, cover the wings and front panel of the car with special covers, or just old blankets.
2. Disconnect the electrical wiring of the brake fluid level sensor-switch from the GTZ tank (refer to illustration above).
3. Using a special ring wrench with a split head, loosen the nuts of the fitting units for connecting the brake lines to the GTZ. Slightly pulling outward, separate the brake lines from the master cylinder fittings. Seal the open ends of the tubes immediately.
4. Give nuts of fastening ГТЦ. Taking care not to twist the hydraulic hoses, remove the cylinder assembly from the brake booster and remove it from the engine compartment.
5. Remove the cap from the GTZ reservoir and drain the brake fluid remaining inside into the prepared container.
6. After replacing the GTZ, the entire hydraulic path must be pumped, and the time spent on pumping can be reduced by pre-filling the master cylinder and pumping it on a workbench before installation (see below)
7. For convenience, clamp the cylinder seat flange in a soft-jawed vise and pour fresh brake fluid into the assembly.
8. Pressing your fingers firmly into the holes for attaching the brake lines (fittings) to avoid drawing air into the cylinder, slowly push the pistons into the cylinder (It is best to use a large Phillips screwdriver), air should begin to exit the pressure chambers into the reservoir. At the same time, it is important that the ends of both tubes are completely immersed in the brake fluid in the reservoir in order to exclude the possibility of air being sucked back into the cylinder when the pistons are released.
9. Continue pumping until the fluid pushed through the tubes is completely free of air bubbles.
10. Installation is carried out in the reverse order.
11. When finished, bleed the hydraulic path. Before starting the operation of the vehicle, make sure that the brakes are working properly.