
Warning! The vehicles covered in this manual are equipped with an additional security system (SRS), better known as an airbag. Before doing any work near the cushion or steering column assembly, be sure to turn off the system to avoid injury from accidental operation - disconnect the battery first negative, then the positive cable and wait at least two minutes before proceeding to maintenance of components located near directional g-force sensors (see Onboard electrical equipment). The insulation and connectors of the SRS wiring harness are bright yellow. Do not connect any diagnostic devices to this circuit!
Attention! If the stereo system installed in the car is equipped with a security code, before disconnecting the battery, make sure that you have the correct combination to activate the audio system!
Examination
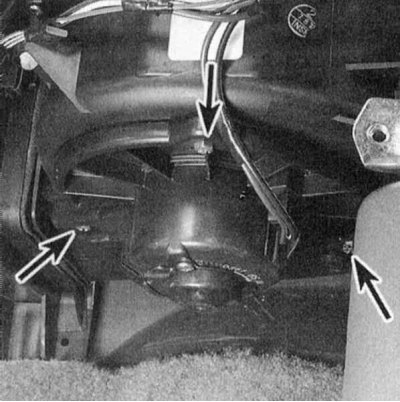
1. As standard, the heater fan is included in the A/C cooler assembly and is located on the right under the instrument panel (refer to accompanying illustration). On models equipped with a rear interior heater, the heater fan is located under the passenger seat. In case of failure or malfunction of the heater fan, first of all check the condition and reliability of fastening of all terminal connections of the corresponding electrical circuit. Make sure the battery is fully charged. Assess the condition of the relevant fuse (see Onboard electrical equipment). It is also possible that the drive motor will fail.
2. Locate the fan wiring connector.
3. If the motor does not function, disconnect the electrical wiring from it, turn on the ignition and make sure that the power supply is working, with the fan on, the battery voltage should be present at the connector. If there is no voltage, then there is a wiring fault in the power circuit in the area between the ignition switch and the fan speed selection switch, the fan operation control switch, the main heater relay, or the wiring in the circuit between the switch and the electric motor.
4. If battery voltage is present, connect the wiring to the motor, from the back of the contact assembly, connect the jumper wire to terminal No. 2 of the connector and ground it to ground - if the fan does not work, you should check the condition of the electric motor. Using a fused jumper wire, apply power directly to one of the motor terminals, ground the other terminal - if the motor does not start, replace it.
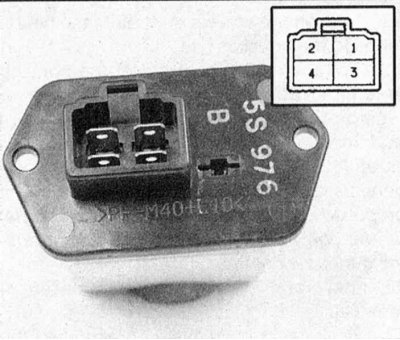
5. With a working electric motor, check the condition of the resistive assembly and the fan speed selection switch, - remove the control panel assembly (see Onboard electrical equipment) and check the distribution of conductivities between the switch terminals in each of its positions. Remove the resistive assembly and check it for continuity between the respective terminals (refer to accompanying illustration).
Replacement
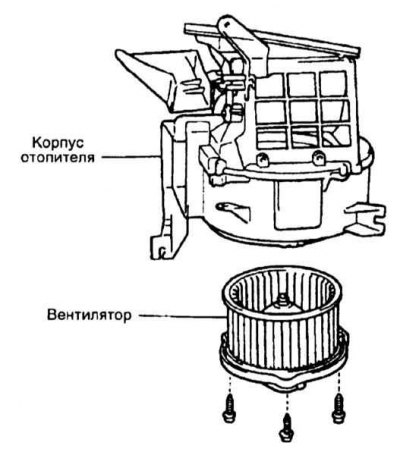
1. If it becomes necessary to replace the heater fan drive electric motor, disconnect the electrical wiring and air ducts from it, then remove its fasteners and lower the fan down (refer to accompanying illustration). If necessary, the impeller can be removed and moved to a new electric motor. Passenger seat must be removed to gain access to the rear blower motor on eligible models (see chapter Body).
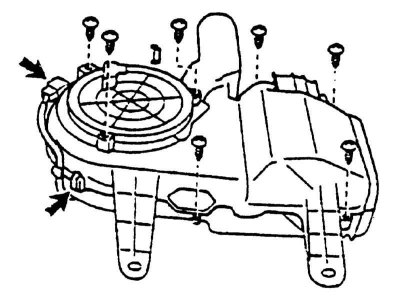
2. Replacing the rear heater fan electric motor requires the removal of the A/C evaporator, for which it is necessary to discharge the A/C system at a service station. Loosen 4 screws and remove the motor cover. Give four screws and unhook three spring clips, then remove the heater housing (refer to accompanying illustration).
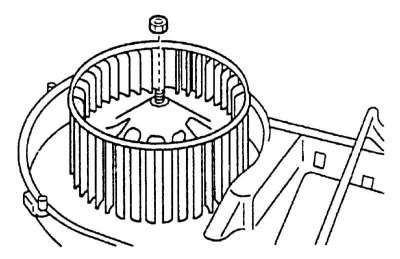
3. Loosen the nut and remove the fan impeller (refer to accompanying illustration).
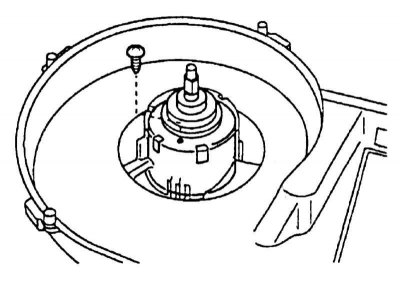
4. Give the screw and remove the fan motor (refer to accompanying illustration).
5. Installation is carried out in the reverse order. Track reliability of a tightening of fixture. Check the coolant level, start the engine and make sure there are no leaks and the fan is working properly.