
Rear driveshaft
Removing
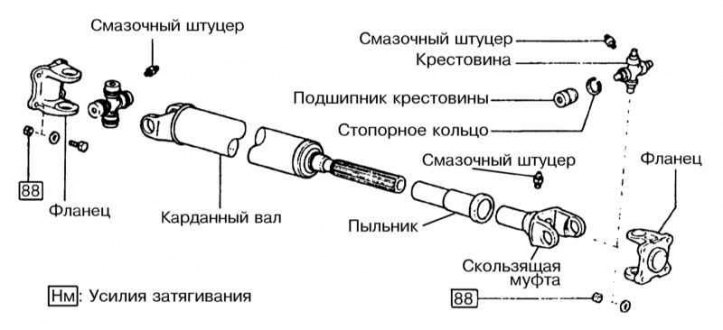
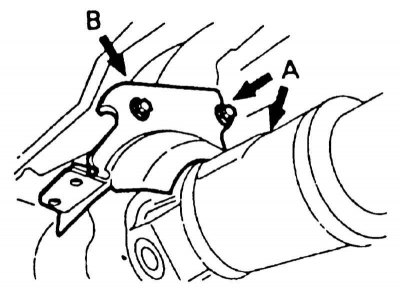
The assembly of the rear propeller shaft is shown in the accompanying illustration.
Assembling the rear driveshaft
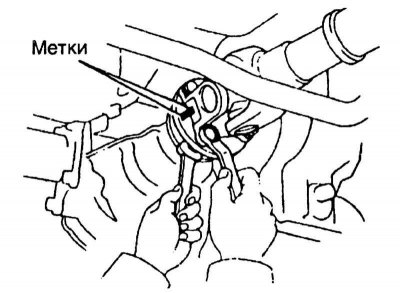
1. Mark all flanges and splines (refer to accompanying illustration) - in order to avoid imbalance during assembly, the shaft must be installed strictly in its previous position.
2. Turn out bolts of fastening of a flange collar to back differential (refer to illustration above), in order to gain access to the next bolt, turn the shaft / rear wheels.
3. Lower the rear end of the driveshaft, then release the fasteners connecting the camshaft flange to the transfer case and release the front end of the shaft from the box.
For a description of the procedures for replacing cardan joints, see Section Replacement of cardan joints. Replacement of differential seals, described in Section Replacement of an epiploon of a leading gear wheel of differential.
Installation
1. Thoroughly wipe the surface of the transfer case housing around the driveshaft inlet. Carefully check the condition of the seal. Lubricate splines and crosses with multi-purpose grease.
2. Bolt the collar assembly of the hinge to the connecting flange, tightening the fasteners only by hand for now.
3. Raise the rear end of the shaft to its normal position, achieve the alignment of the landing marks made during the dismantling process and fill the mounting bolts into the holes.
4. Tighten nuts of fixing bolts with demanded effort. Remove the jack stands and lower the vehicle to the ground.
Front driveshaft
Removing
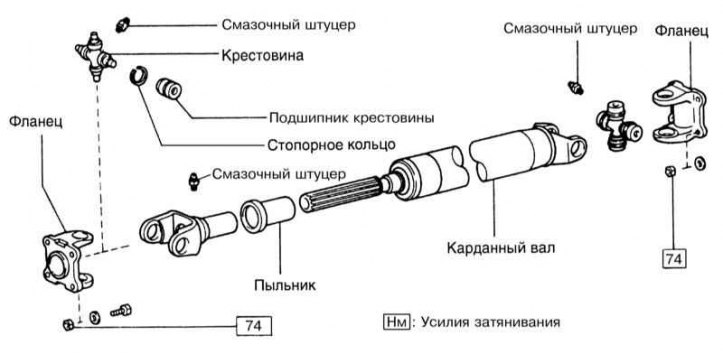
The assembly of the front propeller shaft is shown in the accompanying illustration.
Assembling the rear driveshaft
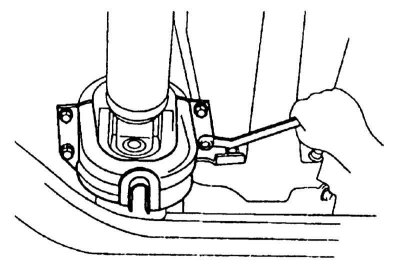
1a. Loosen the fasteners and remove the top dust cover of the shaft (refer to accompanying illustration).
1b. Remove the lower shaft dust cover (refer to accompanying illustration).
2. Mark the position of the cardan shaft in relation to the connecting flanges of the transfer case and the front differential.
3. Give nuts of fixing bolts (don't forget the pucks) and remove the propeller shaft.
A description of the procedures for replacing cardan joints is given in Section Replacement of cardan joints. Replacement of differential seals is described in Section Replacement of an epiploon of a leading gear wheel of differential.
Installation
1. Connect the front end of the shaft to the differential coupling flange. Tighten the nuts on the mounting bolts by hand.
2. Having adjusted the length of the shaft accordingly, connect its rear end to the transfer case flange. Tighten fasteners to the required torque.
3. Replace the shaft dust covers.
4. Remove the props and lower the vehicle to the ground.