
Note. Extraction of epiploons of leading gear wheels of back and forward (4WD models) differentials are made in the same manner.
1. Loosen rear wheel nuts. Jack up the back of the car and place it on jack stands. Support the front wheels with wheel chocks. Remove the wheels, this is necessary for a more accurate measurement of the drive gear preload.
2. Disconnect the propeller shaft from the differential (see Section Removal and installation of cardan shaft), slide it to the side and tie it with wire to the frame elements.
3. Using a torque wrench, measure the torque (preload) pinion gear (refer to accompanying illustration). Write down the result of the measurement.
4. Using a scriber or punch, mark the position relative to each other of the gear axle, mounting nut and connecting flange.
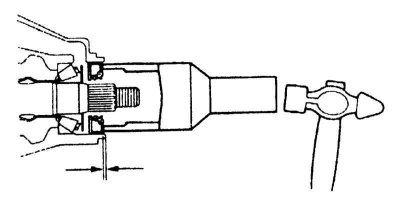
5. Count the number of open threads from the end surface of the nut to the shear of the gear axle, write down the result.
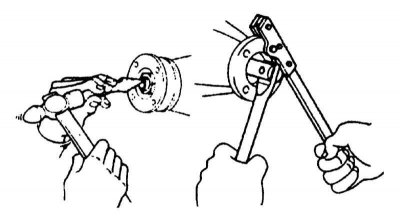
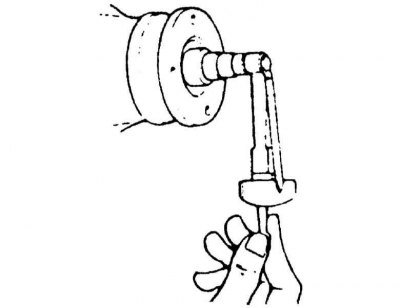
6. Secure the flange against rotation with a special tool, or by inserting a large screwdriver into the hole for attaching the universal joint clamp and wedging it under the bracket located at the rear, the crankcase stiffener, or the tubular section of the bridge (refer to accompanying illustration) and loosen the pinion nut.
7. Defrost the gear nut.
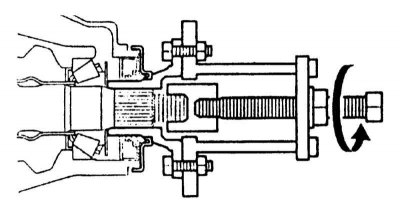
8. Remove the connecting flange, use a puller if necessary (refer to accompanying illustration).
Attention! In no case do not try to pry off the flange with a lever, or knock it down with a hammer!
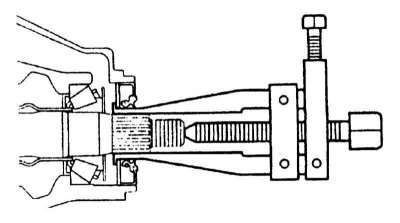
9. Remove the old oil seal from your seat (refer to accompanying illustration).
10. Lubricate the lips of the new oil seal with high temperature grease and tap it evenly into its seat. Follow the perpendicularity of the gland fit, as a mandrel, you can use a socket head of a suitable size, or a piece of pipe of the appropriate diameter (refer to accompanying illustration).
11. Having achieved the alignment of the landing marks applied during the dismantling of the components, install the connecting flange in place - if necessary, tighten the flange with a nut, but in no case tap it into place with a hammer.
12. Lubricate the slots in the center of the flange with a non-hardening sealant.
13. Install washer (if provided) and carefully tighten the nut so that the axis of the gear protrudes above its end surface by the number of threads noted earlier (see paragraph 5).
14. Measure the gear rotation torque, then tighten the nut a little more to compensate for the changes associated with installing a new oil seal, the torque should be slightly (but not more than 0.6 Nm) more than with the old seal.
15. Connect the driveshaft, install the wheels, lower the car to the ground and tighten the wheel nuts to the required torque (see chapter Vehicle settings and routine maintenance).